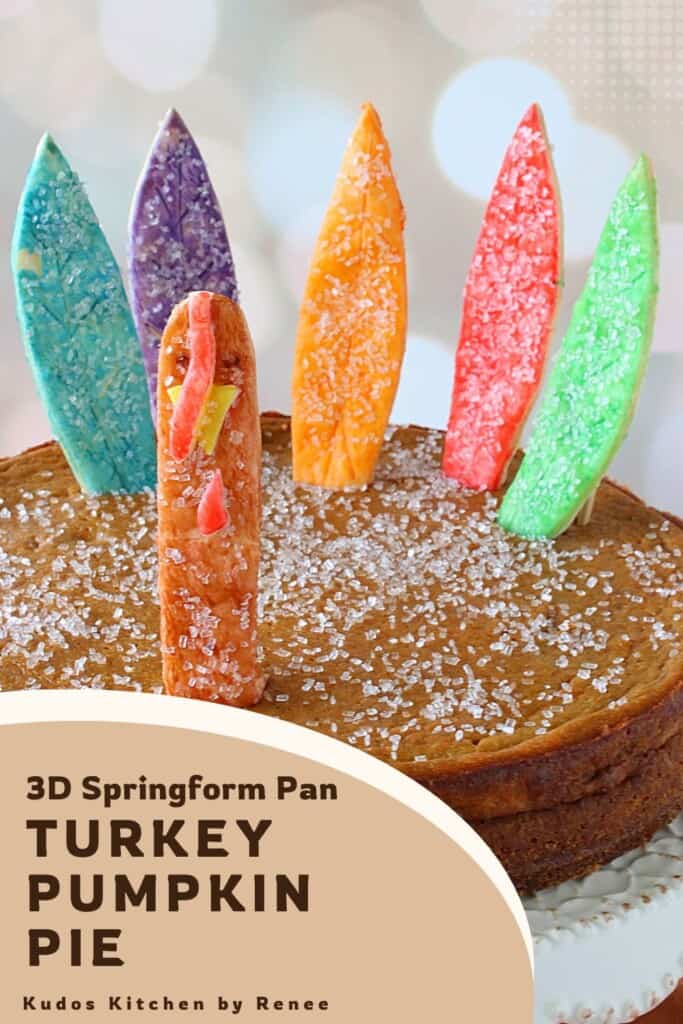
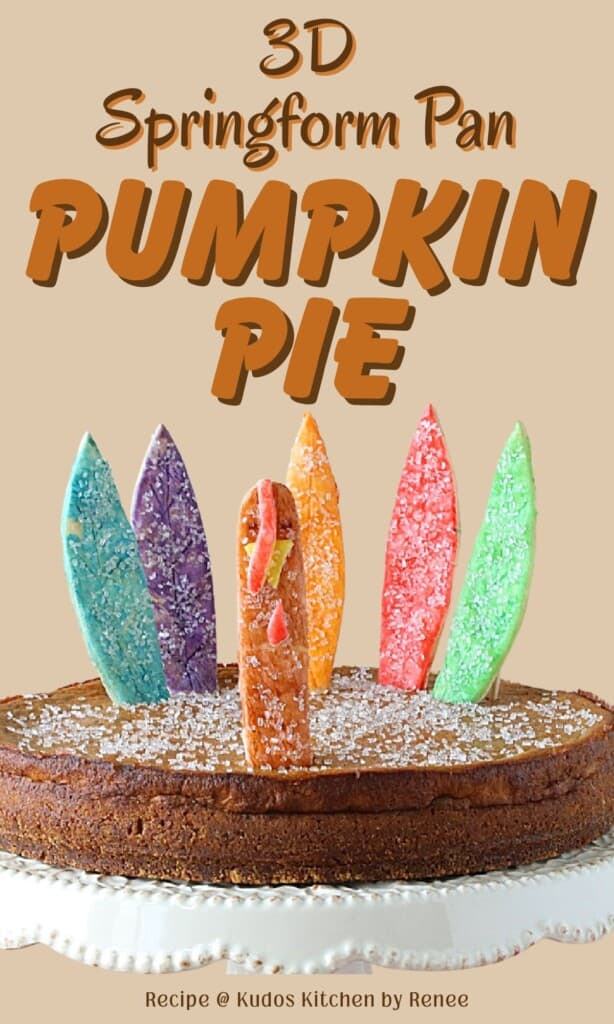
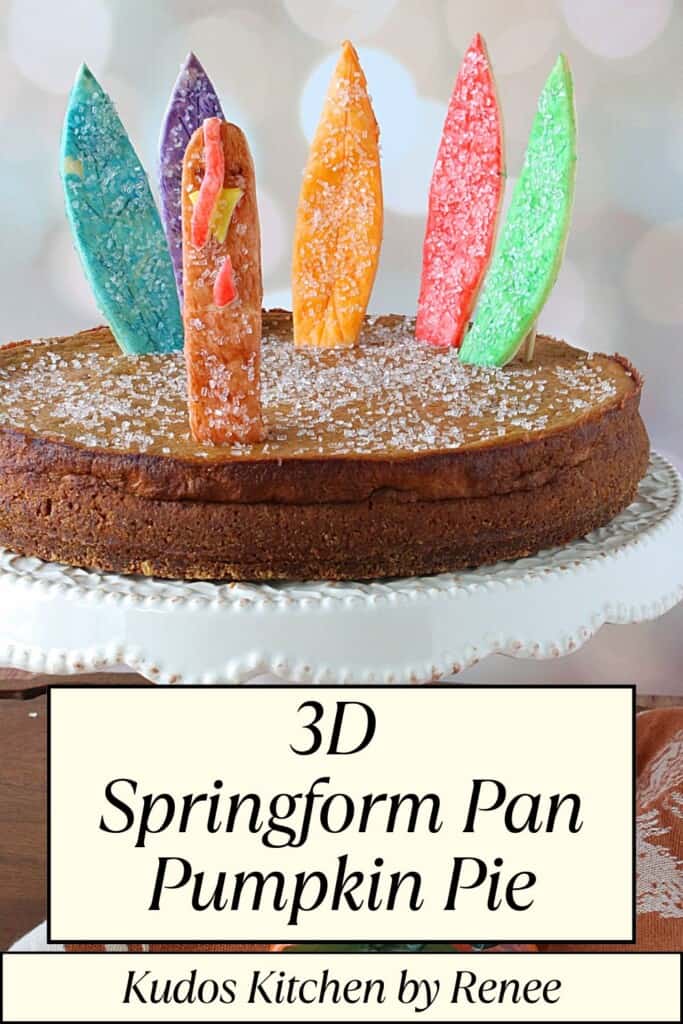
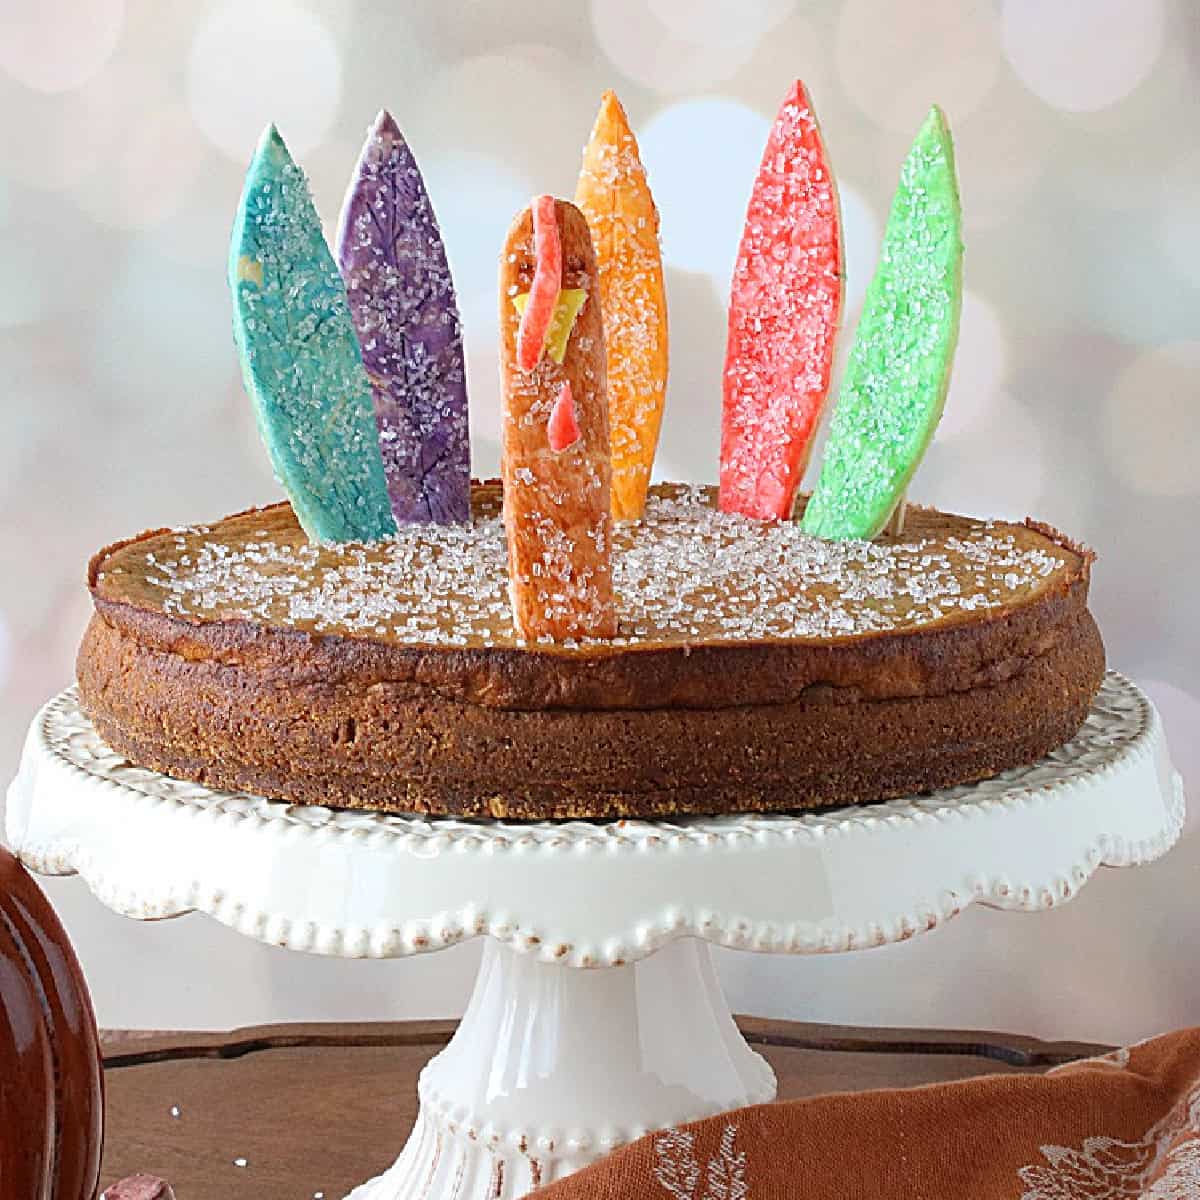
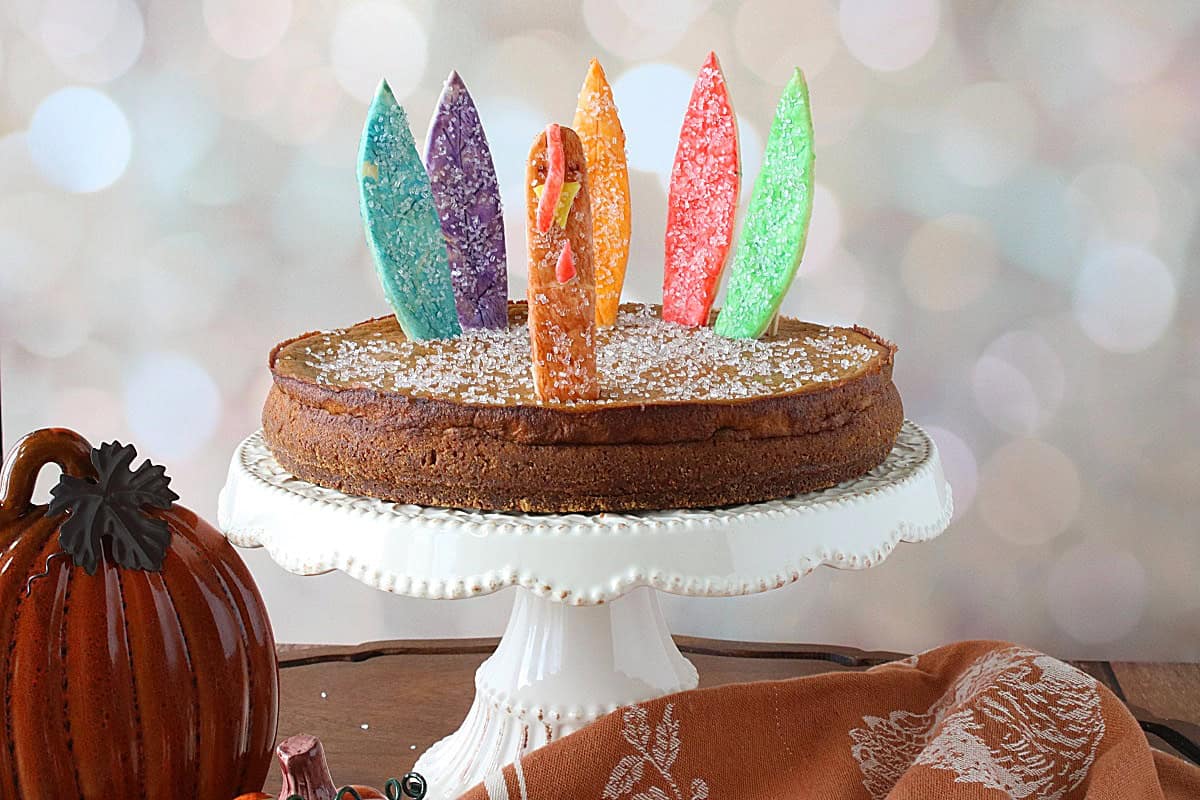
Who says a pumpkin pie must be baked in a traditional pie tin, and that it has to be dull and boring? Not me! This fun and colorful 3D Springform Pan Pumpkin Pie is anything but dull and boring, AND it's incredibly delicious!! You can make it with or without the turkey. It's totally your call!
Whether you're doing the hosting and cooking, or being a guest, I have some wonderful Thanksgiving dishes for gracing your Thanksgiving table this year: Oma's Sweet and Sour Red Cabbage (I'm Oma), Stuffing Stuffed Cremini Mushrooms, Kentucky Bourbon Glazed Carrots and Pecans, and Pimento Cheese Mashed Potatoes.
This recipe post and its contents may include affiliate links for your consideration. I may earn a commission from qualifying purchases, but your prices are never increased as a result. Thank you.
Table of Contents Found Here
- The ingredient list:
- Ingredient information:
- Kitchen tools and equipment needed:
- Can this pumpkin pie be made in a standard pie tin?
- What are the benefits of making a pumpkin pie in a springform pan?
- What size springform pan is needed for this pumpkin pie?
- Can this springform pumpkin pie be made without the turkey tail feathers and head?
- How long does this pumpkin pie bake in the oven?
- When should the pie crust feathers be inserted into the pie?
- How to store a springform pan pumpkin pie:
- Can a springform pan pumpkin pie be frozen?
- Can this pumpkin pie be made in advance?
- How long should this pie be cooled before taking the springform collar off?
- How do you release the pie from the springform pan collar?
- Can the pie be served with the metal bottom of the springform pan, or should it be removed?
- Can the gingersnap cookies be omitted from the recipe?
- Can pumpkin pie spice be used in place of the individual spices?
- Additional fun and colorful Thanksgiving pies you will also enjoy:
- Printable Recipe Card
- Please comment if you've made this recipe.
The ingredient list:
*Please note that the exact measurements along with a "shop the recipe" feature from Instacart and Walmart is available inside the printable recipe card.

Ingredient information:
GINGERSNAP COOKIES- You'll need about 15 gingersnap cookies to make the crust for this springform pan pumpkin pie. If you'd like to make the crust with strictly gingersnap cookies, you'll need approximately 30 gingersnap cookies. You can either use store-bought cookies or homemade gingersnap cookies.
GRAHAM CRACKERS- I had them in the cupboard, so I combined the two flavors of cookies to make the crust for this pumpkin pie. If you'd like to make the crust with strictly graham crackers, you'll need approximately 24 graham cracker squares, but if you're mixing the two types of cookies, you'll need 12 graham cracker squares.
MELTED BUTTER- I use salted butter in all of my baking. Unsalted will work as well. I used the microwave to melt the butter on medium power. Make sure to allow the melted butter to cool slightly before adding that portion to the raw eggs for the filling so the eggs don't curdle.
BROWN SUGAR- The difference between light brown and dark brown sugar is the amount of molasses used. Dark brown sugar has more molasses and a deeper flavor than light brown sugar. They will both work for this recipe. I used a light brown sugar.
PUMPKIN PUREE- You'll need one can (15 ounces) of pure pumpkin purée. Not the pumpkin pie filling, but 100% pure, unsweetened purée.
EVAPORATED MILK- You'll need 1¼ cups (10 fluid ounces) of evaporated milk, not quite an entire can. Perhaps you can save the remaining evaporated milk to add to your morning coffee or tea.
EGGS- Always use large, room-temperature eggs when baking. If you forget to let the eggs sit on the counter to warm before starting, you can speed up the process by allowing the eggs to sit entirely submersed in a bowl or warm water for 4-5 minutes.
ALL-PURPOSE FLOUR- Even though it's a relatively small quantity, this ingredient will aid in the perfect pumpkin pie texture. Sifting the flour and the dry spices together is optional, but it's helpful to avoid lumps of dry flour throughout the filling.
GROUND CINNAMON- This pumpkin pie contains all the warm and comforting spices. If you don't have the individual spices on hand (listed below), you can always use pumpkin pie spice instead. I recommend using 1½-2 teaspoons of pumpkin pie spice instead of the individual spices listed in the recipe card.
GROUND GINGER- Adding the ground ginger reinforces the gingersnap cookies' flavor in this pie's crust.
GROUND NUTMEG- Ground nutmeg compliments the the ground cinnamon and ginger. A little ground nutmeg goes a long way, so only a little is needed.
GROUND CLOVES- Lends an earthy depth of flavor in conjunction with the other warm and woodsy spices called for in this recipe.
WHITE SANDING SUGAR- You'll enjoy the additional crunch, sparkle, and texture the white sanding sugar will add to the completed pie. It's also beautiful when it's sprinkled on the tail feathers and head and neck for one cohesive look.
SALT- Kosher salt is what I use, and the printable recipe card reflects that fact. If, however, you use table salt, please see the highlighted box below and make the minor quantity reduction I suggest.
PIE CRUST (optional)- I used one 9-inch pre-made, roll-out pie crust for the tail feathers and head and neck. If you wish, you can always make your homemade pie crust or forgo the decorative embellishments altogether. The choice is yours.
GEL FOOD COLORING (optional)- When faced with the option of colorful or natural, I almost always choose colorful. That said, I do believe this 3d springform pan turkey pumpkin pie would be quite grand if his feathers, head, and neck sported a totally neutral, monochromatic look. You do you.
*Important Note—If using table salt instead of kosher salt, please cut back on the amount of salt called for in the recipe card by half because they measure differently due to grain size.
Kitchen tools and equipment needed:
- 9" springform pan
- food processor (for making the cookie crust)
- large mixing bowl
- whisk
- spatula
- measuring cups and spoons
- sieve
- can opener (optional)
- liquid measuring cup
- baking spray
- baking sheet (optional)
- parchment paper (optional)
- cooling rack
- cake tester or toothpick
- nutmeg grater (optional)
- kitchen timer
- paring knife (optional, for cutting pie crust)
- food paint brush (optional, for coloring feathers)
- gel food coloring (optional)
- cardboard (optional, for tracing feathers and head)
- scissors (optional if adding feathers and head)
Save this for later.
Email forwarding service for saving information.
Can this pumpkin pie be made in a standard pie tin?
Yes, although the bake time may differ from what is written on the recipe card. Use a cake tester or toothpick to test the doneness of the center of the pie. When it comes out clean, the pie is fully baked.
What are the benefits of making a pumpkin pie in a springform pan?
- Every slice comes out perfectly each and every time.
- There are no worries about burning the crust.
- It's easy to store with its collar in place and plastic wrap or foil over the top.
- It's different and unusual.
What size springform pan is needed for this pumpkin pie?
This recipe is written using a 9-inch springform pan.
Can this springform pumpkin pie be made without the turkey tail feathers and head?
It sure can and will still be a delicious pumpkin pie, but not traditional.
How long does this pumpkin pie bake in the oven?
The crust takes between 10-12 minutes to bake by itself.
Once filled, the entire springform pan pie will take approximately 50 minutes at 375 degrees F (190 degrees Celsius).
Always use a toothpick or cake tester in the center of the pie to check for doneness. When the tester comes out clean, the pumpkin pie is fully cooked.
When should the pie crust feathers be inserted into the pie?
You can make and bake the turkey's feathers and head/neck combo in advance and store them at room temperature in an airtight container for several days.
Up to 1 hour before serving, gently press the pie crust feathers and head into the pie in your desired placement. Placing the pieces into the pie any sooner may cause the pie crust pieces to get soggy and not stand up straight.
How to store a springform pan pumpkin pie:
If making this pie in advance, a great tip is to place the open collar back around the baked and cooled pie. This will keep foil or plastic wrap from sticking directly on the top of the pie. Store the wrapped and covered pie in the refrigerator up to 2 days in advance.
Can a springform pan pumpkin pie be frozen?
Yes.
Once completely cooled, remove the pie crust pieces and store the pumpkin pie (in individual slices or whole) in an airtight freezer container or wrapped well with plastic wrap, and freeze for up to 3 months.
Thaw in the refrigerator overnight.
Can this pumpkin pie be made in advance?
Yes, but wait to add the pie crust feathers and head and neck until shortly before serving so the pie crust doesn't get soggy.
This pie can be made up to two days in advance and stored in the refrigerator. See the above section for how to store a springform pan pumpkin pie.
How long should this pie be cooled before taking the springform collar off?
I like to wait 10-15 minutes to give the pie a little time to release as it cools.
How do you release the pie from the springform pan collar?
After removing it from the oven, cool the springform pie for 10-15 minutes on a wire rack. After 10-15 minutes, carefully run an offset spatula or butter knife around the perimeter of the pan and the pie. This action will release any baked pie filling or crust that may have stuck to the pan.
Gently release the clip from the springform pan collar and open it fully. Carefully remove the collar from the pie and allow the pie to continue cooling completely on the wire rack.
Can the pie be served with the metal bottom of the springform pan, or should it be removed?
I've done it both ways.
If keeping the pan bottom on while serving, wet a paper towel and fold it into a square under the pan (on the serving plate) to prevent the metal pie pan from slipping around on a serving platter or cake stand.
If removing the springform pan bottom for serving, use a cake lifter or giant spatula to carefully scoop and lift the entire pie, in one easy movement, onto a cake stand or platter. No wet napkins are required for this method.
Can the gingersnap cookies be omitted from the recipe?
Yes. If so, use additional graham crackers, or use only gingersnap cookies and omit the graham crackers. The choice is yours.
Can pumpkin pie spice be used in place of the individual spices?
It sure can.
If using pumpkin pie spice, I recommend using 2 teaspoons.
Additional fun and colorful Thanksgiving pies you will also enjoy:
Autumn Leaves Apple Pie is loaded with fresh, plump apples and topped with pie crust maple leaves. When the pie bakes down in the oven, the leaves look like they're freshly fallen straight from the trees.
My Turkey Crust Pumpkin Pie has been shared and made by thousands of people. Everyone I've heard from who has made their version of this pie is always impressed and proud of how it turned out. See the video below for a sampling of the completed pie photos shared with me.
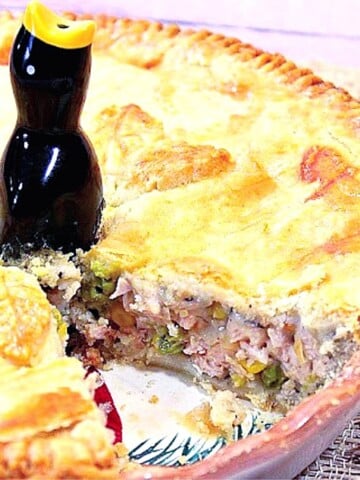
If you feel like taking on a bit more of a food art challenge, try your hand at this festive Cornucopia Pumpkin Pie.

When you make today's recipe (and I hope that you will), I'd appreciate it if you'd take the time to come back and give it a star rating along with a comment on why you rated as you did.
Search engines such as Google appreciate comments and ratings and, in turn, will show my recipes to more people. Please look for the pink star rating box within the printable recipe card. Thank you!!
Printable Recipe Card

3D Springform Pan Turkey Pumpkin Pie
Equipment
- can opener optional
- kitchen scale optional
- kitchen timer optional
- nutmeg grater optional
- cake texter optional
- paper cups
- scissors optional
- cardboard or cardstock optional
- pencil optional
Ingredients
To make the springform pan crust:
- 1 cup ground gingersnap cookies (approximately 15)
- 1 cup ground graham crackers (approximately 12)
- ¼ cup light brown sugar packed lightly
- 4 tablespoons butter melted
- ½ teaspoon kosher salt
To make the pumpkin filling:
- 4 large eggs at room temperature
- ½ cup light brown sugar lightly packed
- 1 can (15 ounces) pure pumpkin purée not pumpkin pie filling
- 1¼ cup evaporated milk not sweetened condensed milk
- 1½ teaspoon pure vanilla extract
- 2 tablespoons butter melted
- 2 tablespoons all-purpose flour
- 1½ teaspoons ground cinnamon
- ¼ teaspoon ground cloves
- ¼ teaspoon ground ginger
- ⅛ teaspoon ground nutmeg
- 1 teaspoon kosher salt
- 1 9" round prepared pie crust optional
- ¼ cup white sanding sugar optional
- gel food colors
Instructions
- Preheat the oven to 375 degrees Fahrenheit (190 degrees Celsius).
- Spray the entire springform pan, with the latch closed, liberally with baking spray. Set aside while preparing the cookie crumb crust.
To make the springform pan crust:
- Pulse the gingersnap cookies and graham crackers together in a food processor until uniform crumbs are formed. Add the melted butter, brown sugar, and salt to the processor and pulse until the mixture resembles wet sand.
- Add the prepared crumbs into the bottom of the prepared springform pan and press the crumbs to form an even layer on the bottom and slightly up the sides of the pan. Bake in the preheated oven for 10-12 minutes. Remove and cool the crust while preparing the filling.
To make the pumpkin pie filling:
- Whisk the room-temperature eggs, brown sugar, and vanilla in a large bowl.
- Add the evaporated milk and pumpkin purée into the egg and brown sugar mixture and whisk until well combined. Stir in the melted (and cooled) butter.
- Sieve together the flour, cinnamon, nutmeg, cloves, ground ginger, and salt into the pumpkin pie filling and whisk well until thoroughly combined.
- Place the waiting springform pan with the crust onto a baking sheet. Pour the pumpkin pie filling into the pan and bake in the preheated oven for 50-60 minutes or until the center of the pie is no longer jiggly and when a cake tester or toothpick inserted in the center comes out clean.
- Allow the pie to cool for 10-15 minutes on a cooling rack and then carefully run an offset spatula or butter knife around the circumference of the pan and the pie to gently release it should there be any sticking.
- Slowly unlatch the collar of the pan and lift it off the pie. Allow the pie to cool completely on the wire rack before decorating.
To make the pie crust feathers and head:
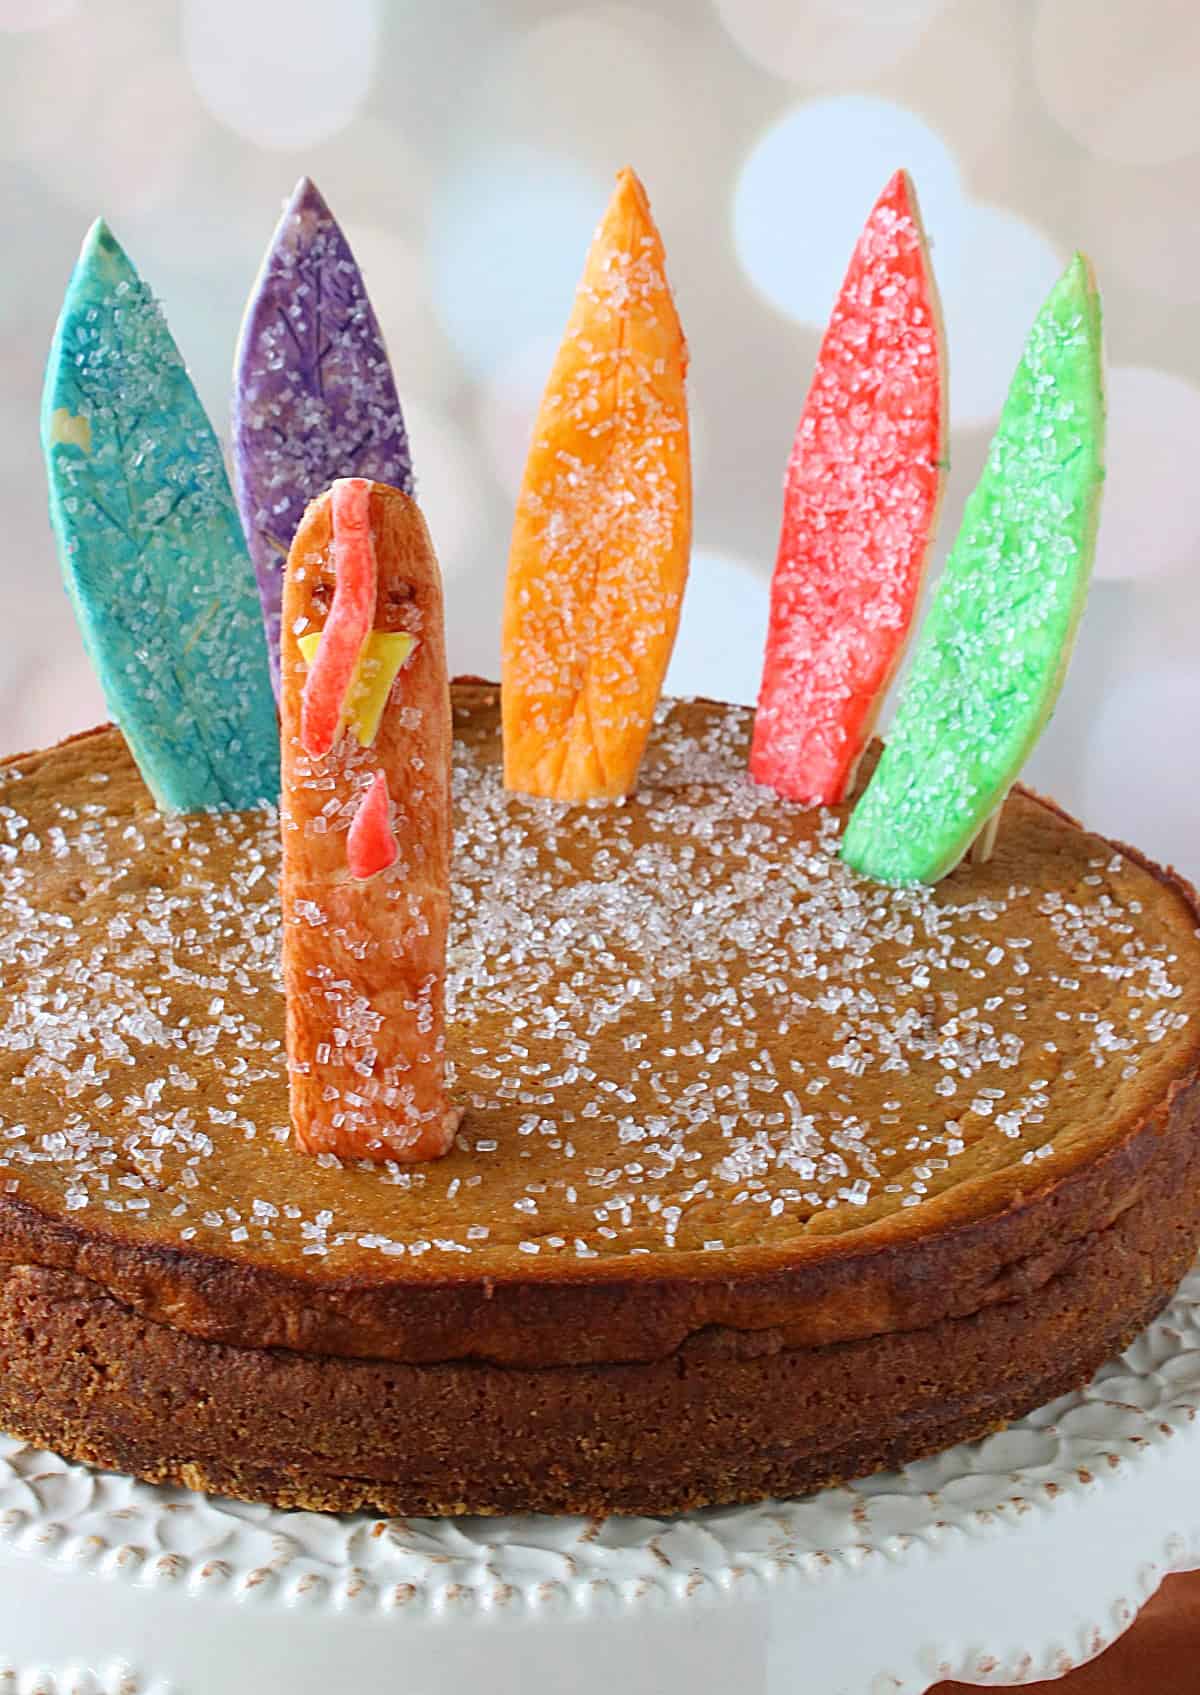
- While the pie is cooling cut 1 feather (approximately 6 inches in length) and one neck and head combo (approximately 6 inches in length) from a piece of cardboard or cardstock using a paring knife.
- Unroll the pie crust onto a lightly floured surface. Cut out as many feathers as you desire (and can fit onto the pie crust round) using the cardboard template as your guide. Do the same with the neck and head piece, noting that you'll only need one of these pieces. Also cut out a small triangle (for the beak) along with a long thin piece for the waddle. Use a light touch of water to adhere the beak and waddle onto the turkey head and neck area.
- In a glass measuring cup whisk together 1 large egg and 1 tablespoon of water. Divide this mixture between paper cups and how many different colors you choose to use. I used brown, red, green, orange, yellow, and blue for reference.
- Add a drop of each gel food color you're using to each paper cup and stir well to combine.
- If desired, gently score the feather marks with the dull side of the paring knife (do not cut completely through the dough) and use a toothpick or cake tester to gently poke eyes into the head portion of the pie crust.
- Use a specified food-only brush to paint each feather with the colored egg washes (all the same, or a mixture of colors) along with painting the head, neck, beak and waddle. Sprinkle each piece with sanding sugar, if desired, and bake for 7-10 minutes, checking on them frequently to prevent burning. Remove and cool completely.
- Liberally sprinkle the top of the completely cooled pie with sanding sugar and right before serving gently insert the all the tail feathers along with the neck and head into place.
- Best served at room temperature with ice cream or whipped cream (optional).
Video
Notes
Nutrition
I sincerely hope you'll enjoy making (and eating) this fun and colorful 3D pumpkin pie as much as I've enjoyed bringing it to you!
Should you have any questions or comments regarding anything you've seen on my site, please don't hesitate to reach out to contact me. It is always my distinct pleasure to get back with you just as soon as I possibly can!
Thank you so much for visiting me today in my Kudos Kitchen. I hope you found something you'll love and that you will come back and visit me often. Please know that there is always room for you around my kitchen table!
Until we eat again, I hope you have a delicious day!


All of the recipes you'll find here on my website are in loving memory of my son, Greg, who left this earth far too soon and will be forever in our hearts.


Mark says
Looks great. Perfect for the holidays.
Renée says
Thank you so much, Mark.
I do hope you'll try this recipe.
Take good care,
Renee