
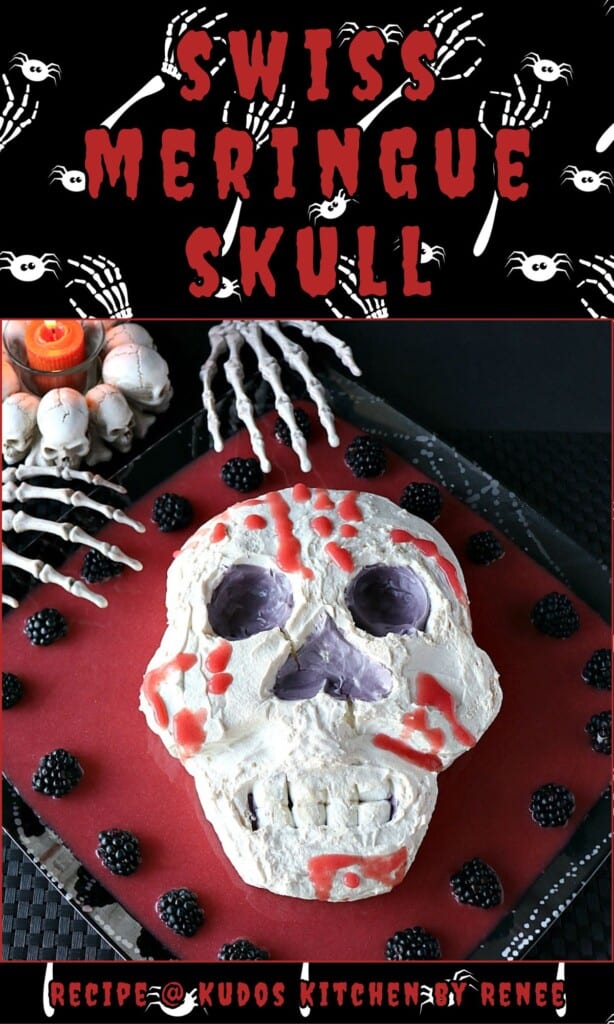

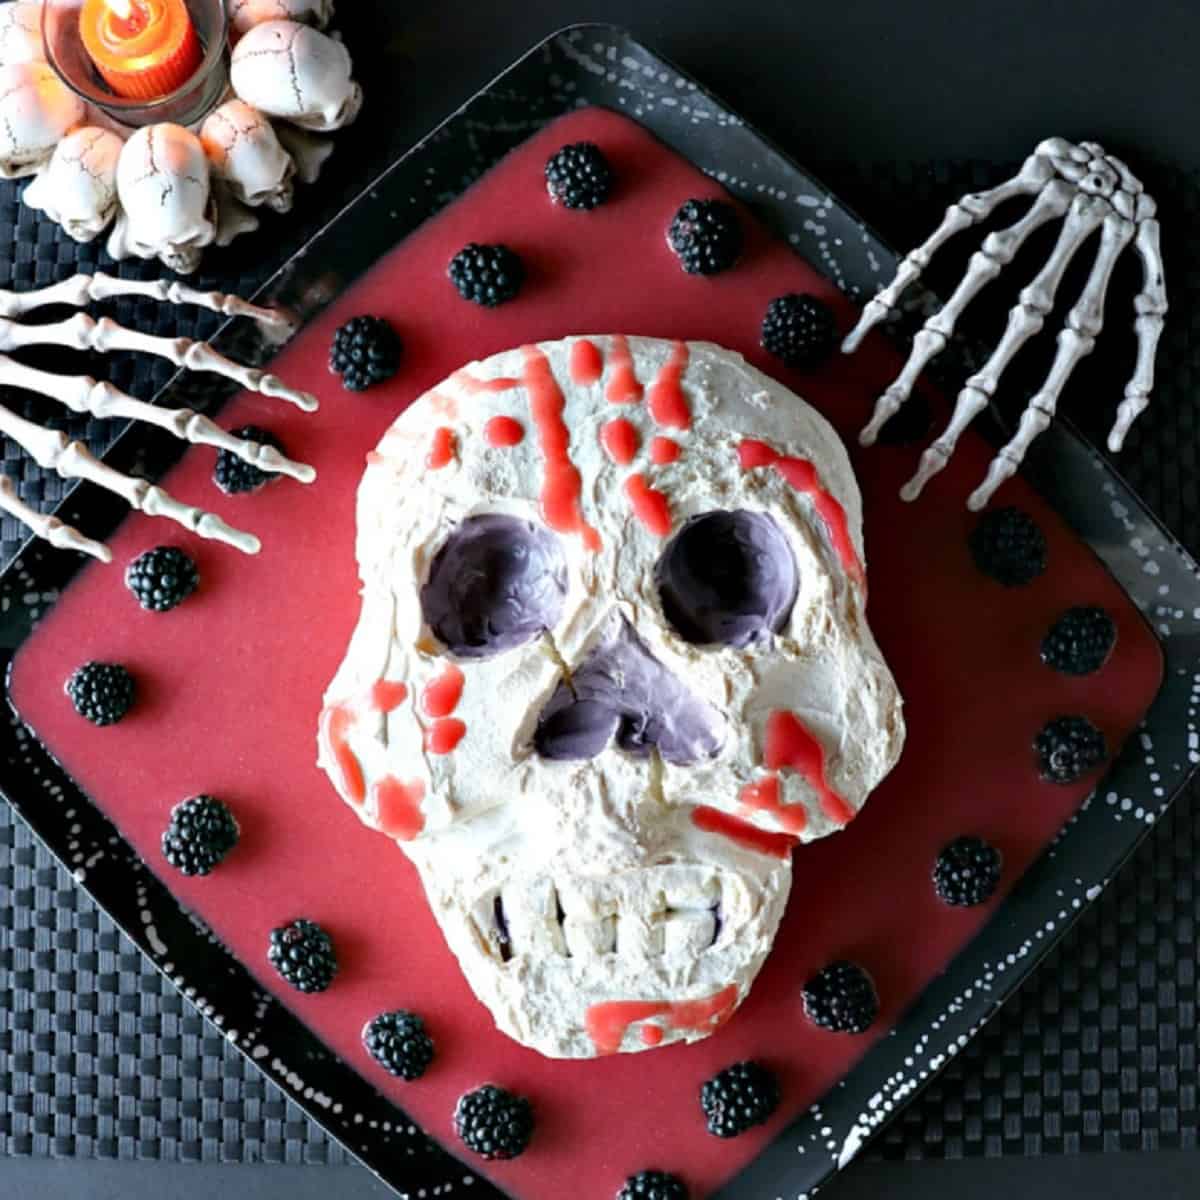
The impact this spooky Swiss Meringue Skull will have when you set him out on the table will be one of freight, and delight.
Grab your spoon and dig in! Make no bones about it, this creepy Halloween treat tastes better than he looks. I've got even more gore for you...Boo Berry Pie is hauntingly good. This Frankenstein Rice Krispie Treat is sure to have you screaming "It's Alive," and Brain Food Jello Salad will give you a lot to "think" about as your scooping out his cranium.
This recipe post and its contents may include affiliate links for your consideration. I may earn a commission from qualifying purchases, but your prices are never increased as a result. Thank you.
Table of Contents Found Here
- The ingredient list:
- Kitchen tools and equipment needed:
- Why this recipe works:
- Dinner and the spooky skull:
- My first experience with Swiss meringue:
- How to create a homemade double boiler:
- Why Swiss meringue?
- How long will this Halloween dessert recipe take to make from start to finish?
- How to store this Swiss meringue sugar skull after baking?
- The step-by-step photo instructions for shaping and baking:
- Additional fun and spooky Halloween recipes:
- Printable Recipe Card
- Please comment if you've made this recipe.

The ingredient list:
- egg whites
- granulated sugar
- salt
- cream of tartar
- vanilla paste
- mini marshmallows
- black gel food color
- frozen strawberries
Kitchen tools and equipment needed:
- patience and courage to fiddle with the design until you're happy with the looks.
- image of a skull
- hand mixer or stand mixer
- double boiler, or a saucepan and heat safe bowl
- measuring cups and spoons
- blender (for making the strawberr puree)
- baking sheet
- parchment paper or silpat baking mat
- offset spatula
- large mixing bowls
- smaller bowls
- black gel food color
- extra large cake lifter or spatula
- serving tray
- baking spray or coconut oil spray
Why this recipe works:
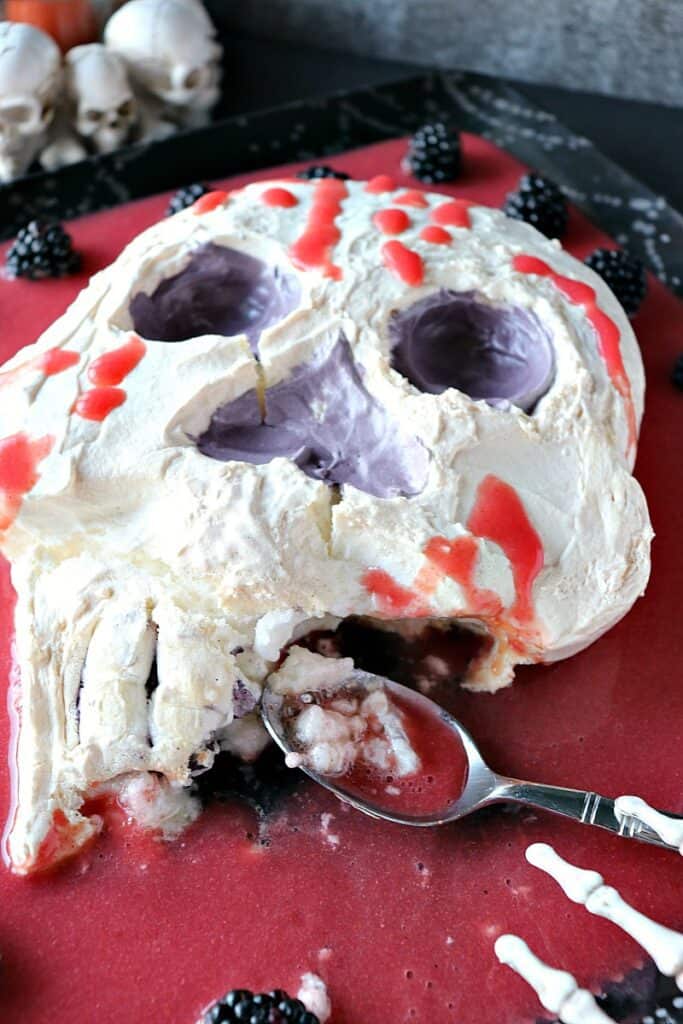
With its marshmallowy texture and strawberry puree ooze, this Swiss Meringue Skull will want to make you close your eyes when you're spooning this dessert into your mouth.
Of course, that will because you'll be in a state of bliss, not horror. Well, maybe just a little horror because that's what Halloween is all about! 🙂
Dinner and the spooky skull:
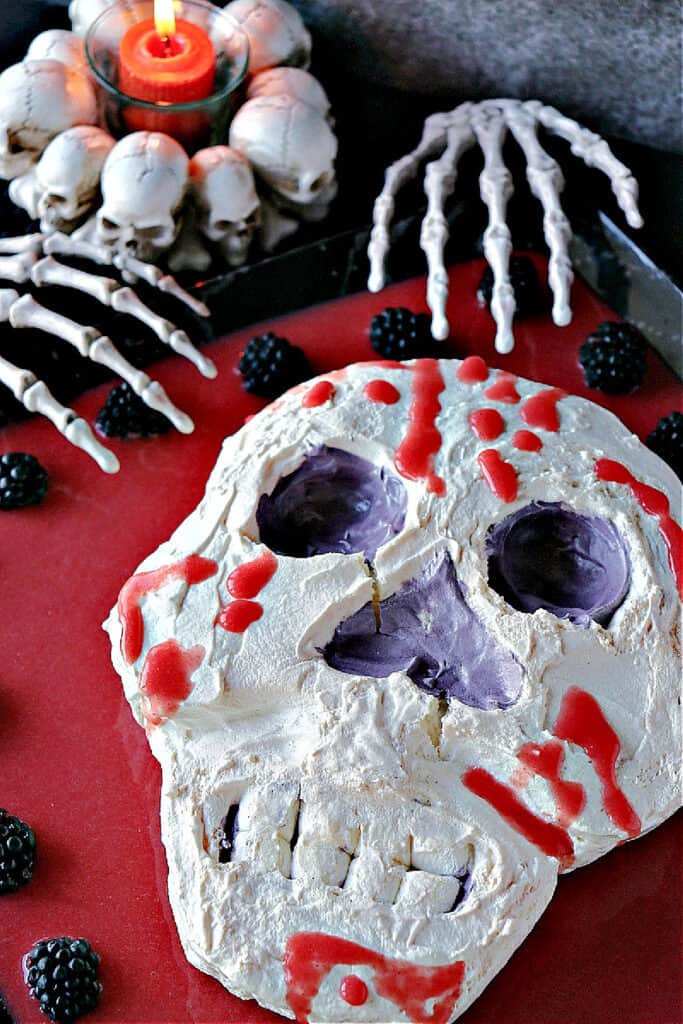
The night I made this ooey-gooey Swiss meringue skull, I set it on the table at dinner.
He was eyeballing us throughout our meal.
When we finished our dinner, I handed my husband a spoon and said, "Just give it a taste!" I know it doesn't look all that appetizing, but let's find out firsthand exactly what it tastes like."
The next thing I knew, we were both digging in with our spoons with gory abandon.
The light sweetness and ooey-gooey "marshmallowy" texture of the Swiss meringue combined with the slight tartness and silky consistency of the strawberry puree are 100% more delicious than they would appear, especially after we'd so mercilessly attacked him. 😉

Save this for later.
Email forwarding service for saving information.
My first experience with Swiss meringue:
Making this sugary skull was my first time making Swiss meringue, and I wasn't quite sure what to expect.
To say I was a little nervous about how this spooky Swiss Meringue Skull would turn out is an understatement! But once I get an idea into my thick skull (see what I did there? HaHa!), it's pretty hard for me to shake it!
How to create a homemade double boiler:
Why Swiss meringue?
I chose to use a cooked Swiss meringue because it's a more stable meringue and would hold its shape better than French Meringue.
How long will this Halloween dessert recipe take to make from start to finish?
Once sculpted and ready to bake, this meringue skull will take 5 hours in a low 200-degree Fahrenheit oven.
Add to that however long it takes you to make the meringue and sculpt the skull into something you're happy with.
I fooled with him for quite some time before I was happy with his appearance.
Hopefully, with my photo tutorial (shown below), you'll be much faster than I was with the sculpting process.
Just remember to have fun making this Halloween dessert, and give yourself plenty of time so you're not rushing and stressed.
I suggest making this sugar skull at least 1 day in advance of when you plan to serve, and on the day of serving make and drizzle him with the strawberry "blood."
How to store this Swiss meringue sugar skull after baking?
Wrapped well (plastic wrap works great), this Swiss meringue Skull can be kept at room temperature for up to 7 days.
The step-by-step photo instructions for shaping and baking:
I did fiddle with this design longer than I had anticipated, but I'm hopeful that you'll benefit from my experience and will learn from the photos below.
- Assemble the ingredients and separate the egg whites from the yolks. Reserve the yolks for another purpose.
- Add the egg white and sugar to a large, heatproof bowl (I used the bowl from my stand mixer).
- Whisk the whites and sugar together.
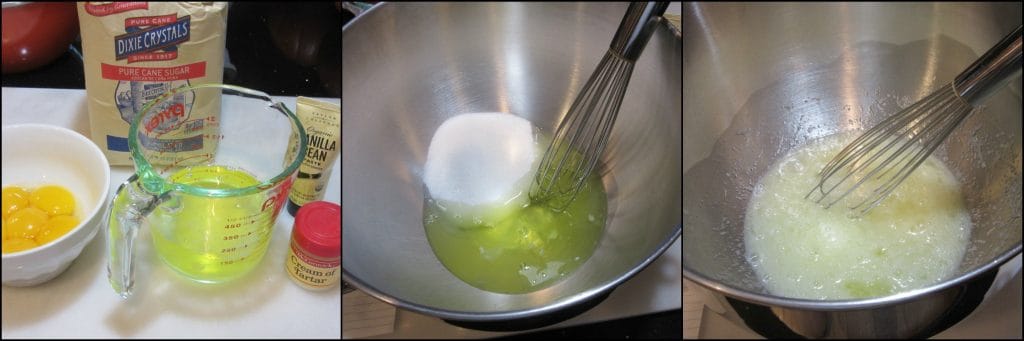
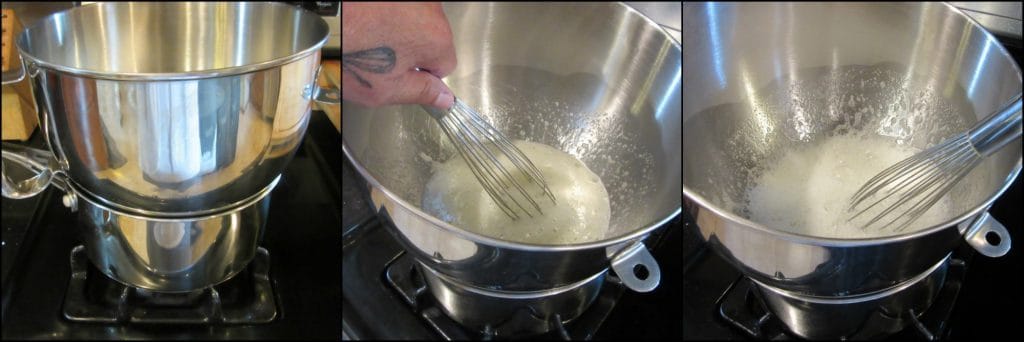
- Place the bowl over a medium saucepan that has approximately ½" of water in the pan, making sure the water does not touch the bottom of the bowl.
- Bring the water to a low boil, whisking the egg whites and sugar continually until the sugar is fully dissolved and the mixture is foamy. *Note - pinch a little of the egg white mixture between your fingers and if it still feels grainy, continue heating until the mixture is completely smooth.
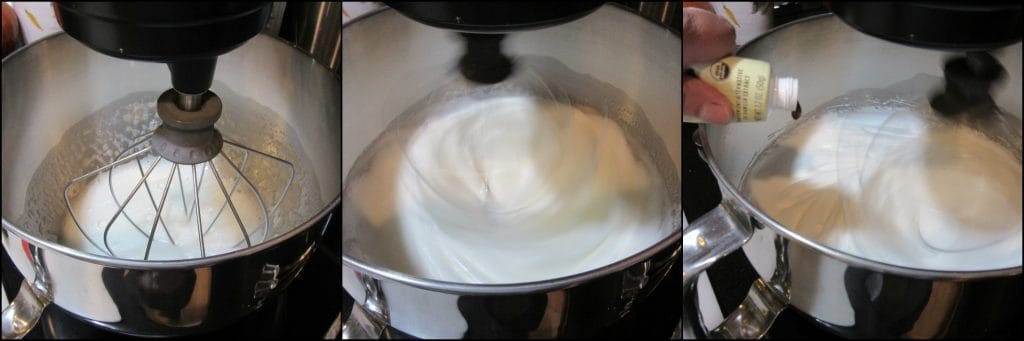
- Using the whip of a stand mixer, or a hand mixer, whip the meringue base (starting on low and gradually increasing the speed to high) continually until the mixture begins to thicken noticeably (approximately 3 minutes).
- Add the vanilla, cream of tartar, and salt to the bowl and continue whisking on highest speed until soft peaks form.

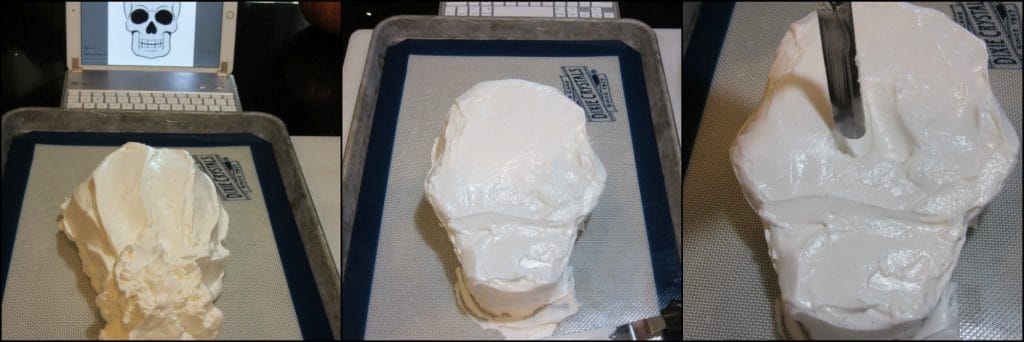
- Using a photo of a skull as a guide, spoon most the Swiss meringue into a general skull shape onto a baking sheet which has been lined with a Silpat sheet. Reserve approximately ½ cup of the meringue for coloring. Set aside.
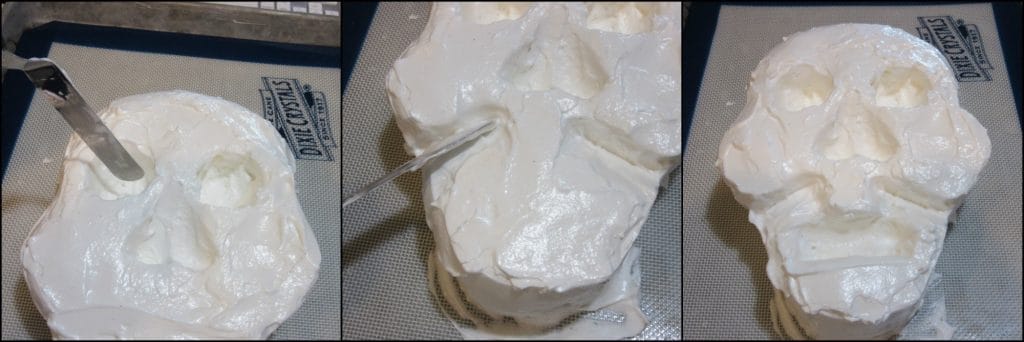
- Use an offset spatula or butter knife to gently shape the skull. You'll want rounded head, square jawline, and pronounced cheeks.
- Use the offset spatula or butter knife to carve an upside heart for the nose, two large'ish holes for the eyes.
- Use the offset spatula to carve away some of the meringue to form chiseled cheekbones and an open mouth that will fit his teeth.
- As needed, build up his cheekbones and chin with some of the remaining meringue which has been carved away from other parts of his skull.
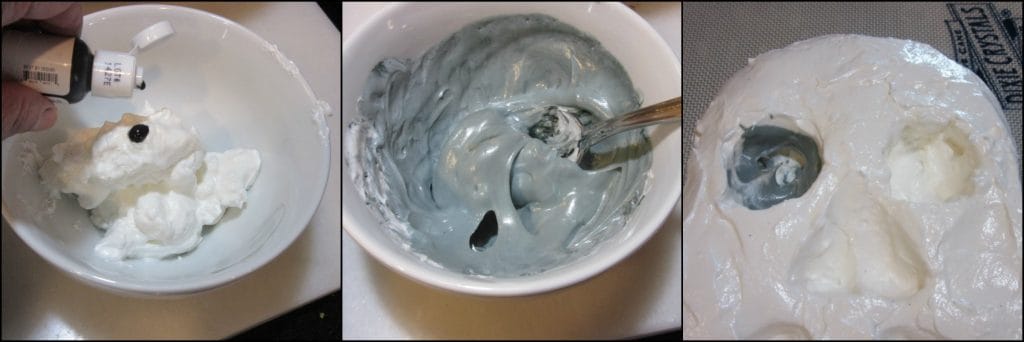
- Color the set aside meringue with a drop or two of black food gel. Stir to combine well.
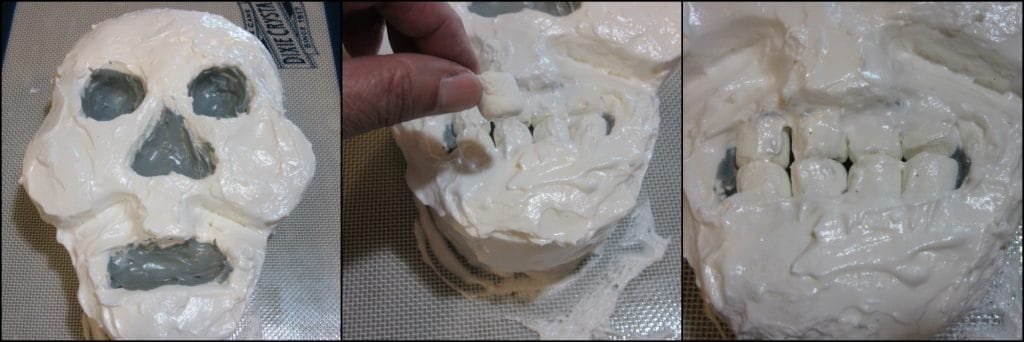
- Using the offset spatula (or I found that fingers sprayed with baking spray to prevent sticking work well for this), gently smooth the colored meringue into the crevices carved for eyes, nose, and mouth.
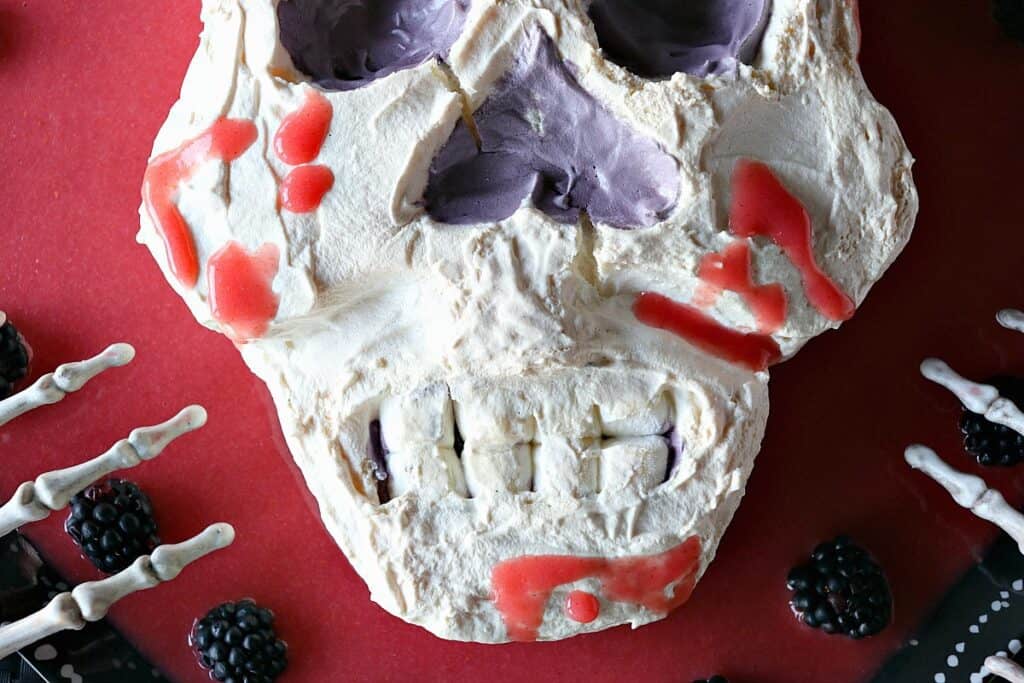
- Cut 4 mini marshmallows in half and press them into this mouth and gum area.
- Gently brush (i.e. wipe) some of the meringue over the "teeth" if desired.
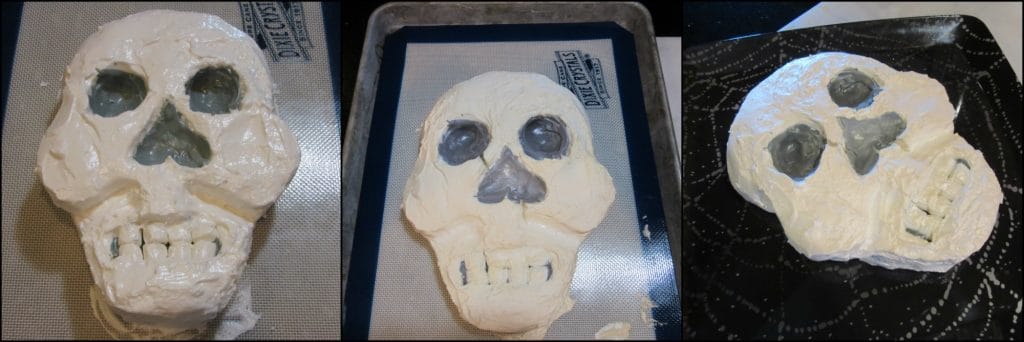
- Preheat the oven to 200-degrees and bake the Swiss meringue skull for 5 hours.
- Turn off the oven, keep the door closed and allow the skull to cool completely inside the oven.
- When the skull is completely cool, remove him from the oven and gently and carefully slide a large spatula under the skull and lift him to a serving platter. *Note - His underside will be sticky, so spraying the large spatula with baking spray or coconut oil is very helpful.
- Blend frozen strawberries until completely smooth.
- Pour the strawberry puree around the Swiss meringue Skull and drizzle some of the strawberry puree directly onto the skull itself.
- Chill until ready to serve.


Additional fun and spooky Halloween recipes:
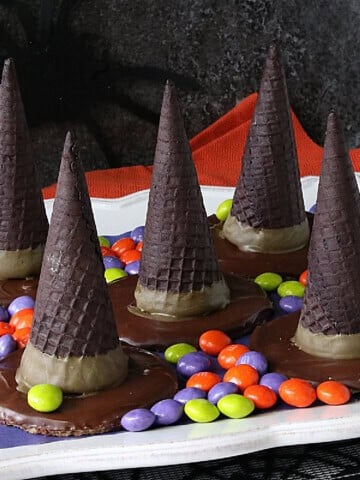
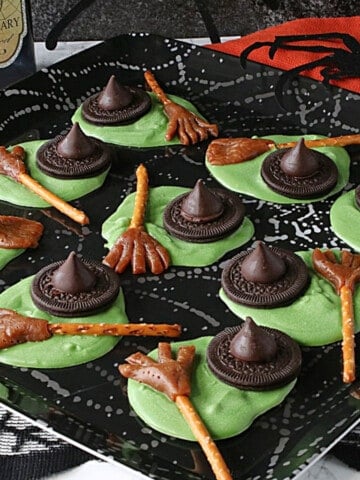
*Melted Witch Candy (not shown)
Melted Witch Candy is my fun wink and a nod to an iconic movie classic, and I'll bet you can easily guess "witch" movie I'm talking about.
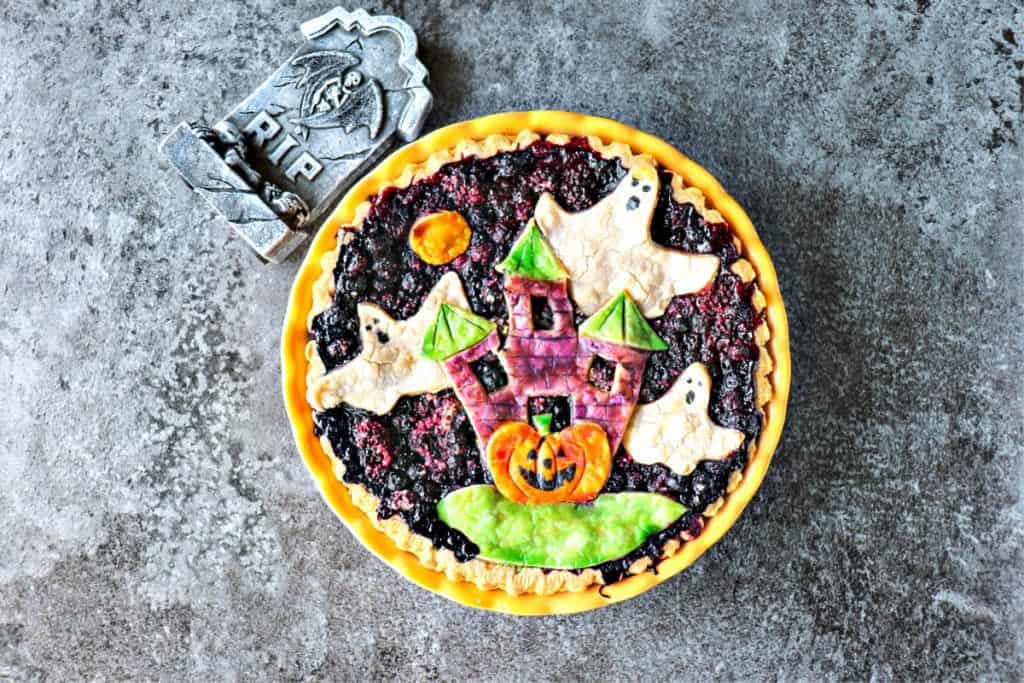
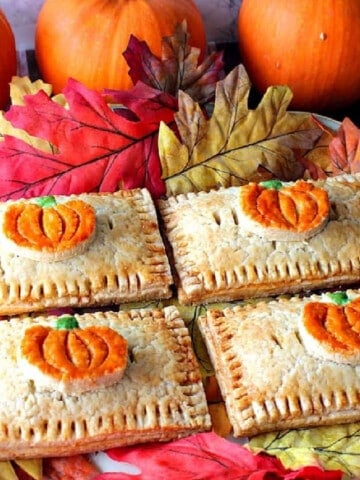
*Boo Berry Pie (shown below)
Hey, Boo! Don’t be scared. This hauntingly delicious Boo Berry Pie is easier to make than you may think, and I’m excited to show you exactly how to do it.
*Frozen Frankenstein Pudding Pops (not shown)
The kids will think you’re the coolest mom around when you make them these Frozen Frankenstein Pudding Pops! Thank you scary much!!
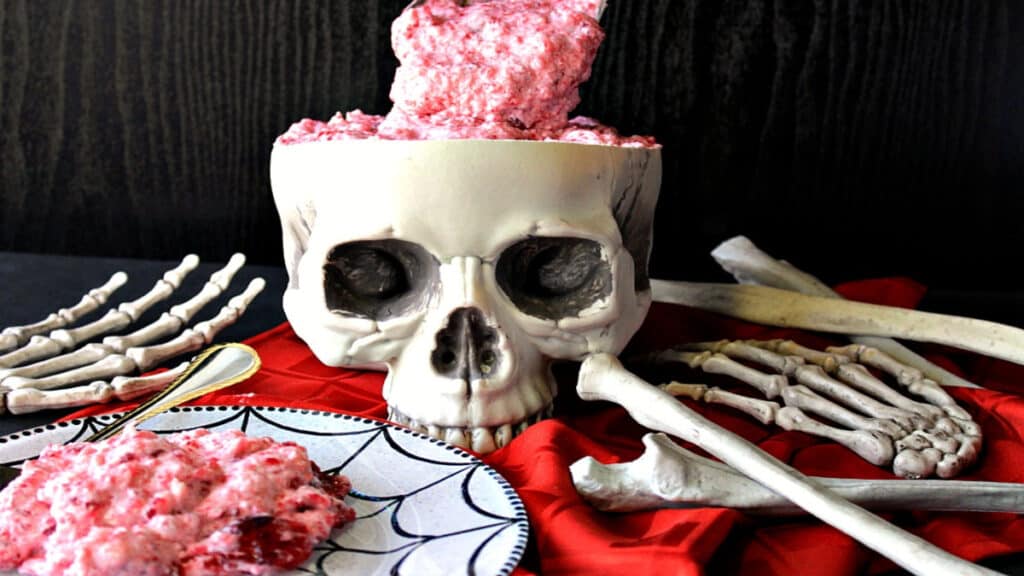
*Brain Food Jello Salad (shown below and featured in the video)
Can you wrap your “head” around eating gory brain food jello salad for Halloween? Try not to “think” about it too much, and you’ll be just fine. *insert evil laughter here*
*Swiss Meringue Skull (shown below) THIS IS THE PLACE!!
When you make today's recipe (and I hope that you will), I'd appreciate it if you'd take the time to come back and give it a star rating along with a comment on why you rated as you did.
Search engines such as Google appreciate comments and ratings and, in turn, will show my recipes to more people. Please look for the pink star rating box within the printable recipe card. Thank you!!
Printable Recipe Card

Swiss Meringue Skull
Ingredients
- 6 large egg whites
- 1 cup granulated sugar
- ⅛ teaspoon salt
- ¼ teaspoon cream of tartar
- ½ teaspoon vanilla extract or vanilla paste
- black gel food color
Instructions
- Assemble the ingredients and separate the egg whites from the yolks. Reserve the yolks for another purpose.
- Add the egg white and sugar to a large, heatproof bowl (I used the bowl from my stand mixer).
- Whisk the whites and sugar together.
- Place the bowl over a medium saucepan that has approximately ½" of water in the pan, making sure the water does not touch the bottom of the bowl.
- Bring the water to a low boil, whisking the egg whites and sugar continually until the sugar is fully dissolved and the mixture is foamy. *Note - pinch a little of the egg white mixture between your fingers and if it still feels grainy, continue heating until the mixture is completely smooth.
- Using the whip of a stand mixer, or a hand mixer, whip the meringue base (starting on low and gradually increasing the speed to high) continually until the mixture begins to thicken noticeably (approximately 3 minutes).
- Add the vanilla, cream of tartar, and salt to the bowl and continue whisking on highest speed until soft peaks form.
- Using a photo of a skull as a guide, spoon most the Swiss meringue into a general skull shape onto a baking sheet which has been lined with a Silpat sheet. Reserve approximately ½ cup of the meringue for coloring. Set aside.
- Use an offset spatula or butter knife to gently shape the skull. You'll want rounded head, square jawline, and pronounced cheeks.
- Use the offset spatula or butter knife to carve an upside heart for the nose, two large'ish holes for the eyes, but not carving completely to the bottom of the meringue.
- Use the offset spatula to carve away some of the meringue to form chiseled cheekbones and an open mouth that will fit his teeth.
- As needed, build up his cheekbones and chin with some of the remaining meringue which has been carved away from other parts of his skull.
- Color the reserved meringue with a drop or two of black food gel. Stir well to combine.
- Using the offset spatula (or I found that fingers work well for this), gently smooth the colored meringue into the crevices carved for eyes, nose, and mouth.
- Cut 4 mini marshmallows in half widthwise and press them into his mouth and gum area.
- Gently brush (i.e. wipe) some of the meringue over the marshmallow teeth if desired.
- Preheat the oven to 200-degrees and bake the Swiss meringue skull for 5 hours.
- Turn off the oven, keep the door closed and allow the skull to cool completely inside the oven.
- When the skull is completely cool, remove him from the oven and gently and carefully slide a large spatula under the skull and lift him to a serving platter. *Note - He will be sticky, so spraying the large spatula with baking spray or coconut oil is very helpful.
- Blend frozen strawberries with a little bit of water until completely smooth.
- Pour the strawberry puree around the Swiss meringue Skull and drizzle some of the strawberry puree directly onto the skull itself for a creepy effect.
- Chill until ready to serve. Serve at room temperature or slightly chilled.
Notes
Nutrition
I sincerely hope you've enjoyed today's spooky Halloween recipe for a Swiss Meringue Halloween Skull as much as I've enjoyed bringing it to you!
Should you have any questions or comments regarding anything you've seen on my site, please don't hesitate to reach out to contact me. It is always my distinct pleasure to get back with you just as soon as I possibly can!
Thank you so much for visiting me today in my Kudos Kitchen. I hope you found something you'll love and that you will come back and visit me often. Please know that there is always room for you around my kitchen table!
Until we eat again, I hope you have a delicious day!


All of the recipes you'll find here on my website are in loving memory of my son, Greg, who left this earth far too soon and will be forever in our hearts.

Valentina | The Baking Fairy says
This is such a fun treat! I love anything with meringue!!
Renée says
Me too. It's delicious! Thanks.
Christie says
Those marshmallow teeth are super cute. I always fail at Swiss meringue. I am definitely trying your step by step instructions.
Renée says
This was my first time with Swiss meringue. I fiddled with the skull quite a bit, but the meringue was forgiving and easy to make. Try it.
Karen says
You really created such a fun dessert!
Renée says
Thank you so much!!
Beth Lee says
OMG! There are so many fun ideas in the Halloween posts. You have outdone yourself with this one. Low calorie and super scary and appropriate for a Halloween party. Bravo!
Renée says
Thank you so much, Beth Lee. I'm thrilled you approve! Happy Halloween!
Tayler Ross says
This is such a fun treat for Halloween! The kids will love it!
Renée says
Thank you, Tayler!
Liz Mays says
This is so seriously fun and festive! I absolutely love how it turned out. I want to try!
Renée says
You 100% need to make one! I'll bet it turns out fantastically!