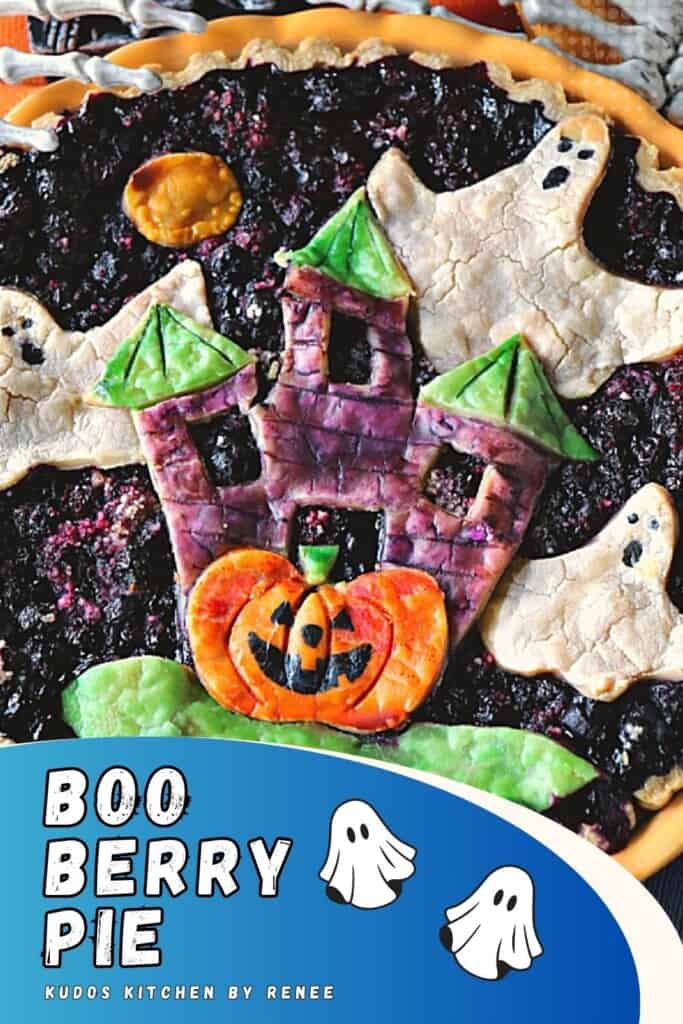
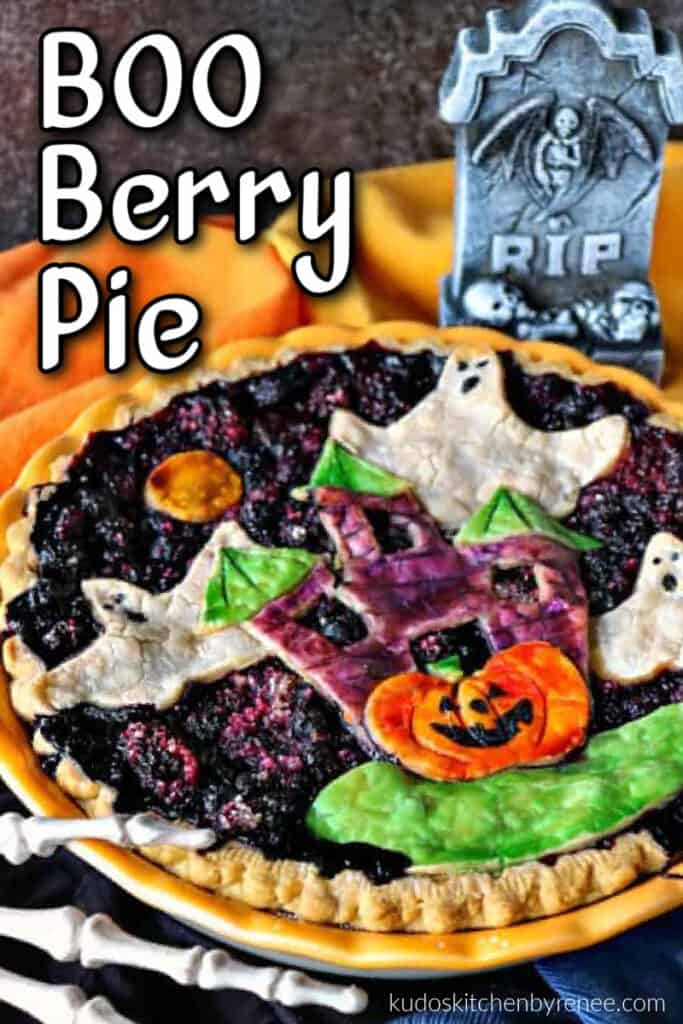
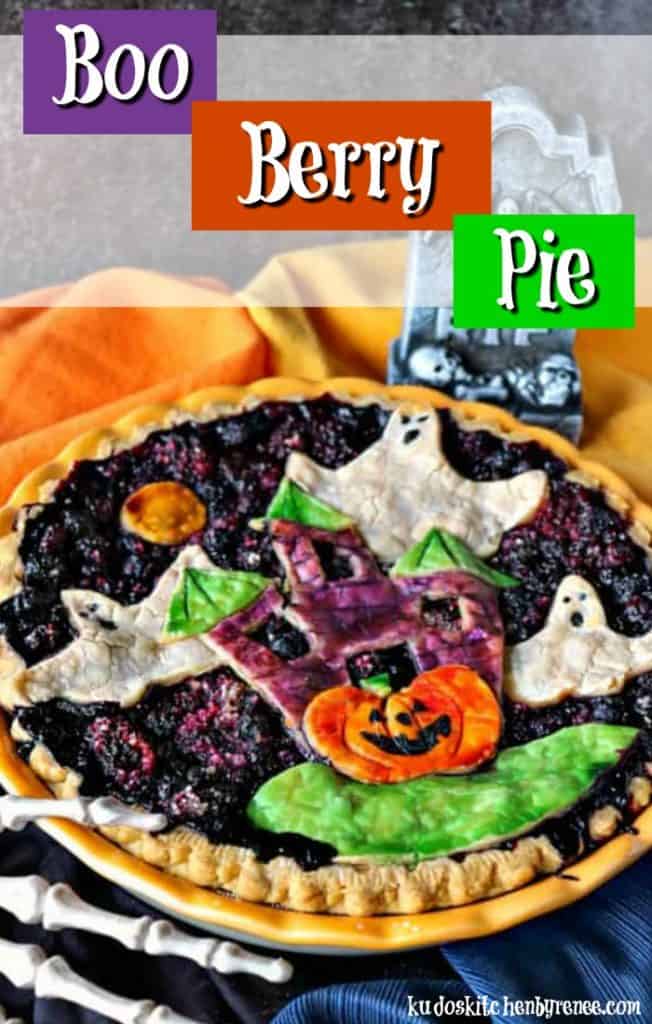
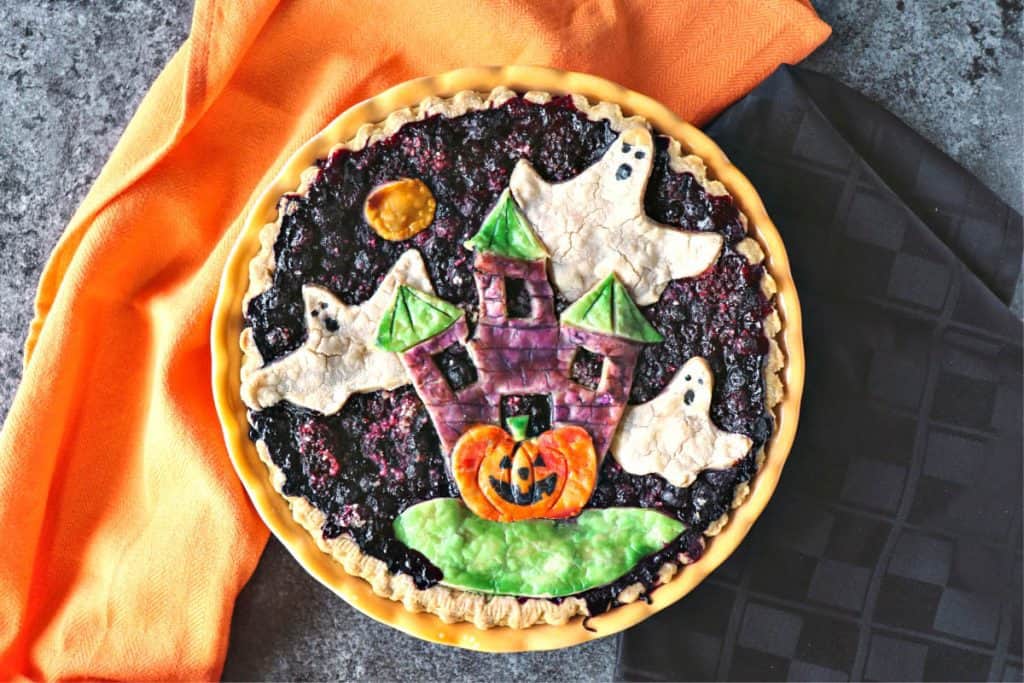
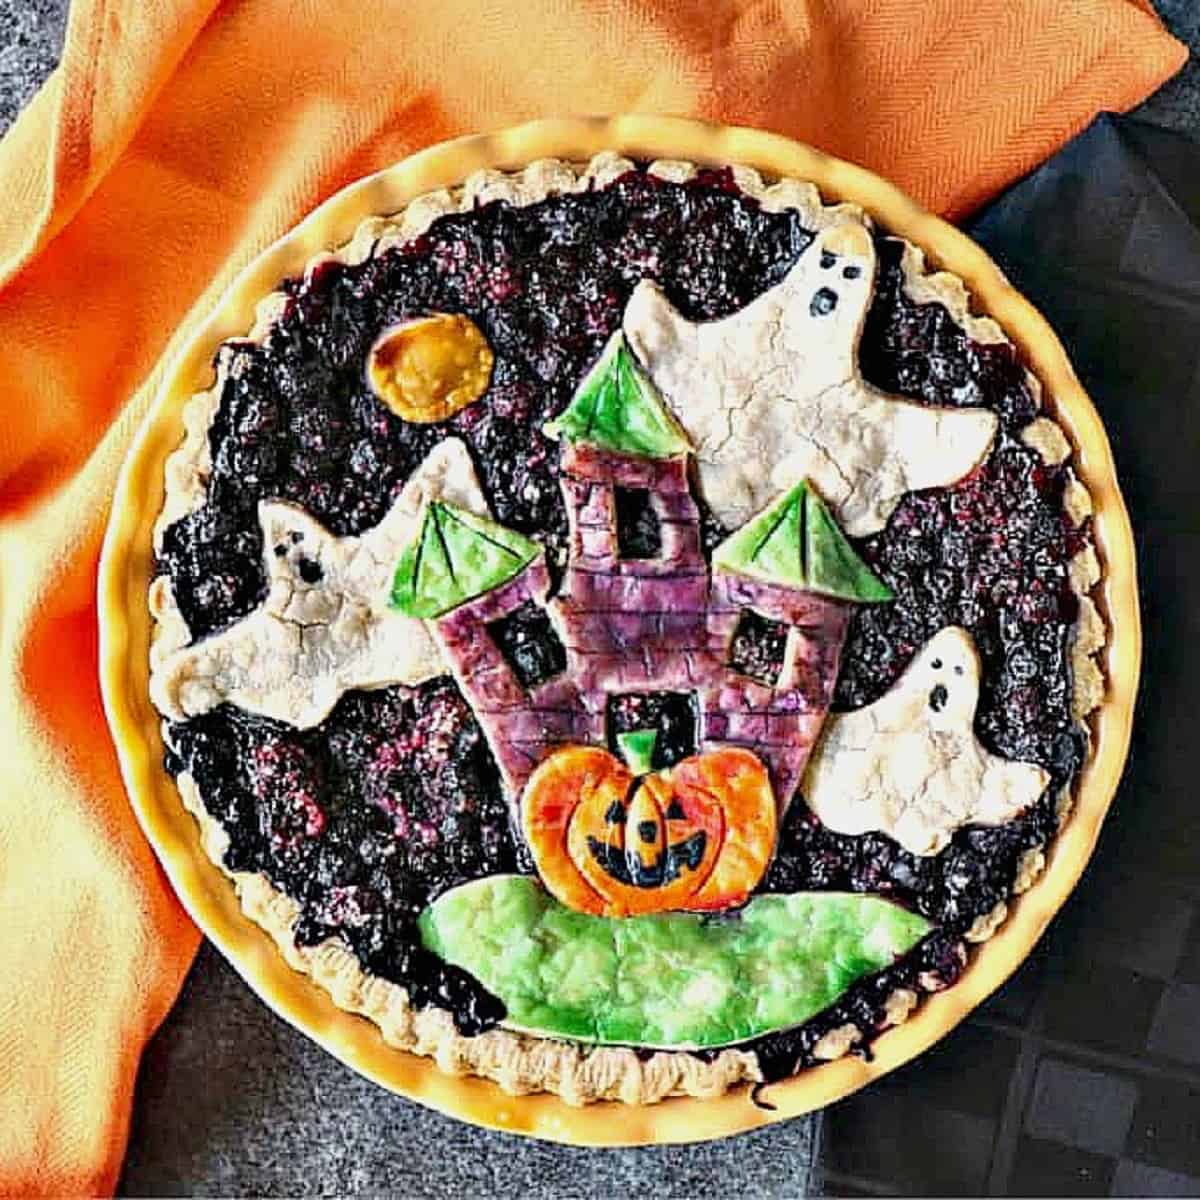
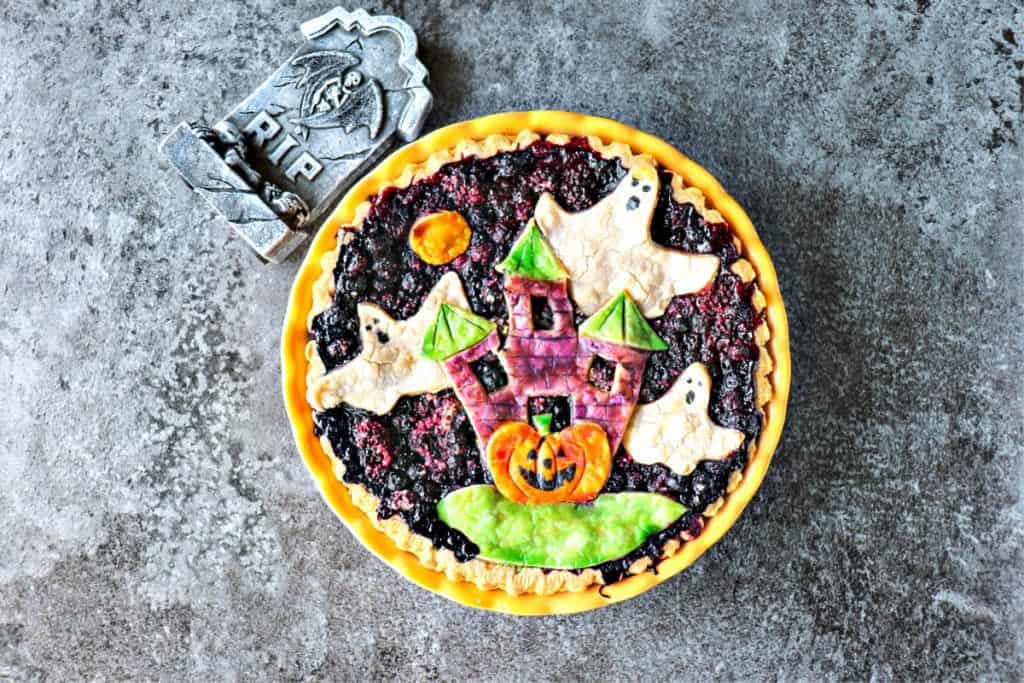
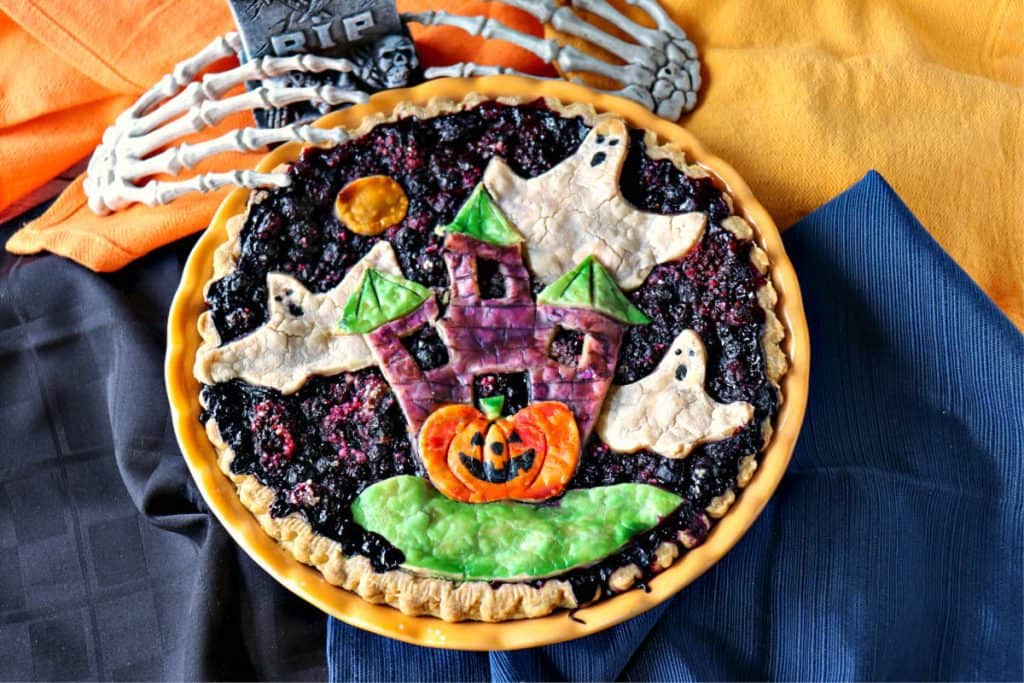
Hey, Boo! Don't be scared. This hauntingly delicious Boo Berry Pie is easier to make than you may think, and I'm excited to show you exactly how to do it.

Boo Berry Pie is a delicious mixed berry pie with orange zest and orange juice to kick up the flavor. If you'd like other fun and freaky Halloween recipes check out my recipes for Brain Food Jello Salad, Melted Witch Candy, and Batwing Cupcakes.
This recipe post and its contents may include affiliate links for your consideration. I may earn a commission from qualifying purchases, but your prices are never increased as a result. Thank you.
Table of Contents Found Here
- The ingredient list:
- Kitchen tools and equipment required:
- How difficult is it to make Boo Berry Pie:
- Keeping things simple!
- Tips and tricks for making Boo Berry Pie with painted pie crust:
- Can Boo Berry Pie be made ahead and frozen?
- To serve after freezing:
- Additional Halloween Recipes:
- Printable Recipe Card
- Boo Berry Pie
- Please comment if you've made this recipe.
The ingredient list:
*Please note that the exact measurements along with a "shop the recipe" feature from Instacart and Walmart is available inside the printable recipe card.
- deep-dish pie crust
- flat-rolled refrigerated pie crust
- all-purpose flour
- fresh blackberries
- fresh blueberries
- ground cinnamon
- orange zest
- orange juice
- almond extract
- butter
- tapioca
- sugar
- salt
- egg
- gel fool color: white, red, purple, green, orange, yellow, and black
Kitchen tools and equipment required:
- large bowl
- measuring cups
- measuring spoons
- sharp paring knife
- paper cups or tiny bowls for mixing colors
- paintbrush
- measuring cup with a pour spout
- baking sheet
- parchment paper
- offset spatula
- gel food color
How difficult is it to make Boo Berry Pie:
If it looks scary or intimidating to make, I hope you'll stick with me because I'll walk you through the entire process of just how simple it is to recreate.
Remember, it's just for fun and every pie will be different so cut yourself some slack, and then cut yourself some pie dough. You got this!
Keeping things simple!
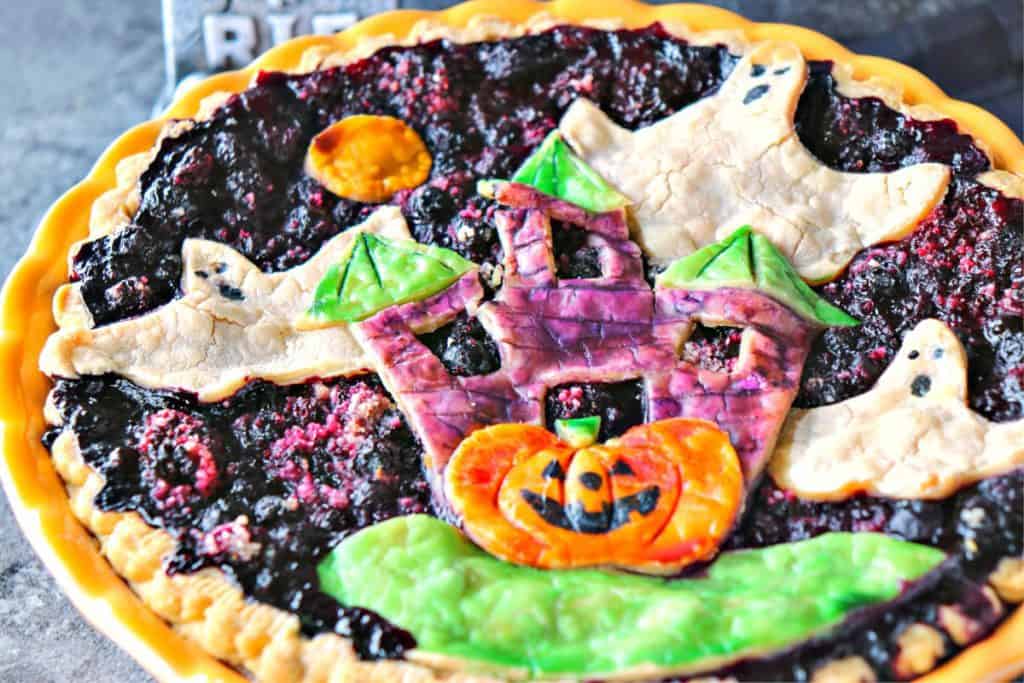
To make things simple I've used a store-bought deep dish pie crust and a flat-rolled refrigerated crust for the easy cut out shapes.
However, if you love to make your own pie crust and you've got the time I say GO FOR IT!
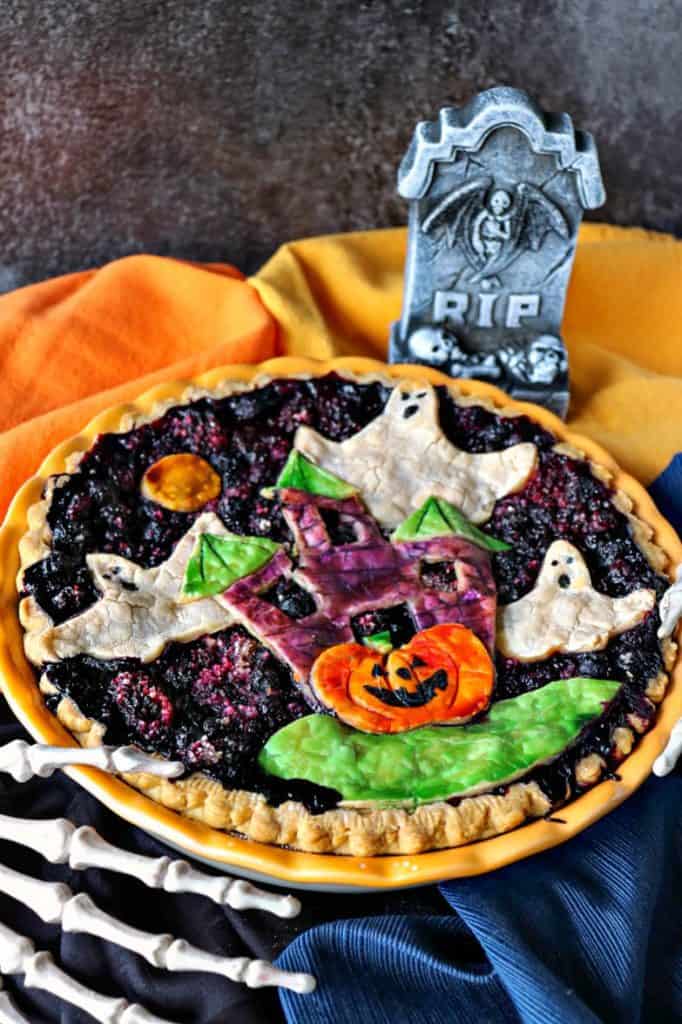
Tips and tricks for making Boo Berry Pie with painted pie crust:
- First and foremost...Have fun with it!!!
- Keep your flat pie crust as cold as possible so it cuts better.
- Don't worry about perfection, if you're nervous about cutting out shapes freehand, draw your images on a sheet of paper then place them on top of your pie crust and cut around them.
- Make sure to wash your paintbrush in water before changing colors.
- For more vivid colors, paint 2 coats of color on each item.
- Add water to affix the pieces together, but you can move them around first until you're happy with their placement.
- Make it as detailed as possible, OR keep it simple with only one, or two, ghosts if desired. It's your pie and you can make it however you like.
- Place the decorated pie on a baking sheet before baking in case the filling bubbles over.
- The colors of the gel egg wash will intensify slightly during baking.
- While the pie is baking, keep an eye on it and if the outer crust looks like it's getting too brown, cover the outer pie crust with foil.
- After the pie has baked and cooled, use a detail paintbrush and the black egg wash to add the faces on the ghosts and pumpkin.
Can Boo Berry Pie be made ahead and frozen?
Yes! I've done it several times.
Save this for later.
Email forwarding service for saving information.
After the pie has baked and cooled completely, wrap it well in several layers of plastic wrap.
Freeze for up to two months.
To serve after freezing:
Thaw the unwrapped pie completely at room temperature.
To warm, place the thawed pie in a low preheated 325-degree oven for 15 minutes prior to serving.
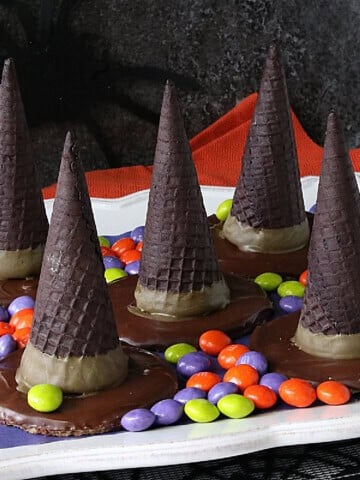
Additional Halloween Recipes:
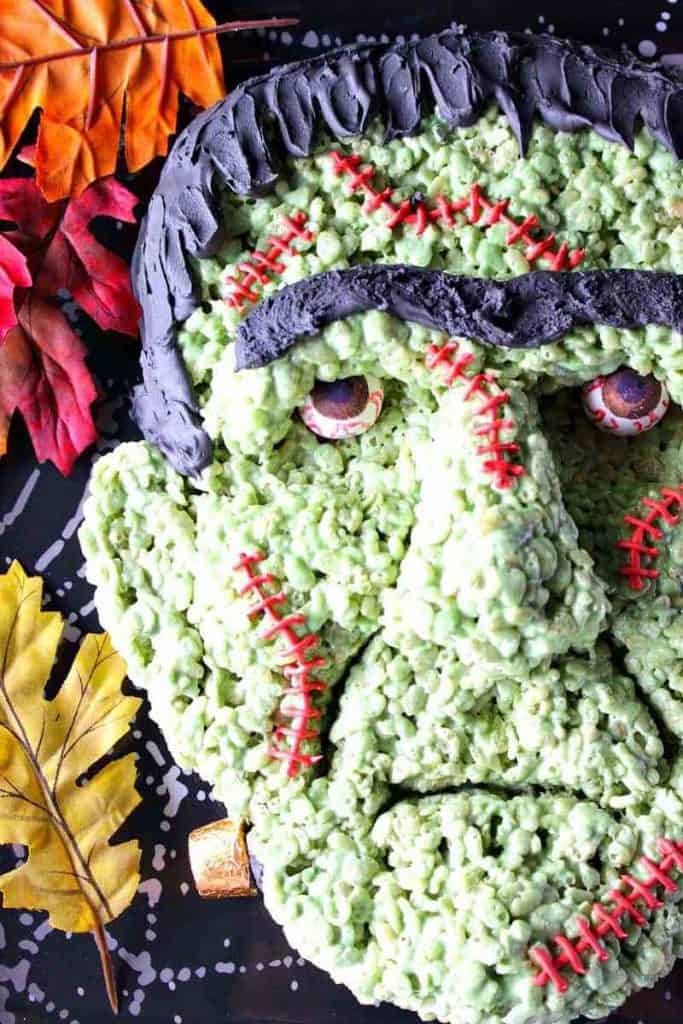
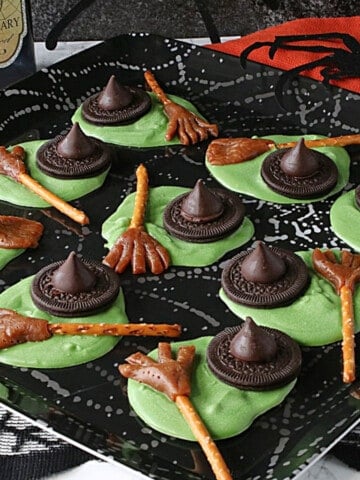
Freaky Frankenstein Rice Cereal Treat (pictured below)
Stick with me (marshmallow humor) as I show you just how painless making this Frankenstein Rice Cereal Halloween Treat will be.
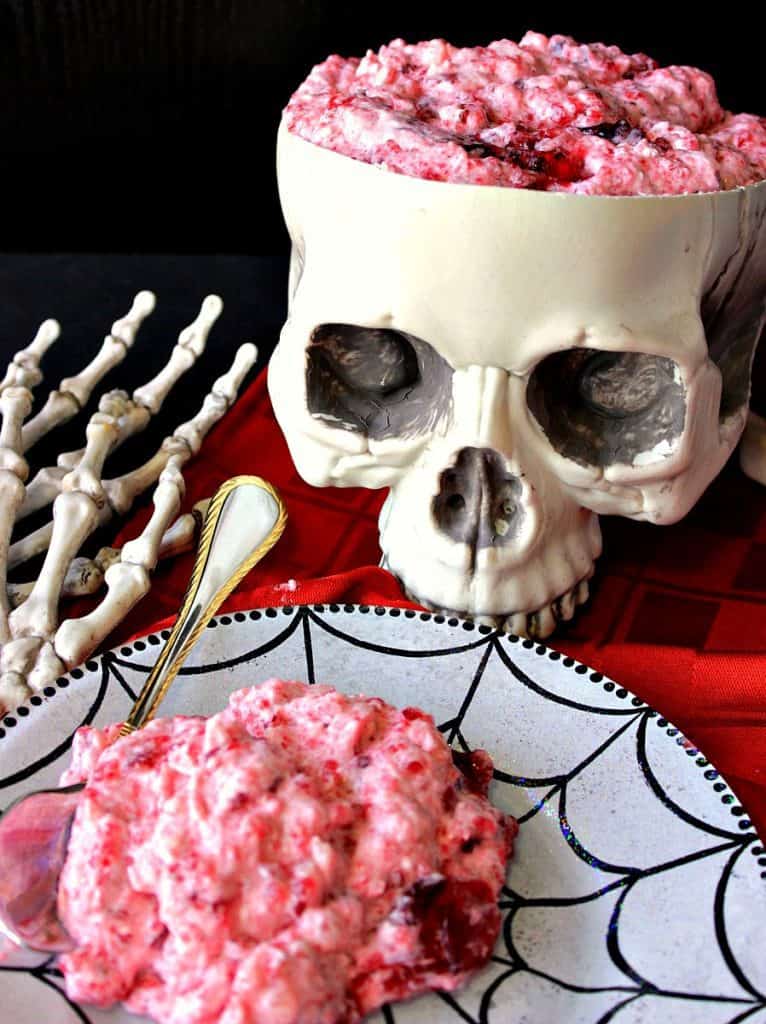
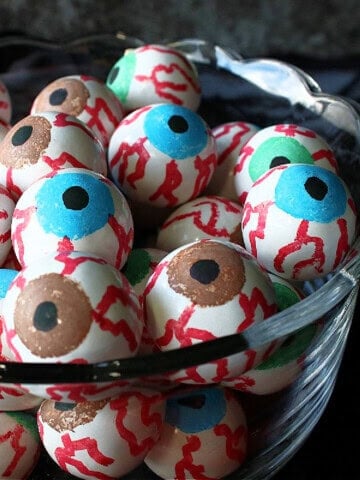
Brain Food Jello Salad (pictured below)
Can you wrap your “head” around eating gory brain food jello for Halloween? Try not to “think” about it too much, and you’ll be just fine. *Insert evil laughter here*
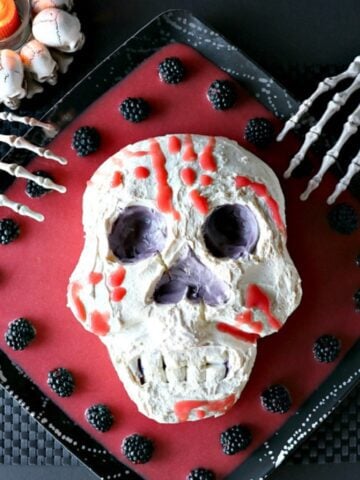
Rat Loaf Meatloaf (pictured below)
So the other day I faced my fears (Halloween humor) and went on Facebook to make my Rat Loaf Meatloaf LIVE, from my Kudos Kitchen.

Halloween Treats Recipe Roundup (not pictured)
From spooky to cute, sweet to savory, today’s Halloween recipe roundup has everything you’ll need to celebrate Halloween with your little (and big) goblins alike.
When you make today's recipe (and I hope that you will), I'd appreciate it if you'd take the time to come back and give it a star rating along with a comment on why you rated as you did.
Search engines such as Google appreciate comments and ratings and, in turn, will show my recipes to more people. Please look for the pink star rating box within the printable recipe card. Thank you!!
Printable Recipe Card

Boo Berry Pie
Equipment
- paper towels
- paper cups for mixing gel food colors
- paint brushes for painting pie crust
- Offset spatula optional, for moving and placing dough pieces
Ingredients
- 1 deep dish unbaked pie shell
- ½ cup fresh blackberries
- 2½ cups fresh blueberries
- 1 tablespoon fresh orange zest
- 2 tablespoons fresh orange juice
- 1 teaspoon almond extract
- ⅛ teaspoon salt
- ½ cup tapioca
- ¼ cup granulated sugar
- 3 tablespoons butter softened
- 1 refrigerated flat pie crust
- 1 large egg
- gel food color red, white, purple, green, orange, black, yellow
Instructions
- Preheat oven to 350-degrees Fahrenheit (175 degrees Celsius)
To make the pie:
- In a large bowl, stir together the blueberries, blackberries, orange zest, orange juice, almond extract, salt, tapioca, and sugar.
- Pour the berry filling evenly into a deep-dish pie crust. Dot the top of the blueberries with the softened butter. Set aside.
To make the decorated crust:
- Lightly flour a cutting surface and roll or press out a 9" flat refrigerated crust.
- Use a sharp paring knife to cut out your desired shapes. Use a spatula to gently place the shapes on top of the pie filling, moving them around until you're happy with their placement.
- Use a light amount of water to affix the shapes together.
- Mix one egg with 1 tablespoon of water in a measuring cup with a pour spout.
- Add approximately 2 teaspoons of eggwash into very small cups (cut paper cups work well for this) for each different of gel color you're using. Mix each color well.
- Use a clean paintbrush to paint the details onto each cut pie crust piece. Two coats may be needed for more intense color if desired. **Note - Make sure to clean the paintbrush with clean water between each color change.
- Place the pie onto a baking sheet and bake in a preheated oven for (approximately) 60 minutes, or until the juices ooze slightly, and the outer pie crust is golden in color. *Note - if the outer pie crust turns golden too quickly, cover the outer rim of the pie crust with foil.
- Cool on a cooling rack. When the pie is completely cool, add the faces to the ghosts and pumpkin with the black eggwash and a small detail brush if desired.
- Refrigerate until ready to serve. Serve chilled or at room temperature.
Video
Notes
Nutrition
I sincerely hope you've enjoyed today's fun and freaky Halloween Boo Berry pie as much as I've enjoyed bringing it to you!
And NOW for bonus Halloween treats from some of your favorite (and mine) food bloggers:
- Melting Ghost Hot Chocolate from Big Bear's Wife
- Day of the Dead Mexican Chocolate Cupcakes from Pook's Pantry
- Devilish Halloween Deviled Eggs from Pastry Chef Online
- Candy Corn Layer Cake from ReciPEAs
- Cauldron Cupcakes from Mrs. Happy Homemaker
- Black Magic Skull Cakes from Sugar Dish Me
- Frankenstein's Monster Pudding Cups from I am a Honey Bee
- Halloween Sprinkle Cookie Cake from Love and Confections
- Chocolate Dipped Brownie Pops for Halloween from Southern From Scratch
- Creepy Crawly Dirt Cup Pudding Parfaits from 4 Sons R Us
- Creepy Eyeball Donuts from Daily Dish Recipes
- Mummy Bites from Eat Move Make
- Monkey Brain Bread from Pint Sized Baker
- Monster Donuts from The Baking Fairy
- Boogeyman Brew from Who Needs A Cape?
- Purple People Eater Thumbprints from The Spiffy Cookie
- Hocus Pocus Halloween Decorated Pretzels from Lady Behind The Curtain
- Skeleton Popsicles from A Kitchen Hoor's Adventures
- Monster Mash Cake from Mildly Meandering
- Graveyard Skillet Brownies from Strawberry Blondie Kitchen
- Blood-Red Pomegranate Margarita from The Redhead Baker
- Halloween Snoballs from The Beard and The Baker
- Halloween Chocolate Cherry Hand Pies from House of Nash Eats
- Halloween Dunkaroo Dip from Savory Experiments
- Bloody Eyeball Cherry Cheesecake Cupcakes from Katie's Cucina
Should you have any questions or comments regarding anything you've seen on my site, please don't hesitate to reach out to contact me. It is always my distinct pleasure to get back with you just as soon as I possibly can!
Thank you so much for visiting me today in my Kudos Kitchen. I hope you found something you'll love and that you will come back and visit me often. Please know that there is always room for you around my kitchen table!
Until we eat again, I hope you have a delicious day!


All of the recipes you'll find here on my website are in loving memory of my son, Greg, who left this earth far too soon and will be forever in our hearts.

Nellie Tracy says
LOVE this pie! So fun for Halloween parties!
Renée says
Thank you, Nellie! It's great fun! The kids love it, and so do the grownups. 🙂
Denay DeGuzman says
Wow! This has to be the cutest Halloween pie I've ever seen. Simply stunning. I'd love to make one for my nieces and nephews this Halloween season.
Renée says
I hope you do, Denay. If you do, please tag me on Instagram as I'd love to see your finished pie!
Have fun baking!
Renee
Christie says
I'm jealous of your pie abilities. This one is another stunner! Super creative and delicious looking.
Renée says
No reason to be jealous. I do believe anyone can do it. Just have fun and don't put pressure on yourself to make it perfect. Have fun and you'll be successful. Thank you for the compliment though 😉
Jenni says
I always love your painted crust pies, and I really love your haunted house and ghosties on this one!
Renée says
Thank you so much, Jenni! I think you also know how much fun these are for me to make. It's a tough job but somebody has to do it. LOL
Toni | Boulder Locavore says
This is amazing! You are really creative!
Renée says
Thank you, Toni. I really love what I do so its great fun for me!
Valentina | The Baking Fairy says
This is such a beautiful pie, Renee! You make it look easy!! 😉
Renée says
Thank you, but tt's not hard, Valentina. I hope you'll give it a try. I'll bet you surprise yourself.
Karen says
I am always soooo blown away by your talents! This looks amazing. I'm not sure I could cut into it!
Renée says
Thank you so much, Karen! But you'd have to cut into it because it tastes even better than it looks!
Dan from Platter Talk says
Holy Fright! You have knocked this ghostly dessert right out of the park; what a fun and creative idea for Halloween!
Renée says
LOL. Thank you so much!!
Linda says
This pie is simply scary ..I mean delicious looking (lol) and perfect for Halloween get-togethers. Your directions make it look easy and so much fun to put together. I bet kids would have a ball cutting out the shapes and getting to paint them.
Renée says
I agree. I'm sure the kids would love helping to make this pie!
Jennifer Banz says
Really Cute!
Renée says
Thank you so much!