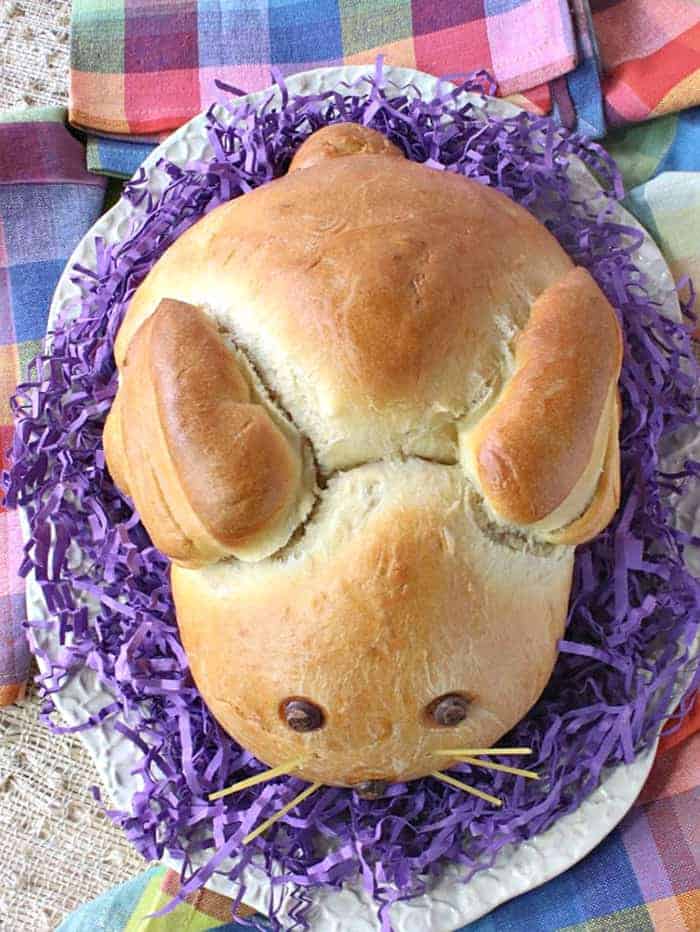
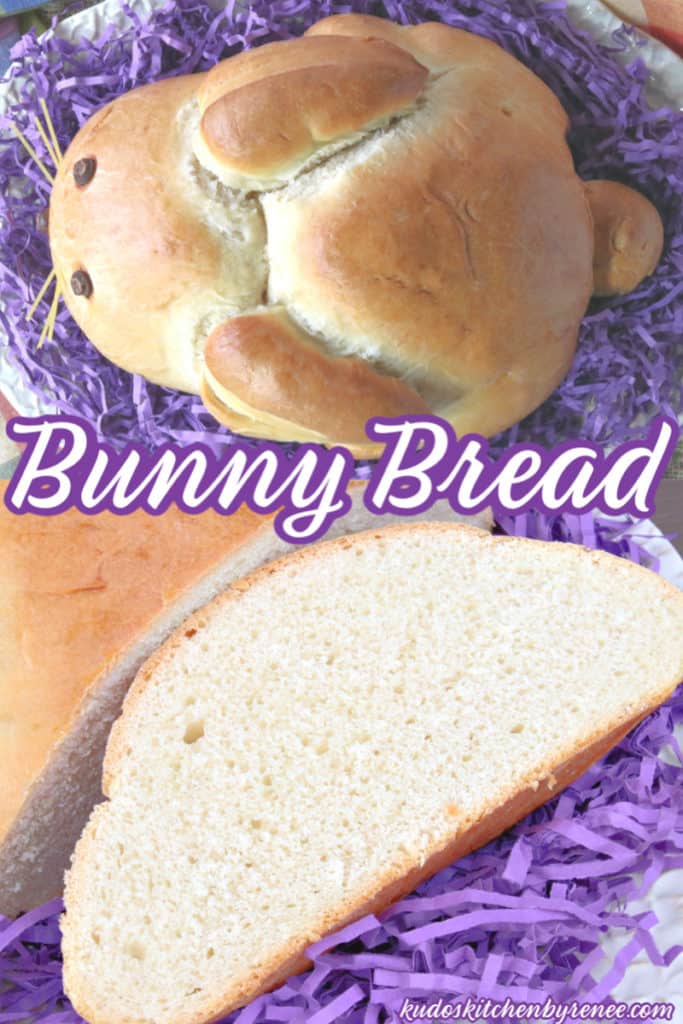
Bunny Bread is a fun and delicious way to charm and delight even the pickiest eaters. The taste and texture of this dense and chewy bread is everything you want in a hearty homemade white bread!

This shaped yeast bread recipe is not at all difficult to make. It will take time, however, but most of the time involved is "hands-off" time which is used for proofing the dough.
Let me walk you through the easy process of shaping this German bunny bread. It truly is only a few simple shapes, and anyone can do it! You have my word on it!
Table of Contents Found Here
- The ingredient list:
- Kitchen tools and equipment needed:
- What is the difference between bread flour and all-purpose flour?
- Can all-purpose flour be used in this recipe?
- How can I tell if my dry yeast is still active?
- What is the secret to the golden brown color and shine on the bunny bread?
- What temperature should the milk be and what happens if it's too hot?
- The easy instructions for making German bunny bread:
- Can German Easter bunny bread be frozen?
- Additional Easter recipes:
- Printable Recipe Card
- Please comment if you've made this recipe.
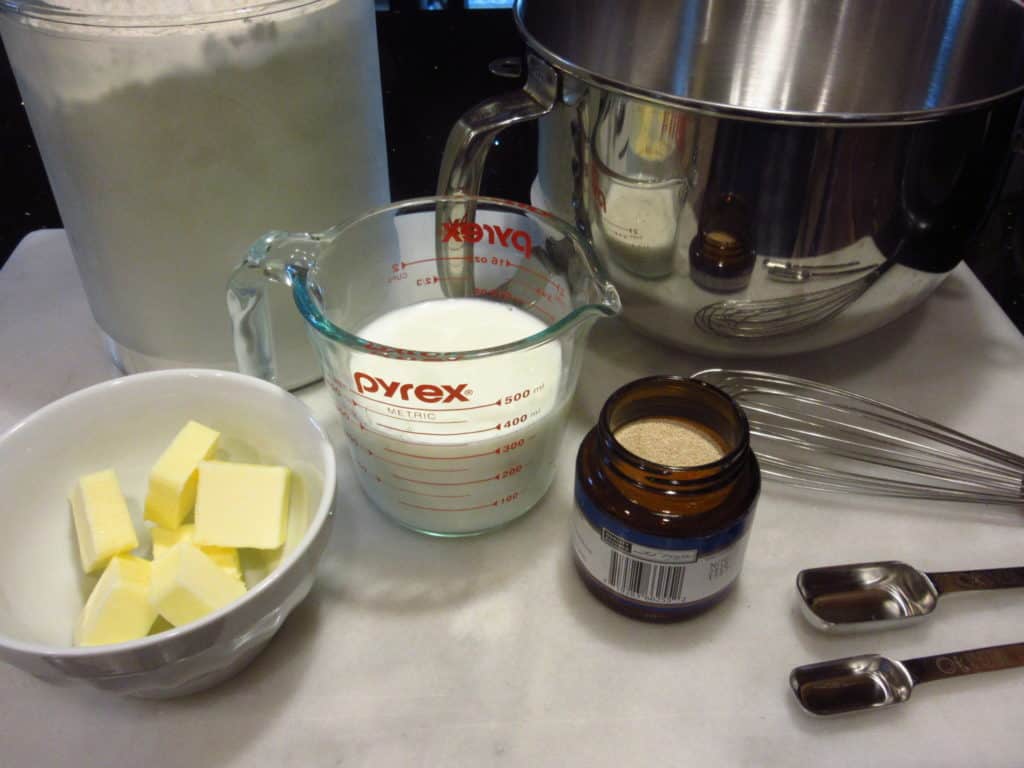
The ingredient list:
**Note - The following lists of ingredients plus kitchen tools and equipment contain affiliate links (highlighted in blue) for your consideration and shopping convenience. #CommissionsEarned
- bread flour
- coarse salt
- butter
- milk
- sugar
- active dry yeast
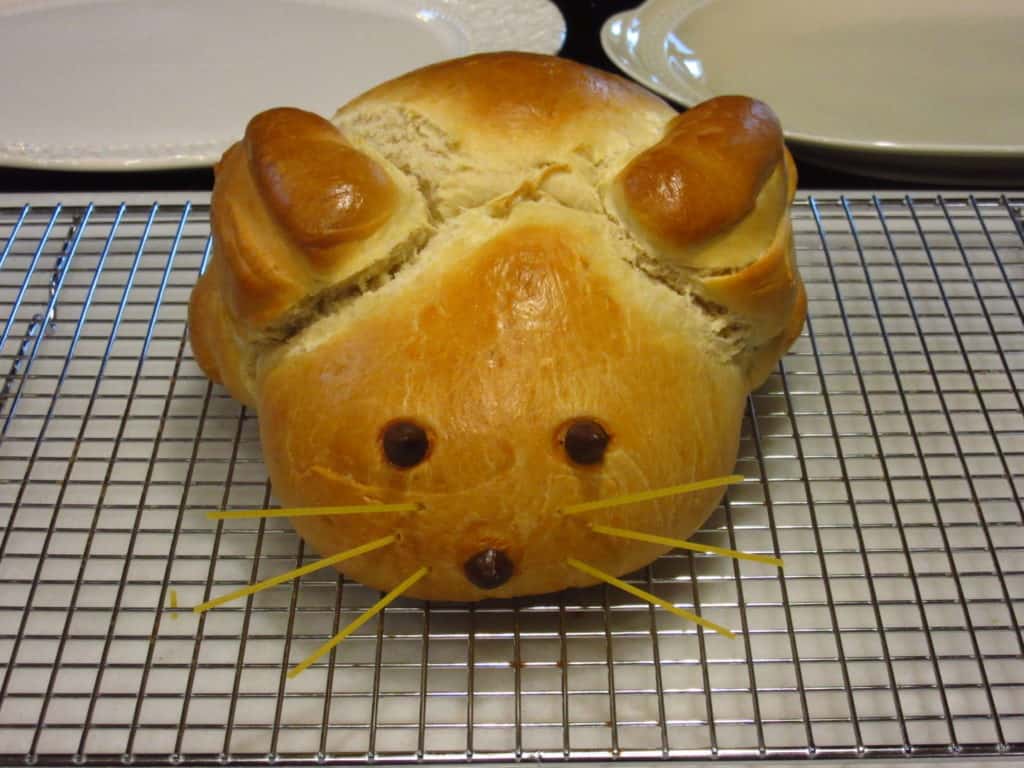
- chocolate chips (eyes and nose)
- dry spaghetti (whiskers)
Kitchen tools and equipment needed:
- stand mixer or large bowl with a wooden spoon
- medium bowl
- instant-read thermometer
- measuring cups and spoons
- parchment paper
- cooking spray
- baking sheet
- bench scraper or chef's knife
- butcher's twine
- pastry brush
- plastic wrap
What is the difference between bread flour and all-purpose flour?
Bread flour has a slightly higher protein level than all-purpose flour so the rise from bread flour will be a bit more.
Can all-purpose flour be used in this recipe?
Yes!
The rise may not be as good as using bread flour but the bunny bread will still be just as tasty.
End (LOL! See photo below) of the story!

How can I tell if my dry yeast is still active?
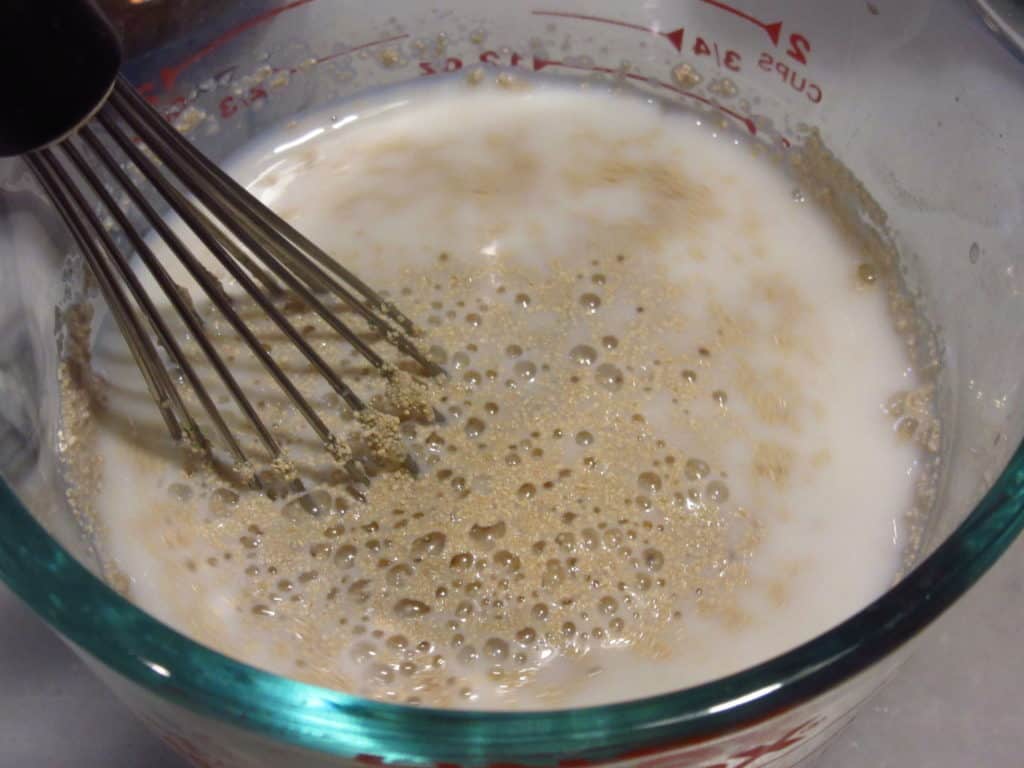
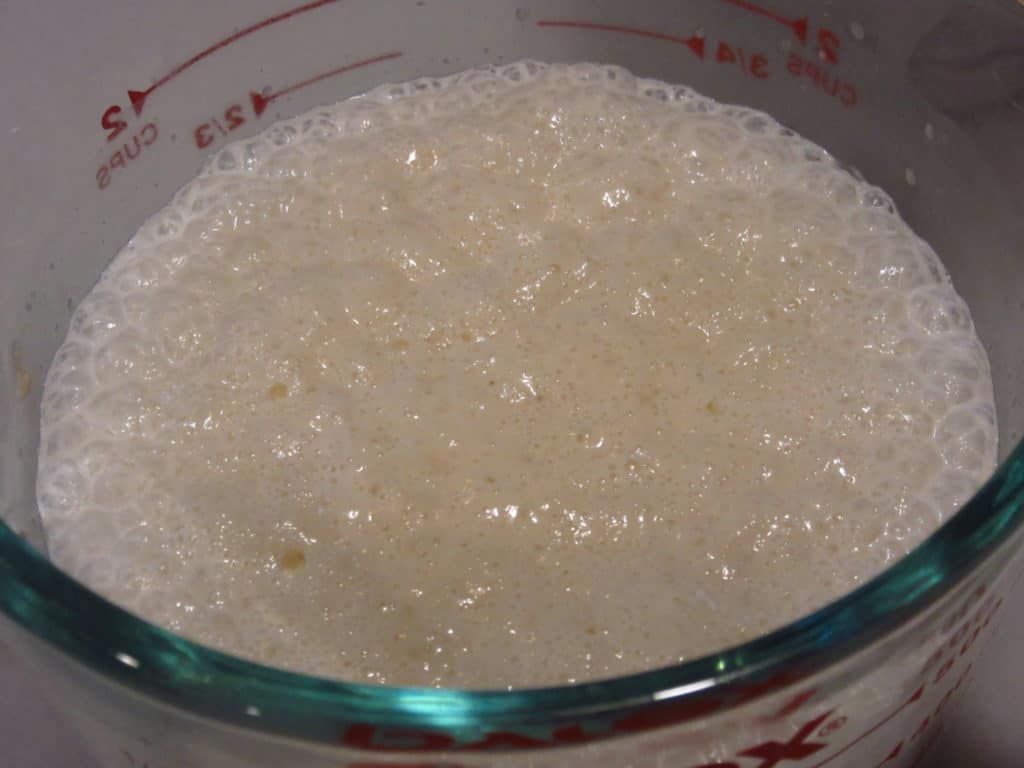
After dissolving the yeast in the warm milk, the addition of sugar will feed and activate the yeast.
If the yeast and milk mixture does NOT get foamy, the yeast is no longer active and the bread dough will not rise as it should. It is time to start over with new yeast.
What is the secret to the golden brown color and shine on the bunny bread?
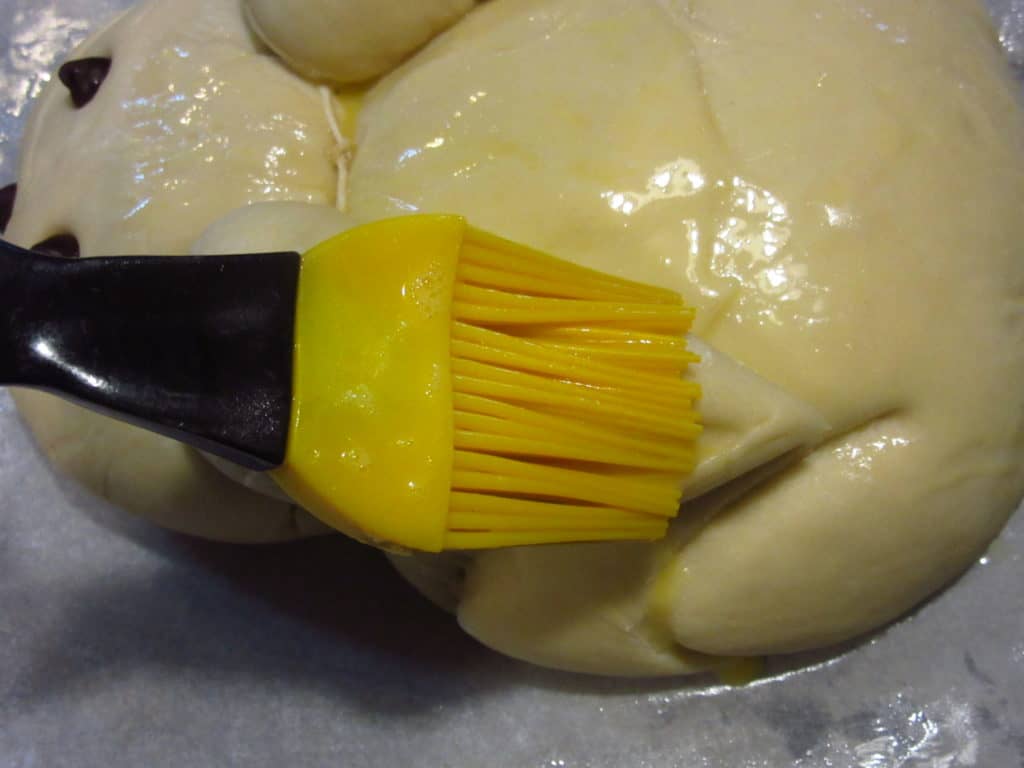
Brushing the unbaked bunny bread with a beaten egg mixed with a little water is the key to a golden brown and shiny crust.
This step is optional but the results are well worth the extra minute of time it takes before popping the bunny bread into the oven.
What temperature should the milk be and what happens if it's too hot?
If the milk is too hot it will kill the yeast and it will no longer work to prove (raise) the bread.
The proper temperature for the milk should be warm to the touch (between 105-110 degrees Fahrenheit)
The easy instructions for making German bunny bread:
- Assemble ingredients: warm milk, active dry yeast, softened butter, flour, sugar, and salt.
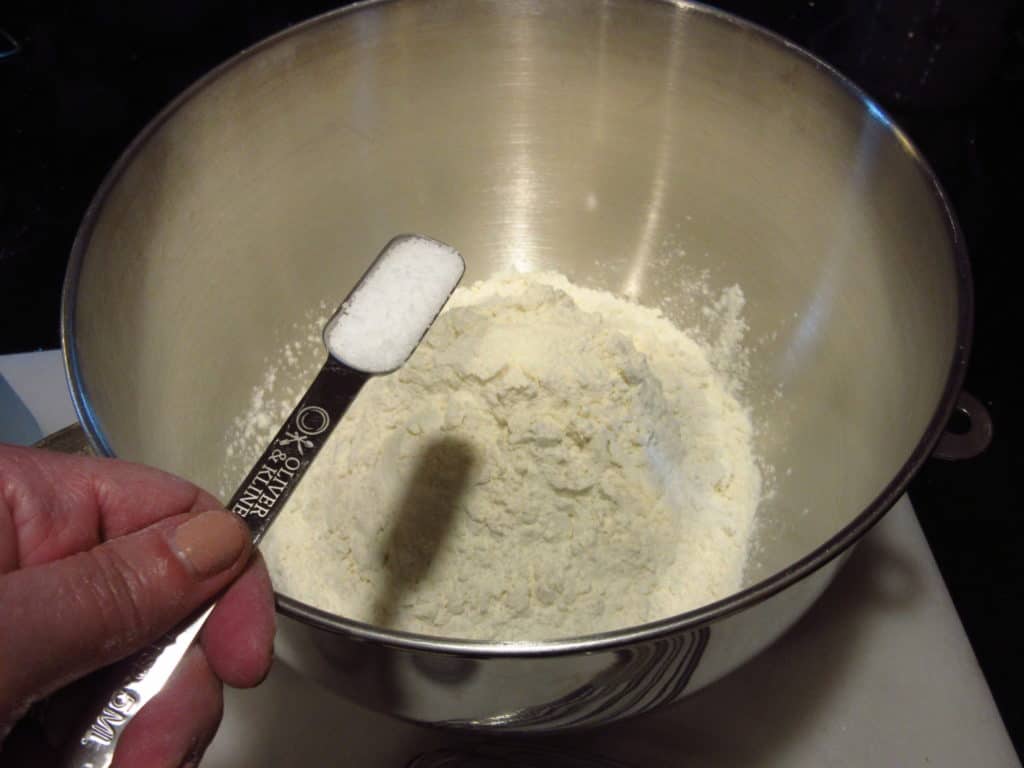
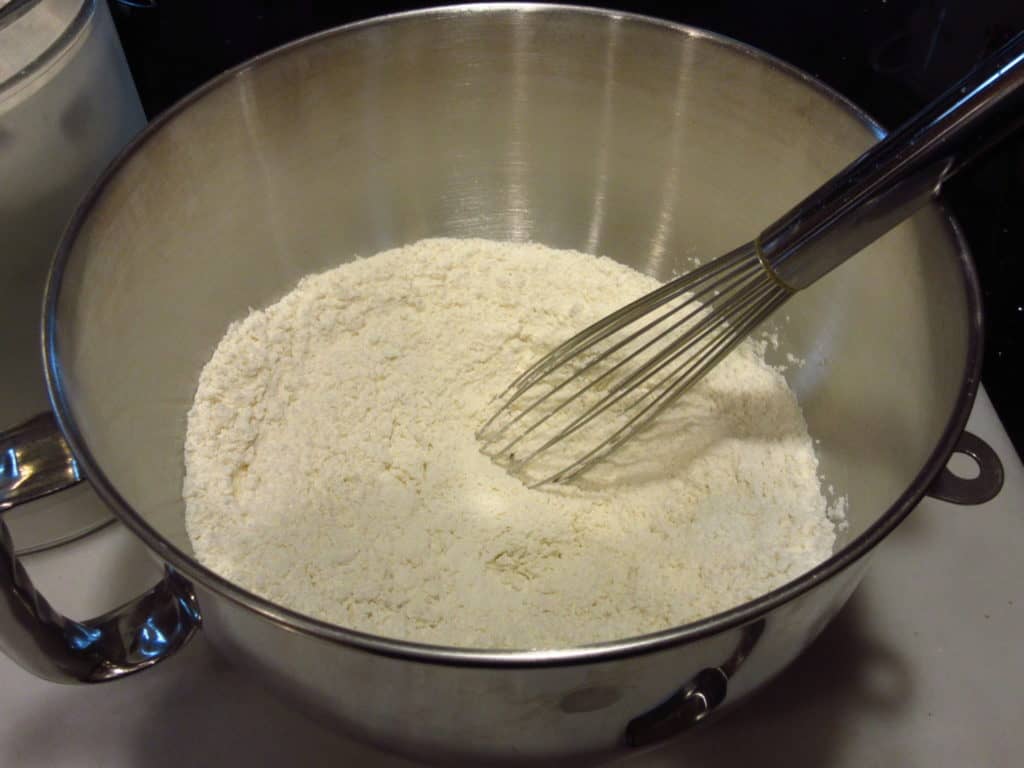
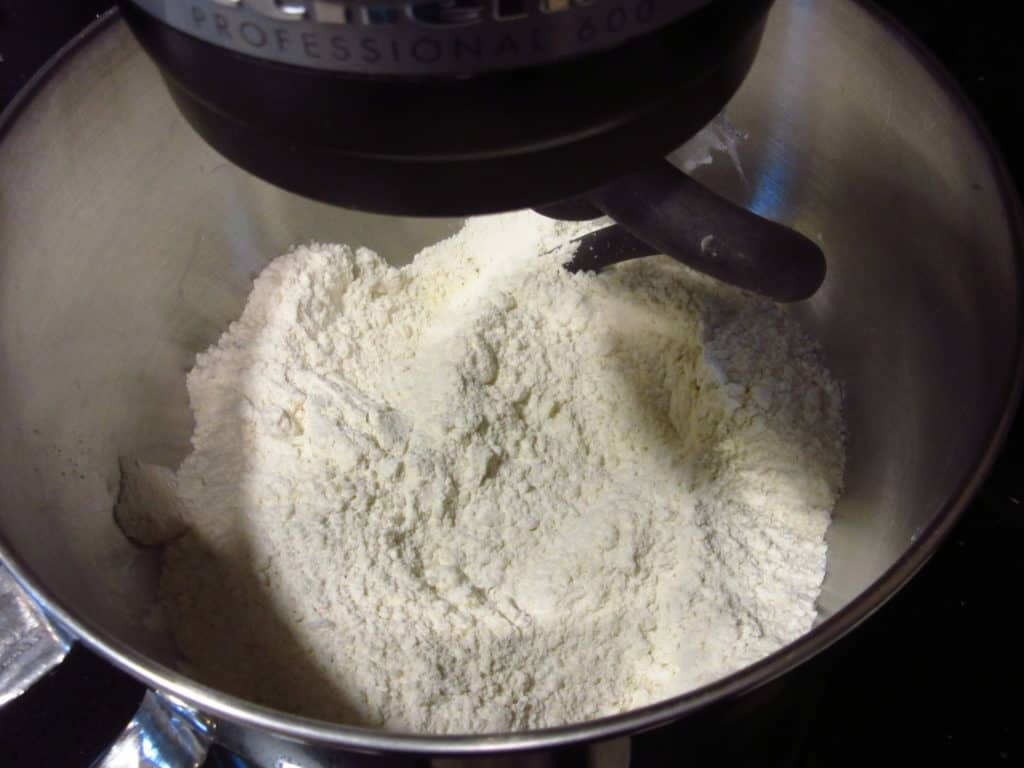
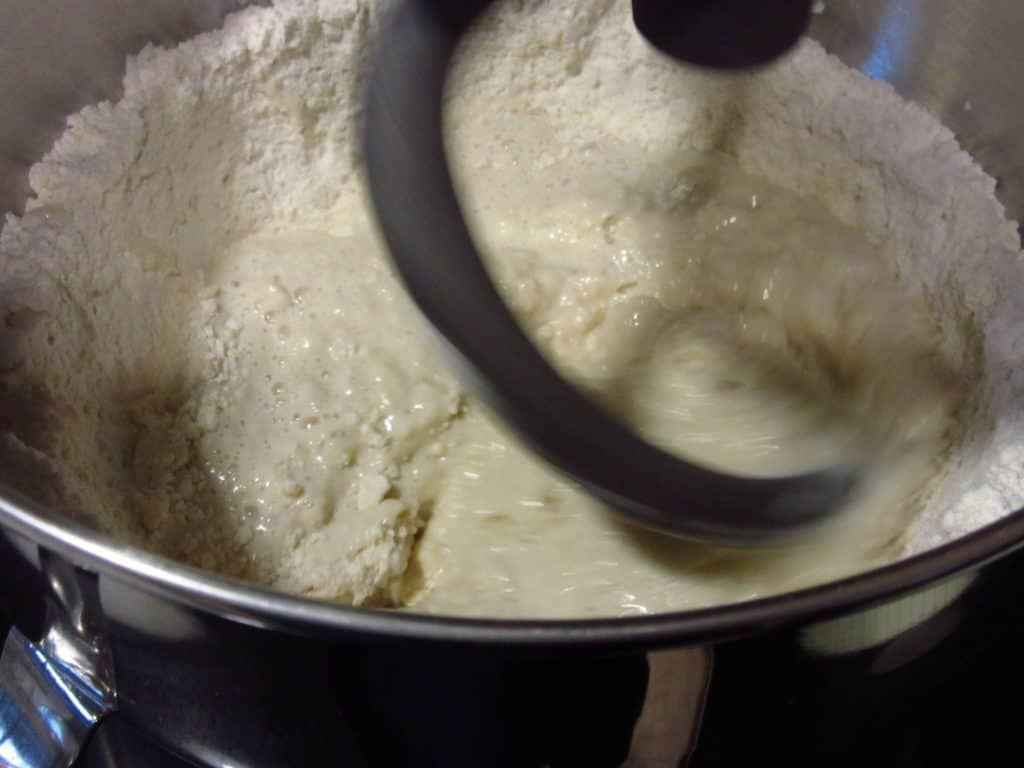
- In a large bowl, whisk together the flour and salt. Set aside.
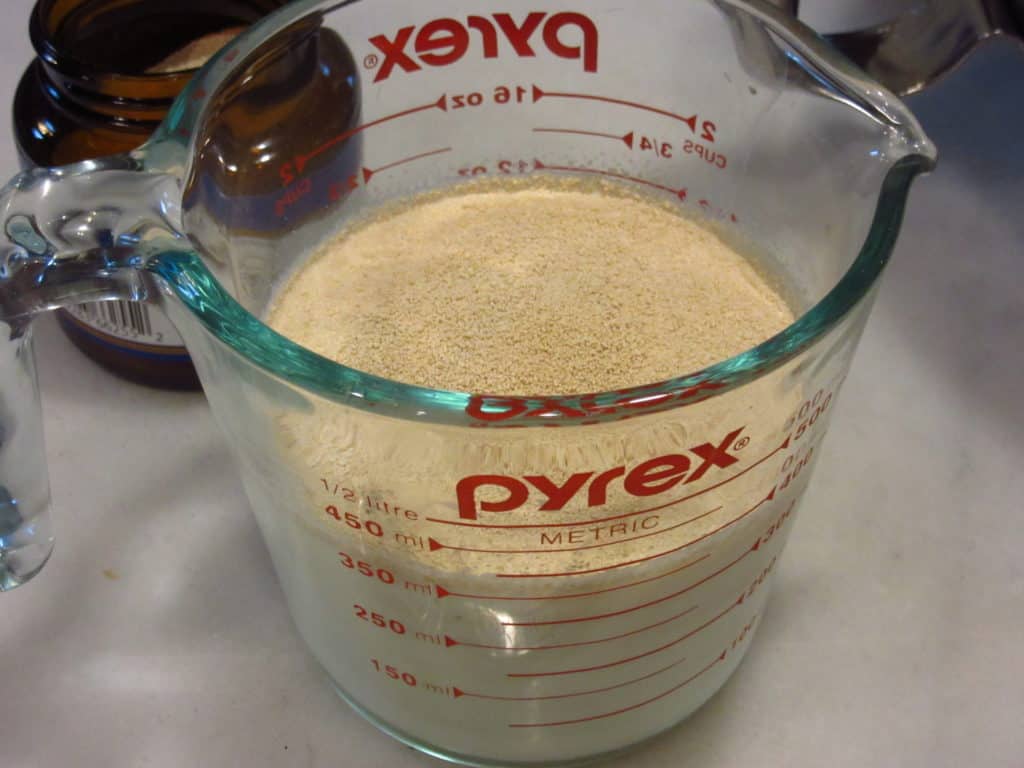
- In a small bowl, dissolve the yeast in the warm (to the touch) milk.
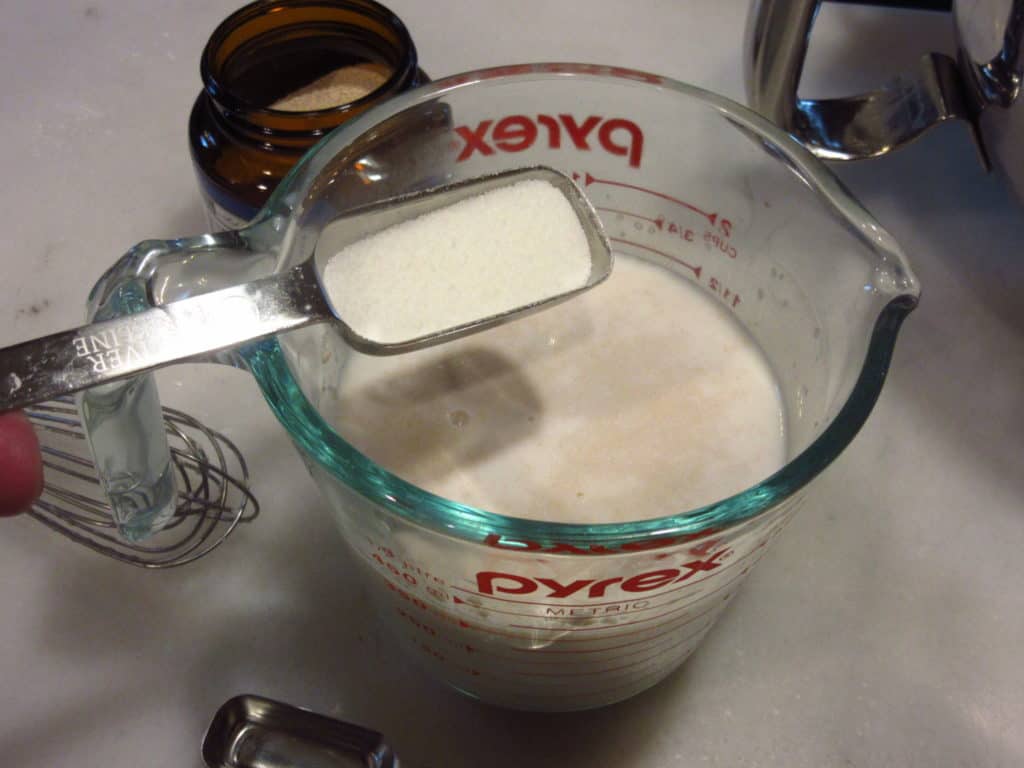
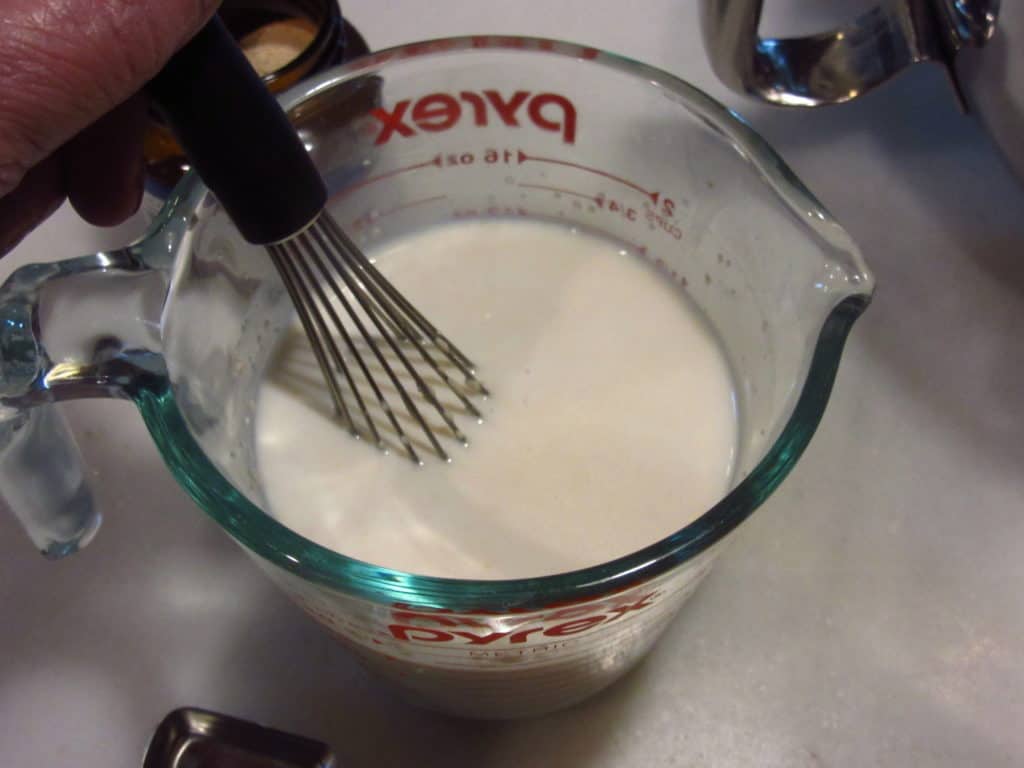
- Add the sugar to the yeast and milk mixture and whisk to combine. Allow the yeast and milk mixture to sit and get foamy (approximately 5 minutes).
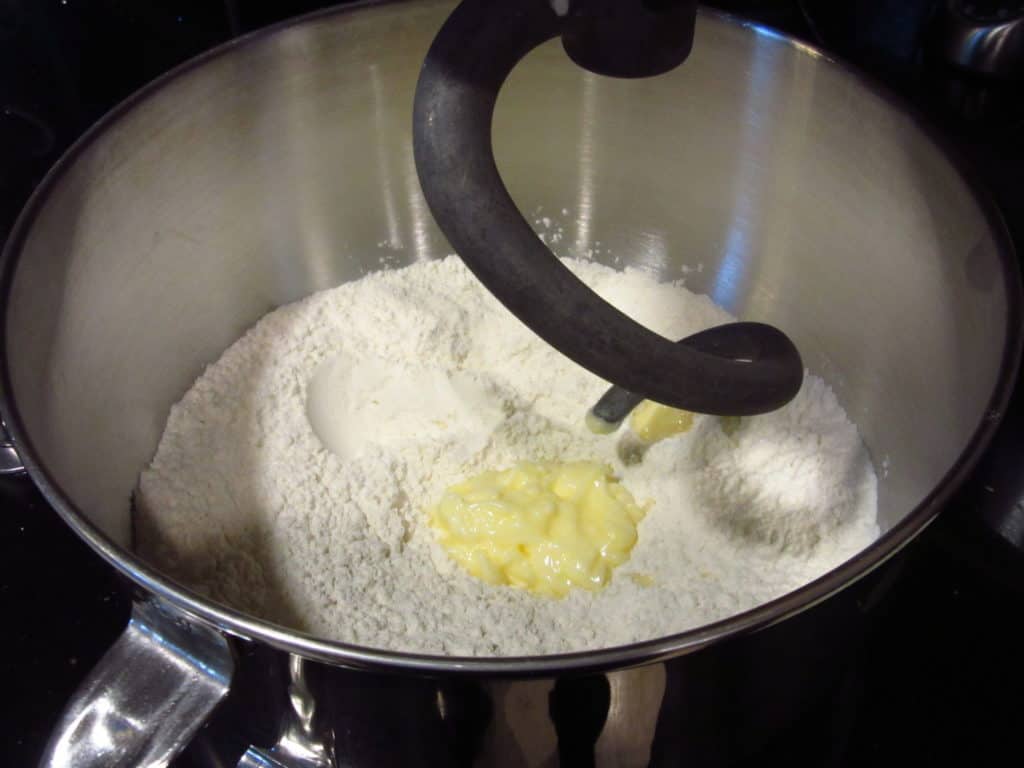
- Meanwhile, add the softened butter to the flour and salt mixture and blend until you can no longer see the butter.
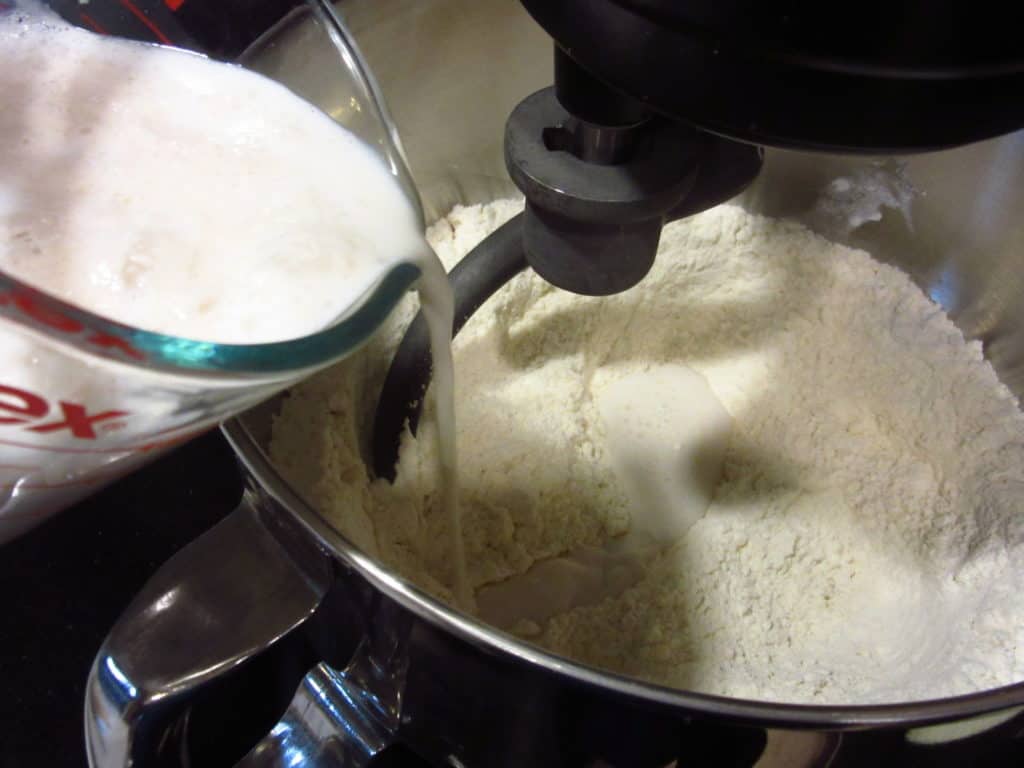
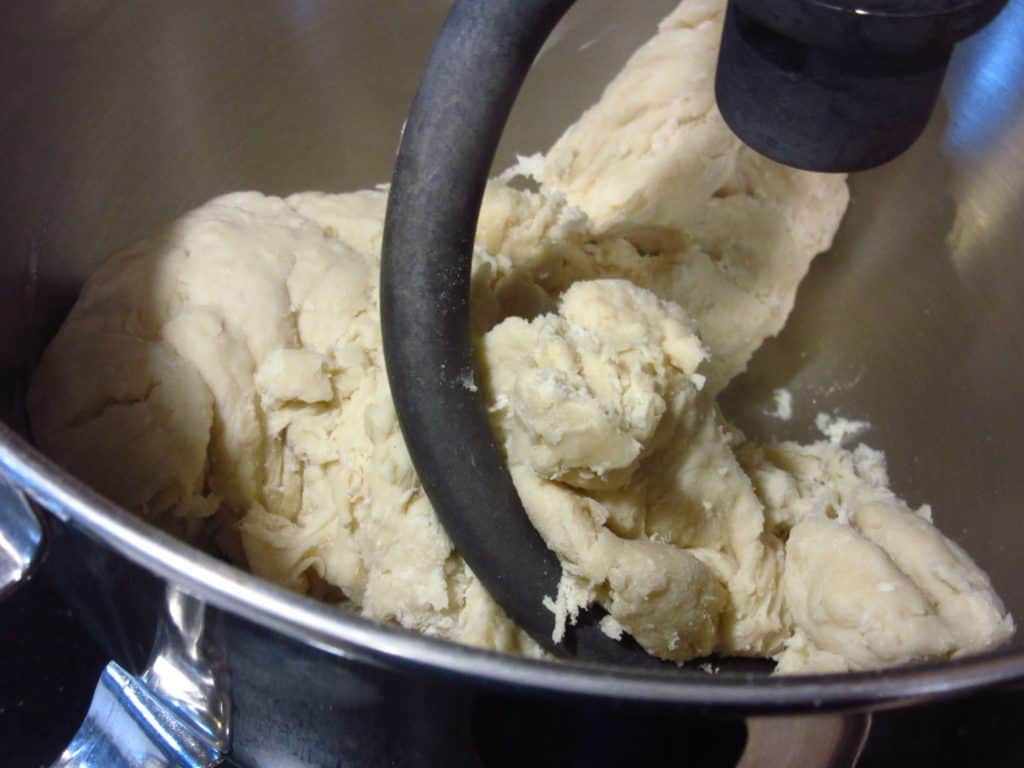
- Add the yeast and milk mixture to the flour and use the dough hook to thoroughly knead until the mixture forms a dough.
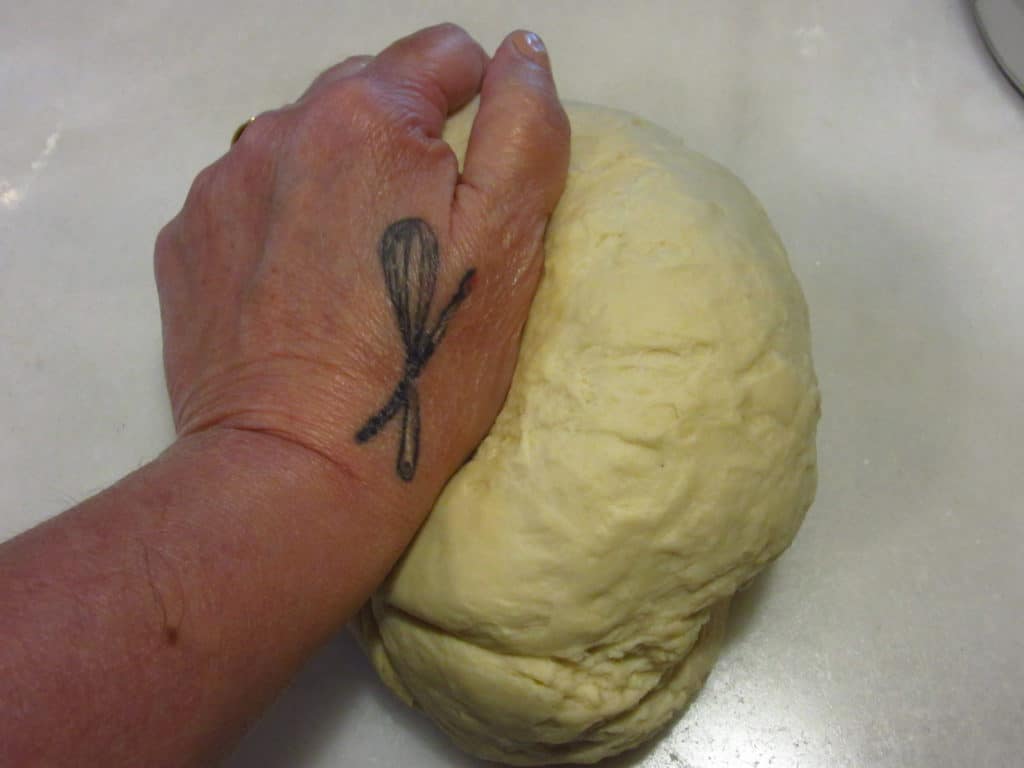
- Continue to knead at least 10 minutes.
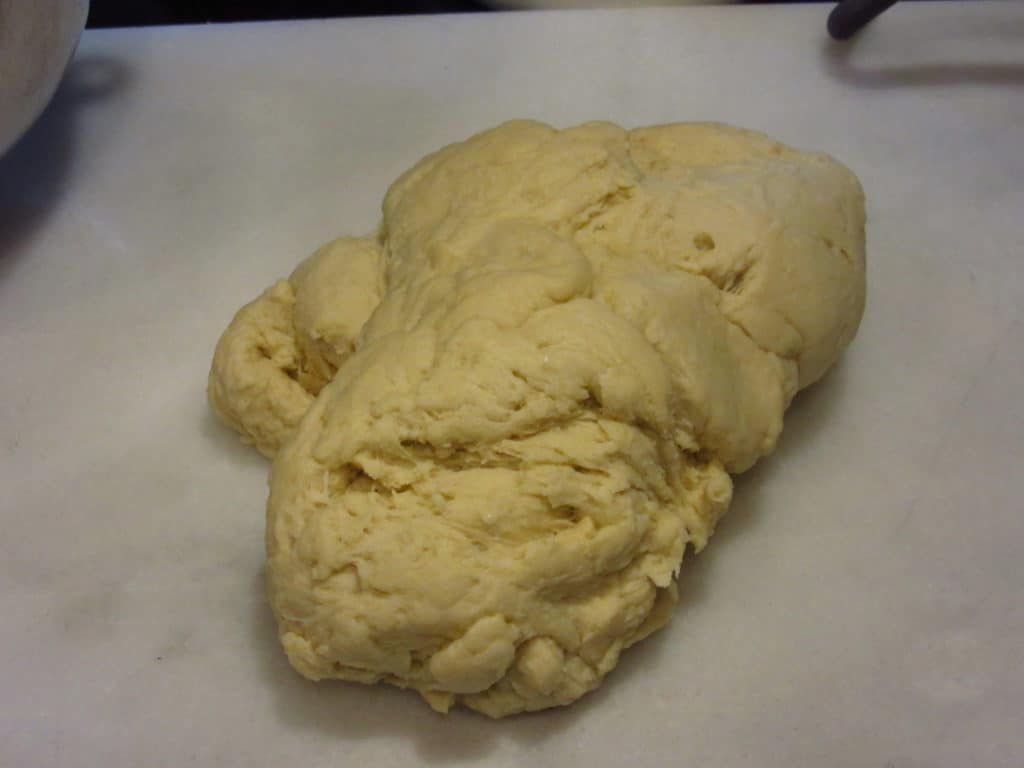
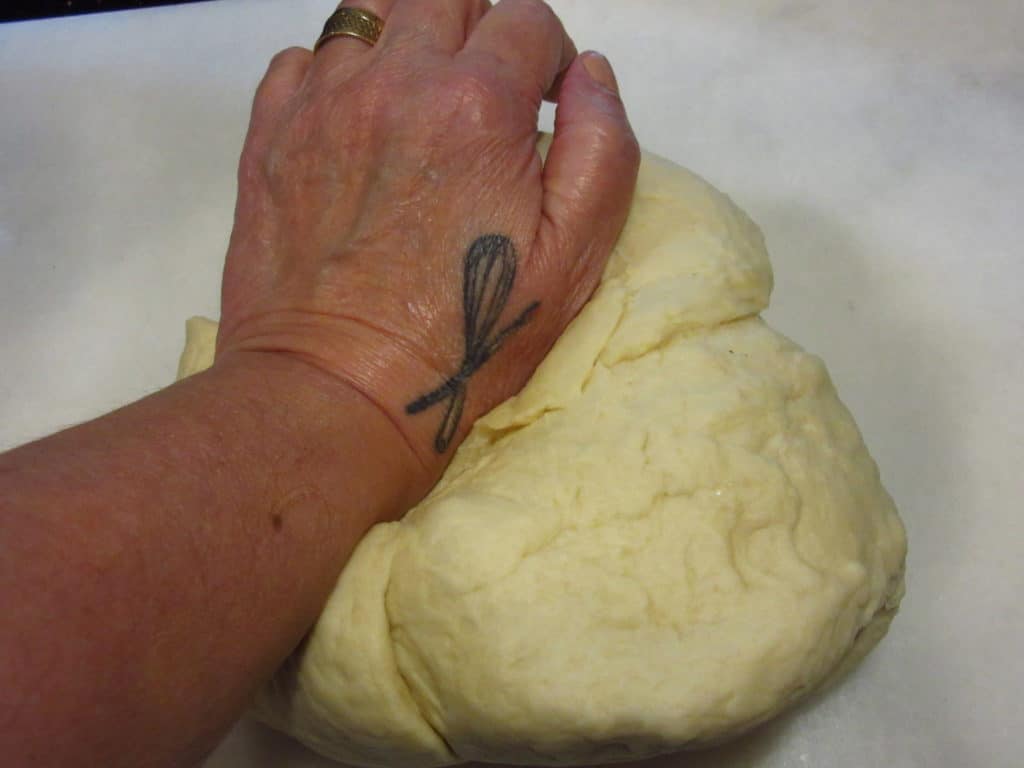
- Turn the dough out of the bowl and hand-knead for an additional 1-2 minutes.
Save this for later.
Email forwarding service for saving information.
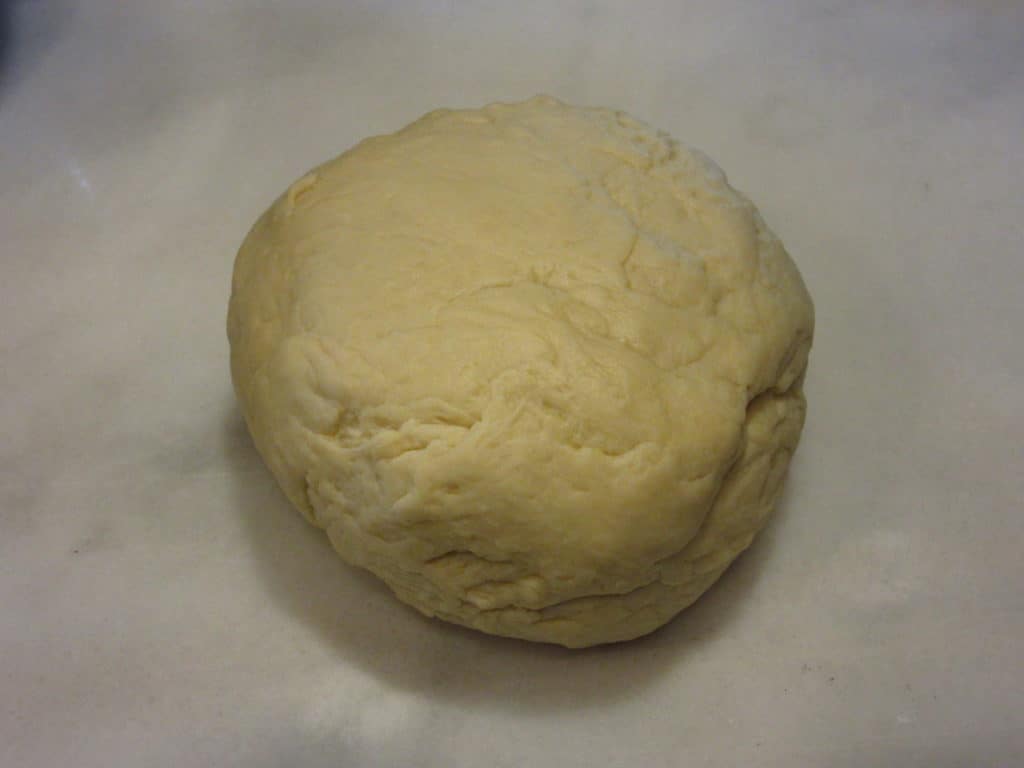
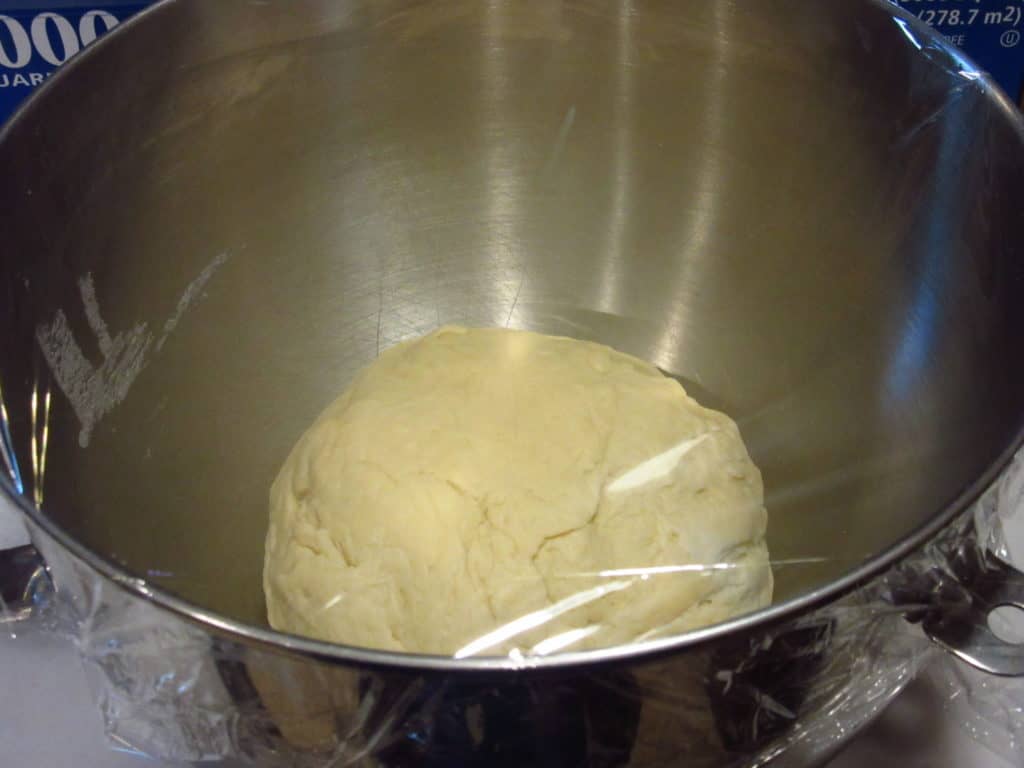
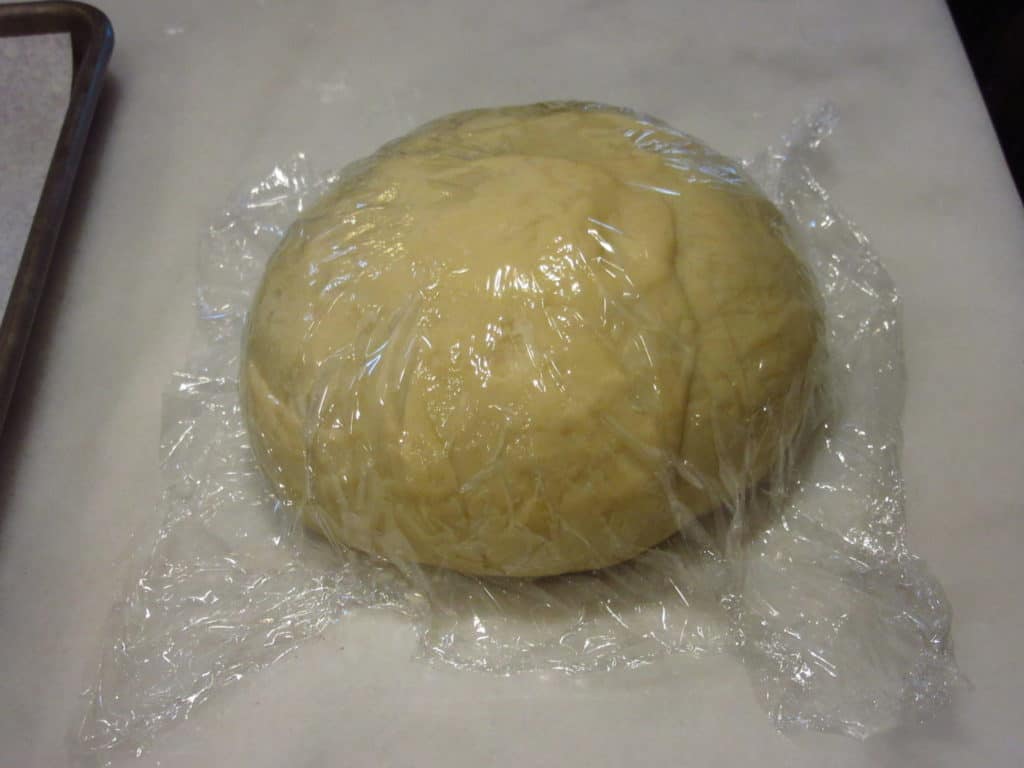
- Add the dough ball back into the bowl of the mixer and cover it with plastic wrap.
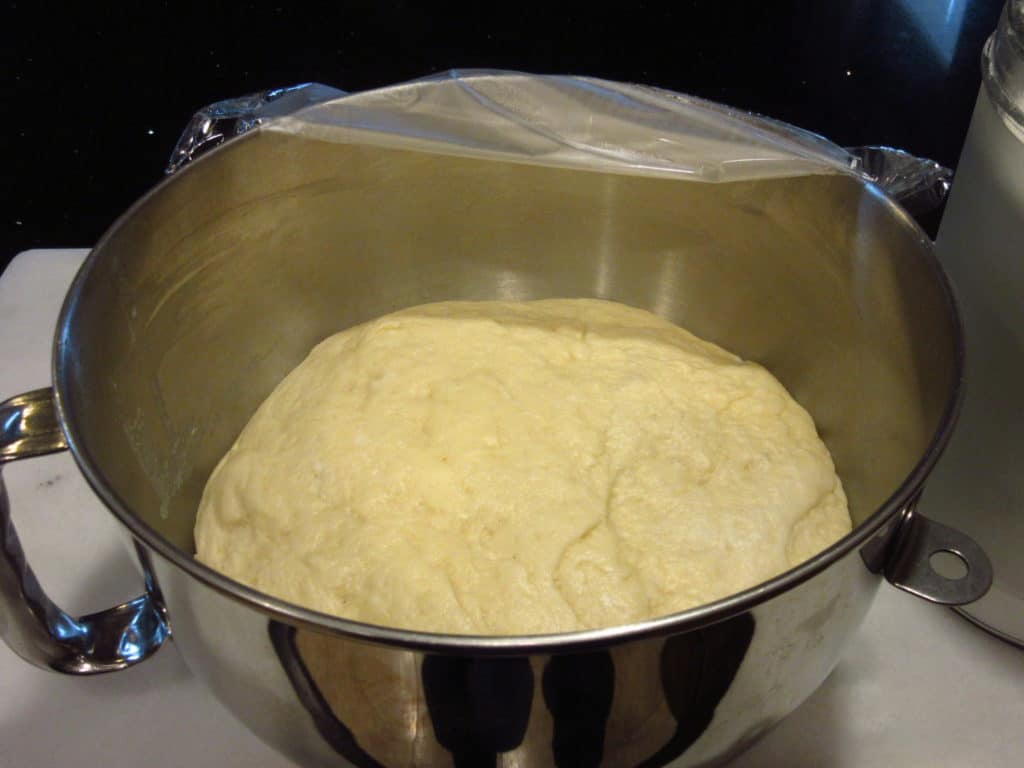
- Allow the dough to rest in a warm place for approximately 60-90 minutes or until doubled in volume.
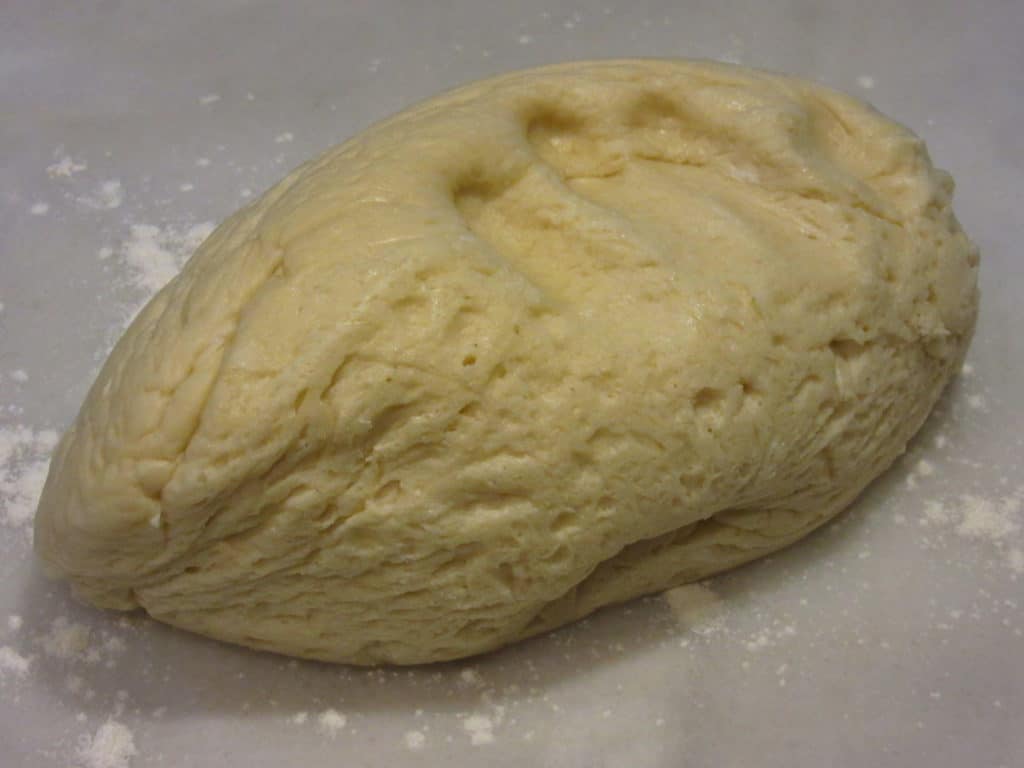
- Once doubled, turn the dough out onto a lightly floured surface and hand-knead for approximately 10 minutes.
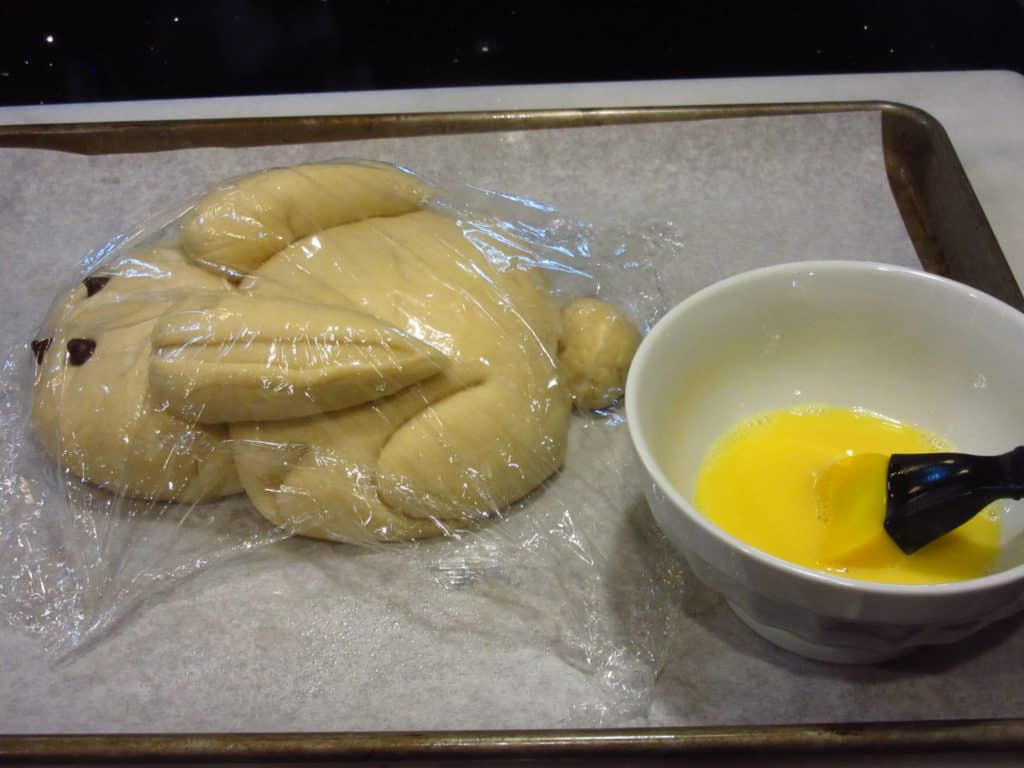
- Form the dough into a smooth ball and allow the dough to rest for 20 minutes (covered with plastic wrap) before shaping.
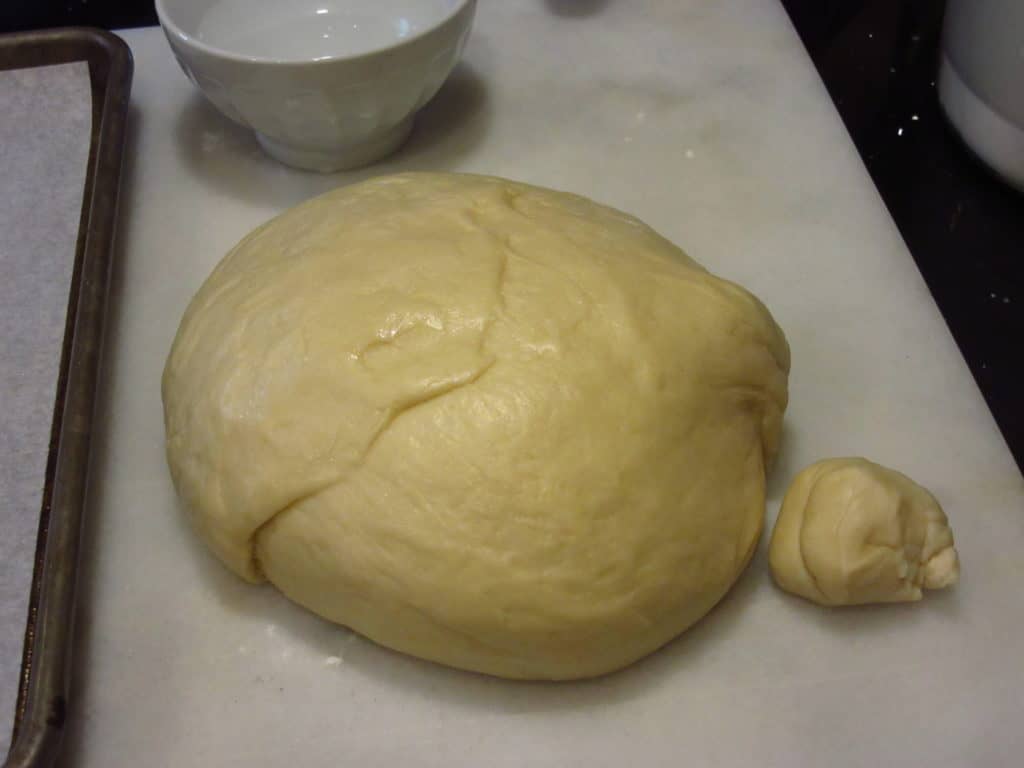
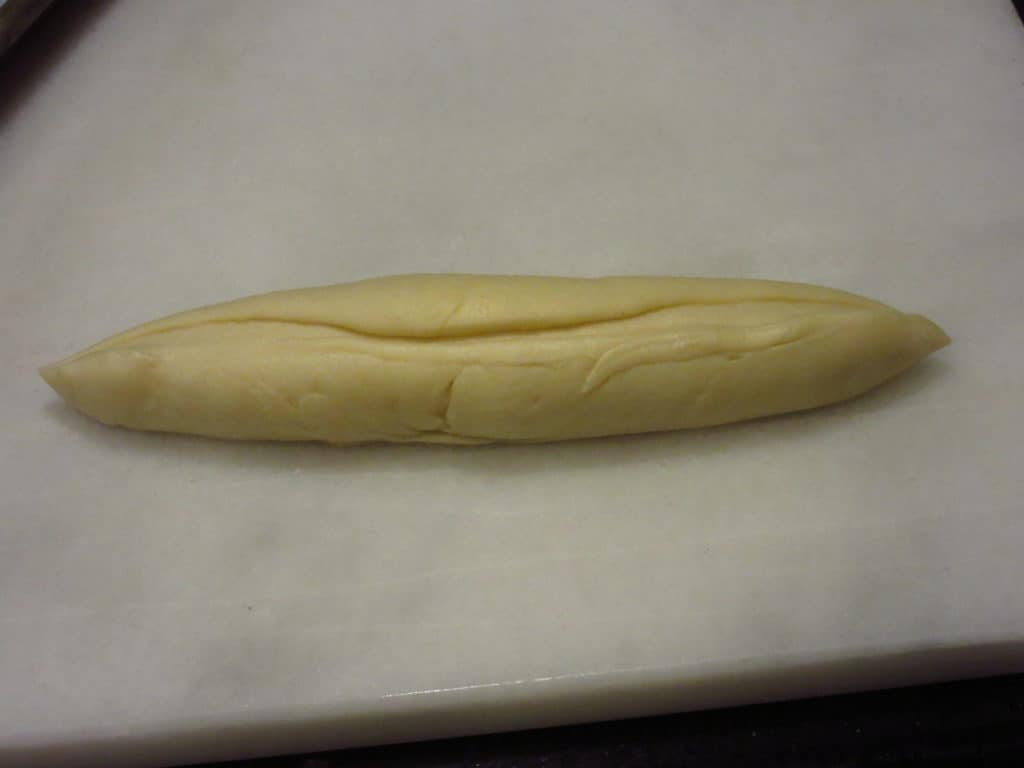
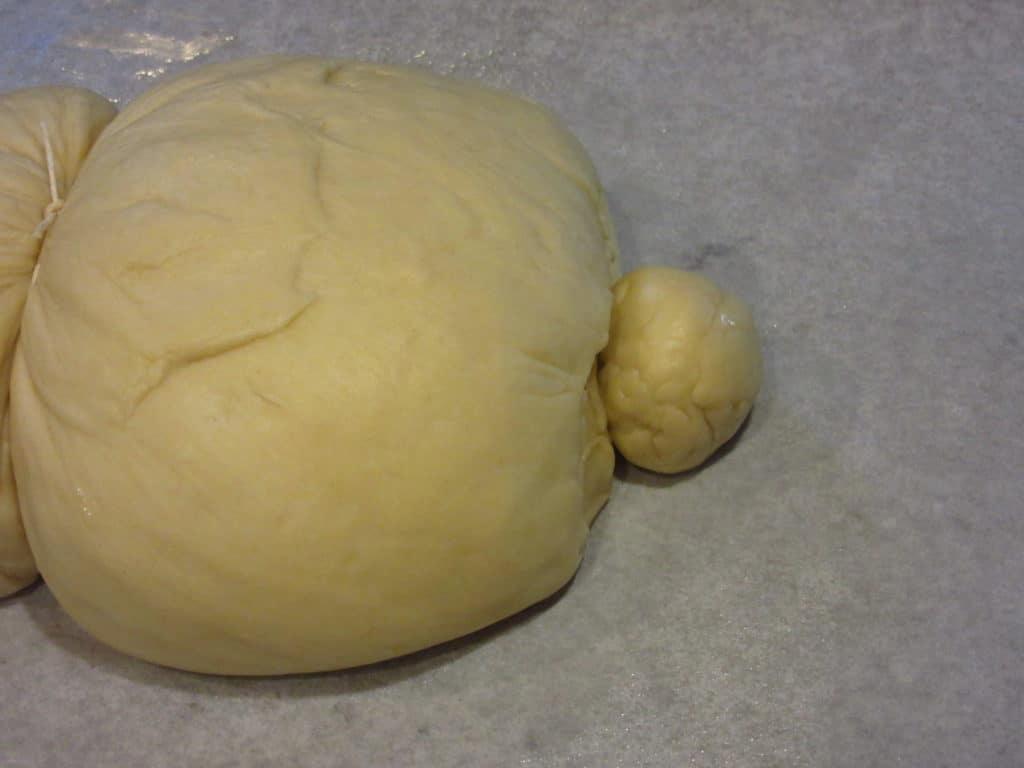
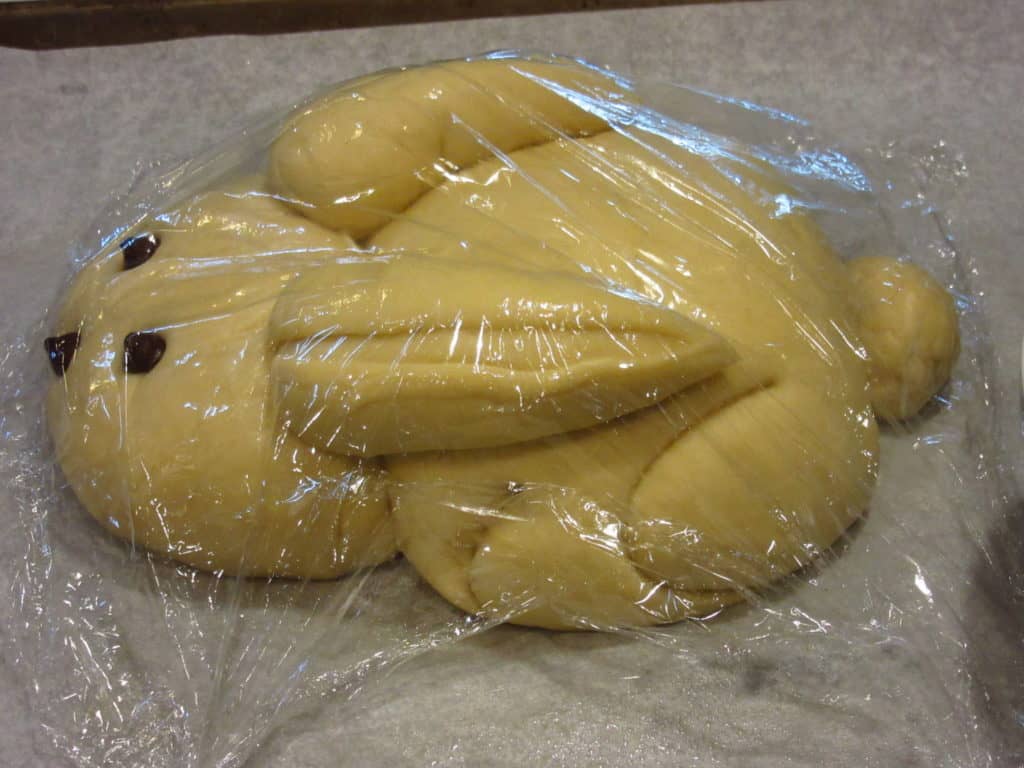
- Break off a piece of dough (about the size of a golfball) for the tail and roll. Set aside.
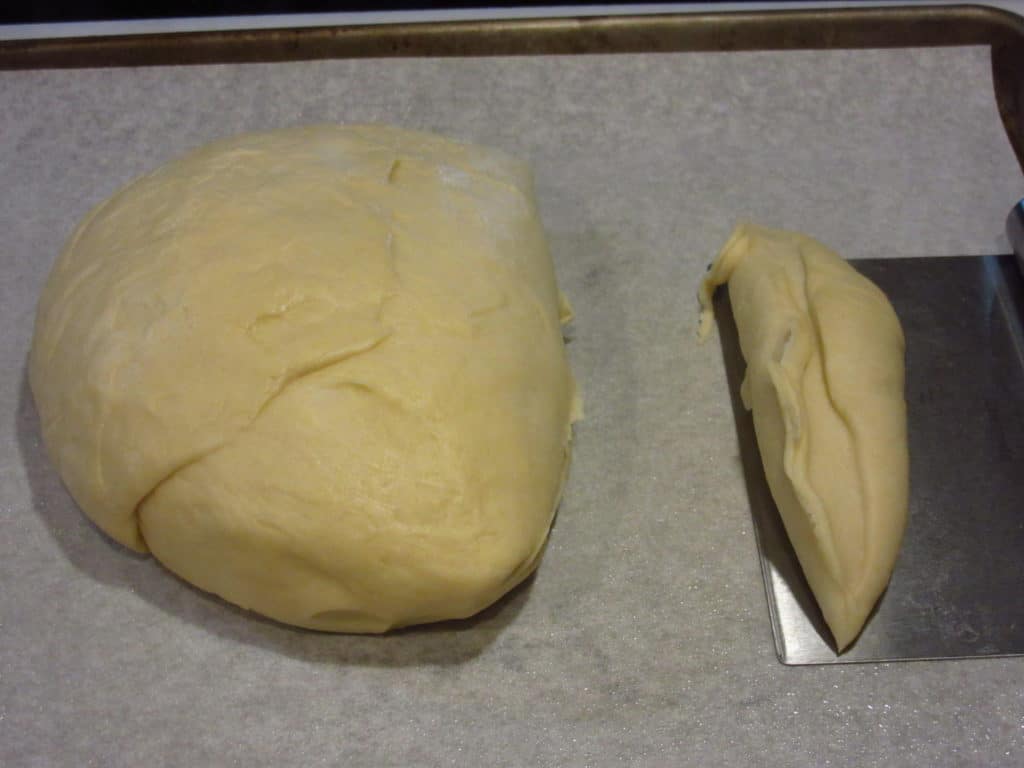
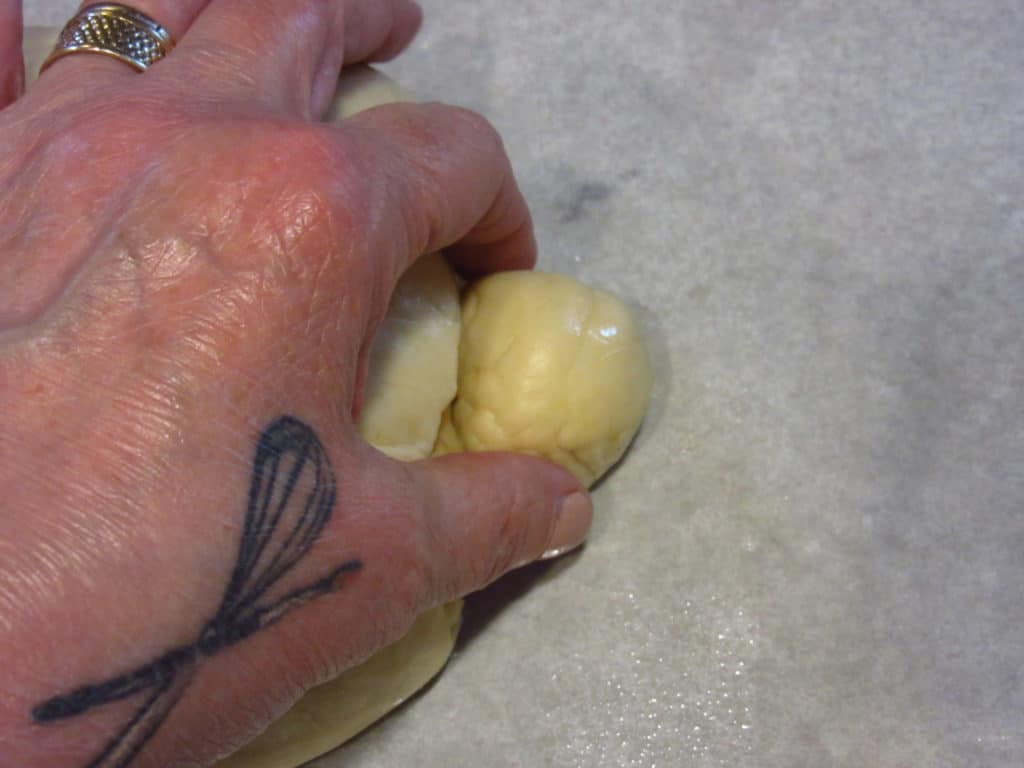
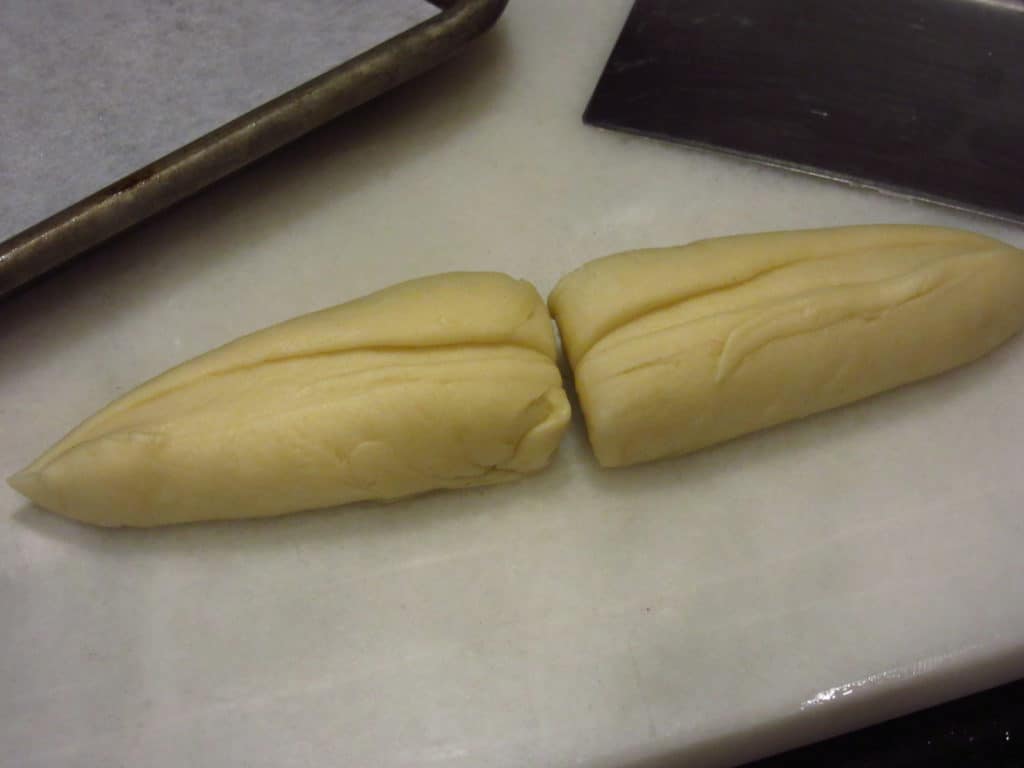
- Use a bench scraper or chef's knife to cut off a small' ish piece of the doughball for the bunny ears.
- Roll the bunny ears to pointy (if desired) and set them aside.
- Reroll the main dough (as needed) to form a ball.
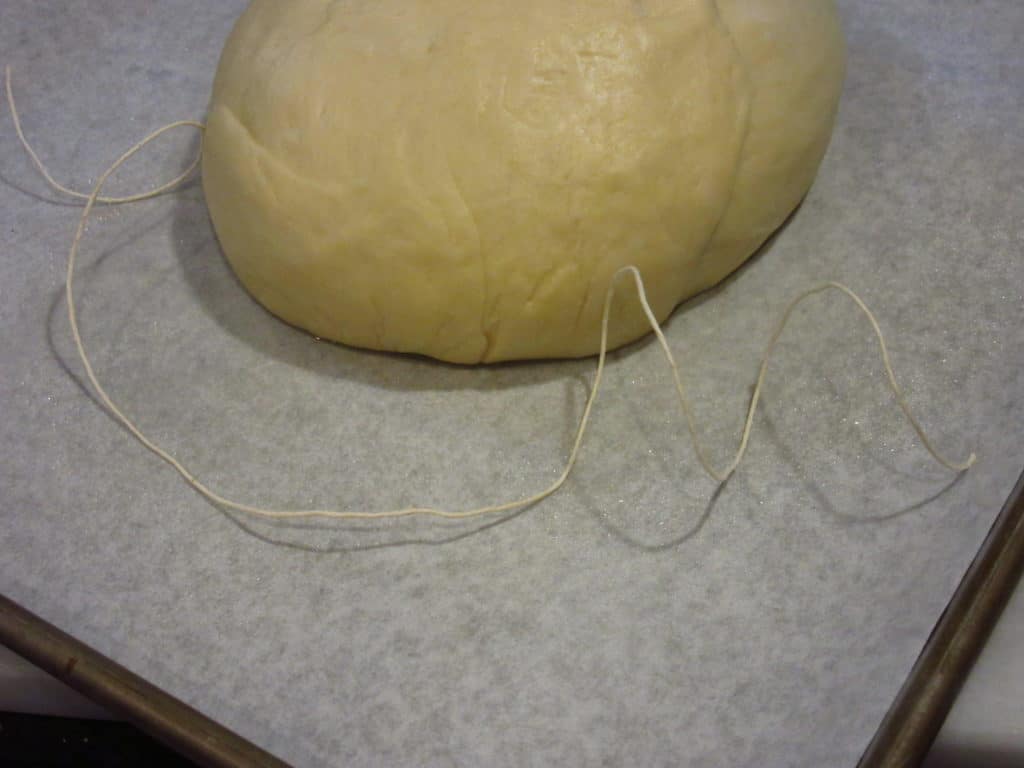
- Place the bunny dough on a parchment-lined baking sheet.
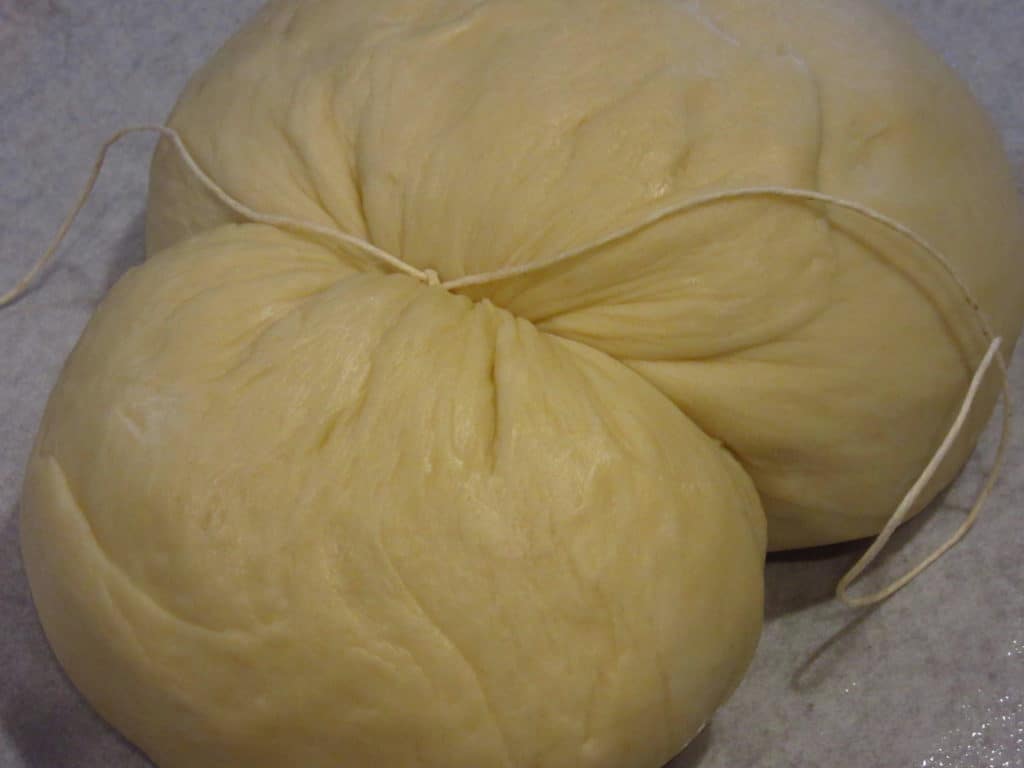
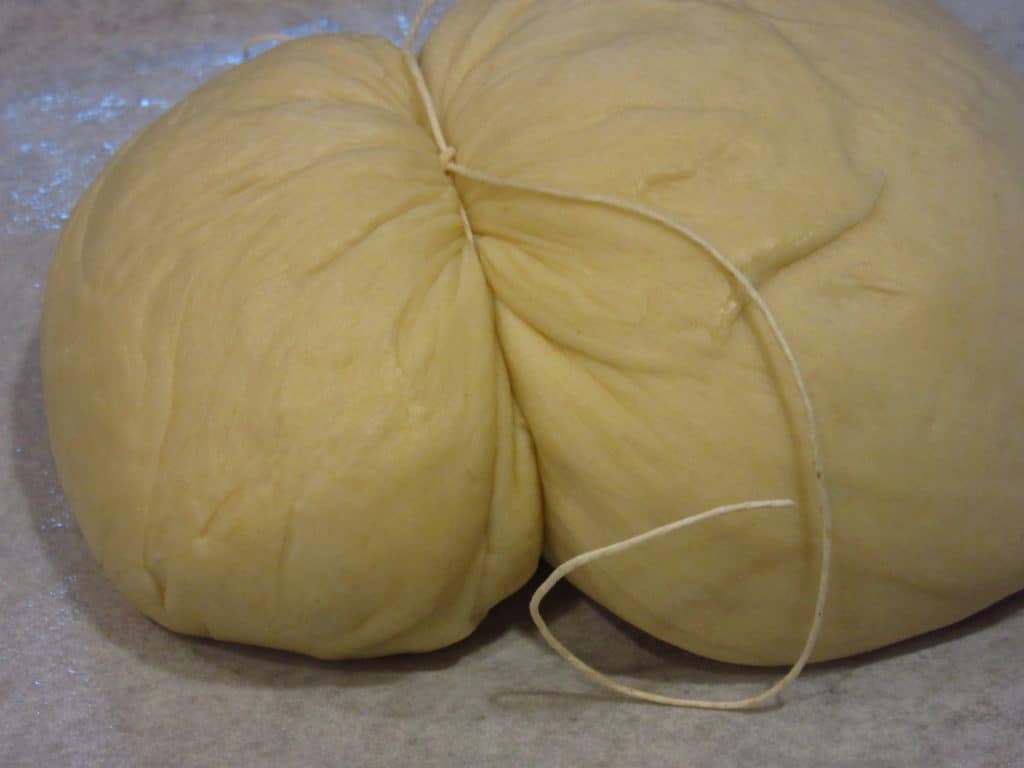
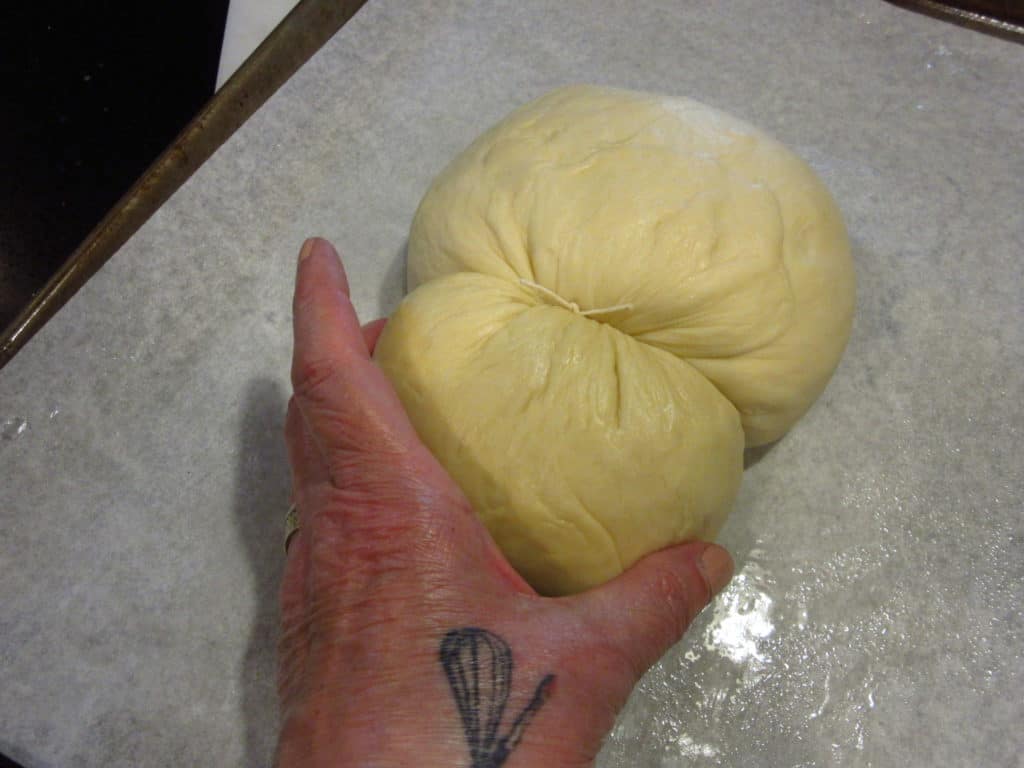
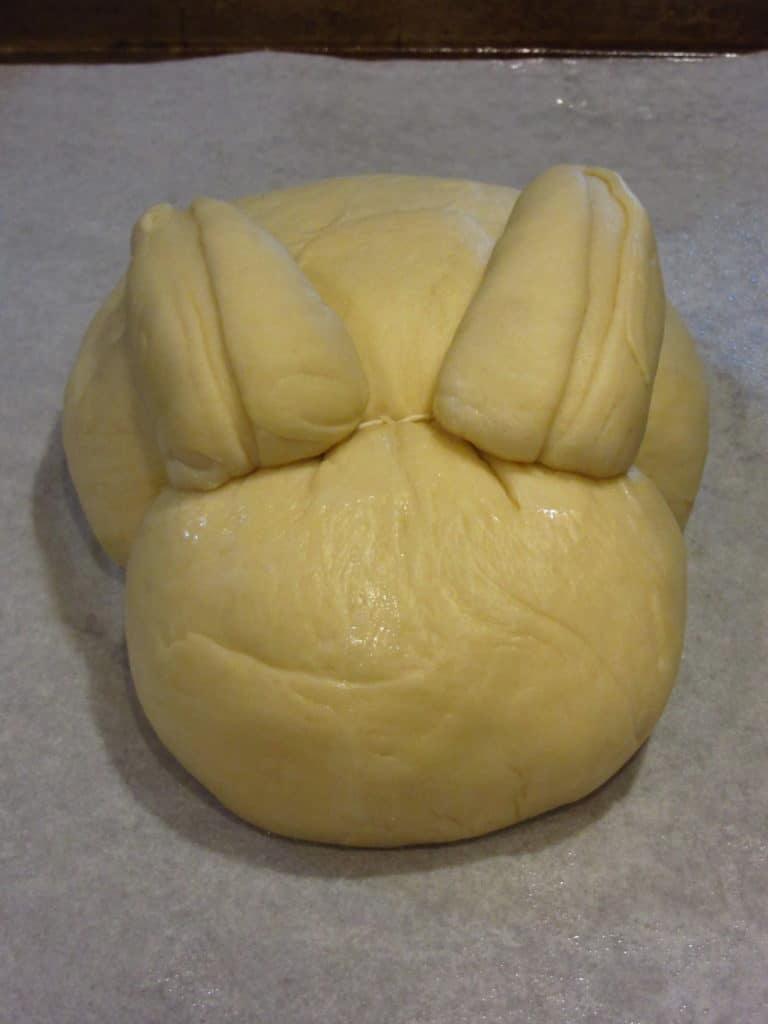
- Using a long piece of butcher's twine, gently tie off as much dough as you want to form the head of the bunny.
- Gently but firmly, press and shape the dough head and body with your hands until you're happy with the shape.
- Using water as "glue" affix the tail onto the back end of the bunny's body pressing it slightly into place.
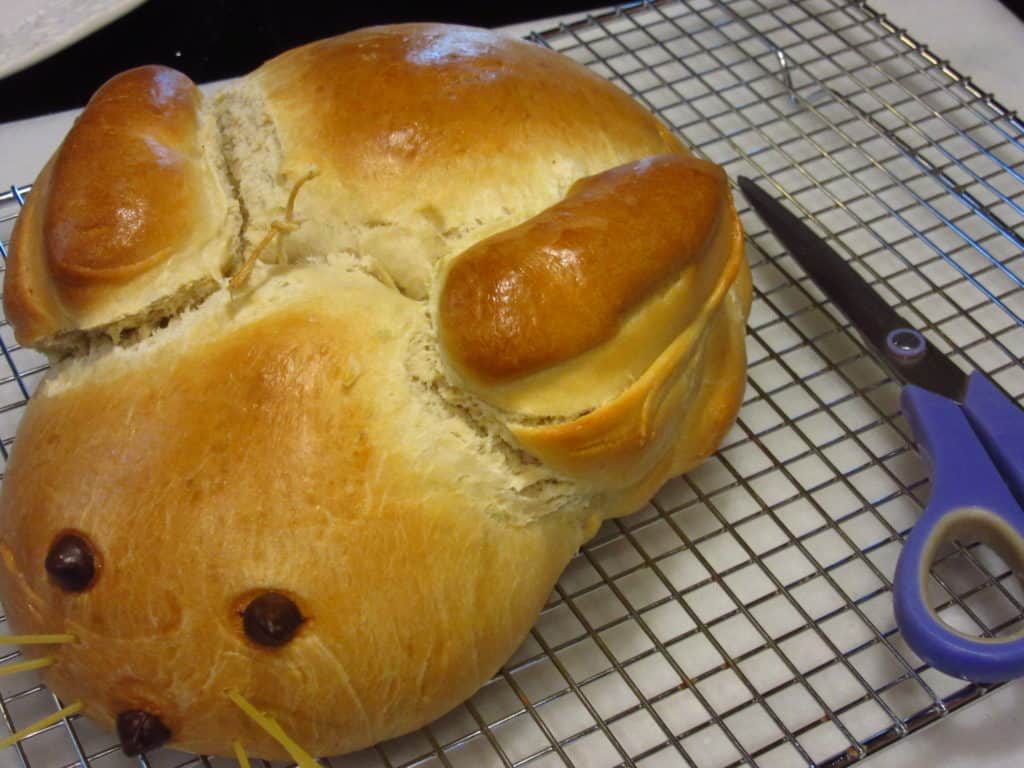
- Cut the earpiece in half (lengthwise, to form two separate ears) and use water to gently press the ears into place (flat side) onto the bunny's head. *Note - The placement is up to you, but remember that as the bunny rises (and bakes) the ears may tend to flop down to the sides a little so plan accordingly.
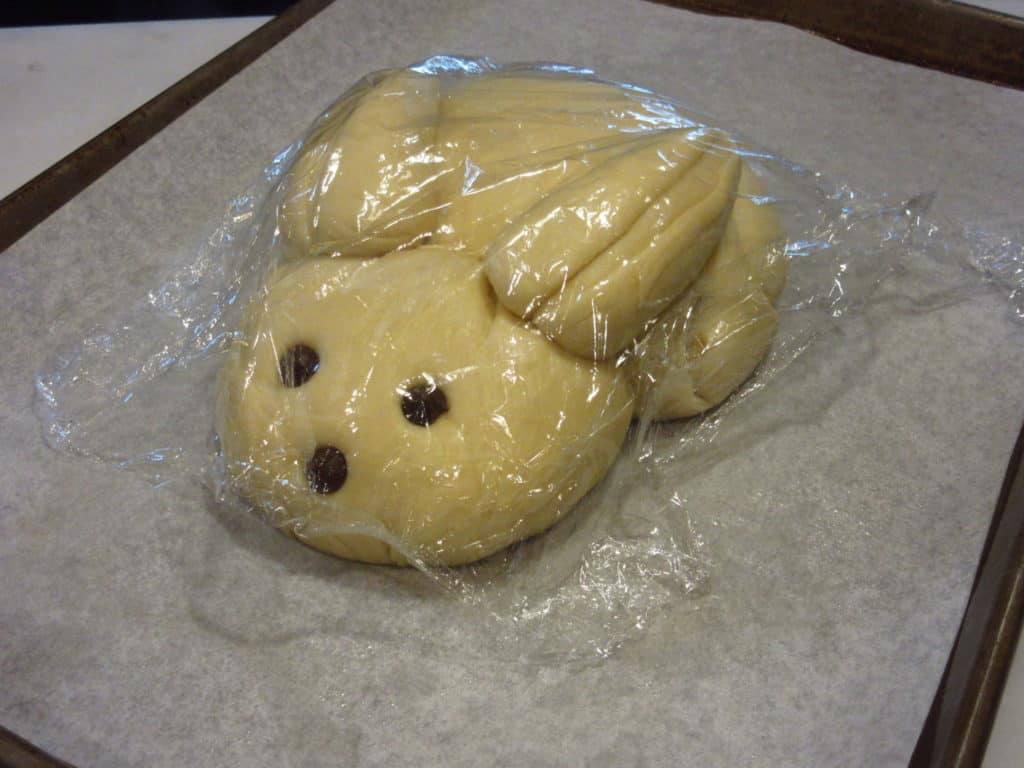
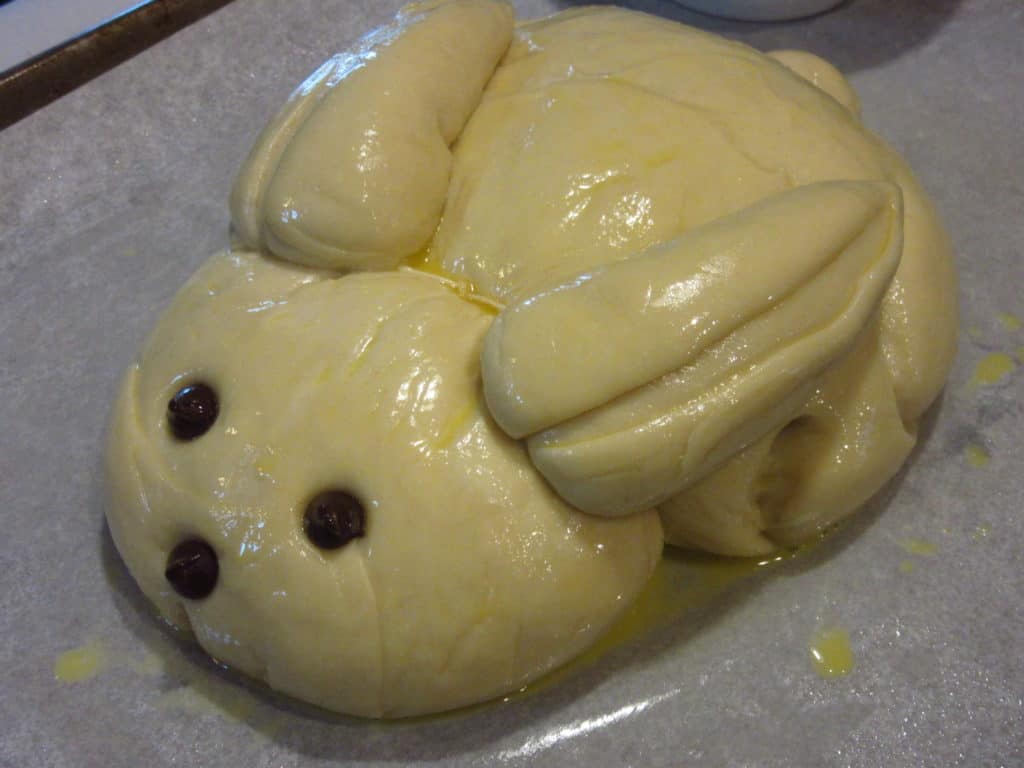
- Use water to gently press the chocolate chips (raisins may also be used) in place for the eyes and nose.
- Cover the bunny bread with plastic wrap and allow it to rest and rise for another 30-40 minutes.

- Preheat the oven to 375-degrees.
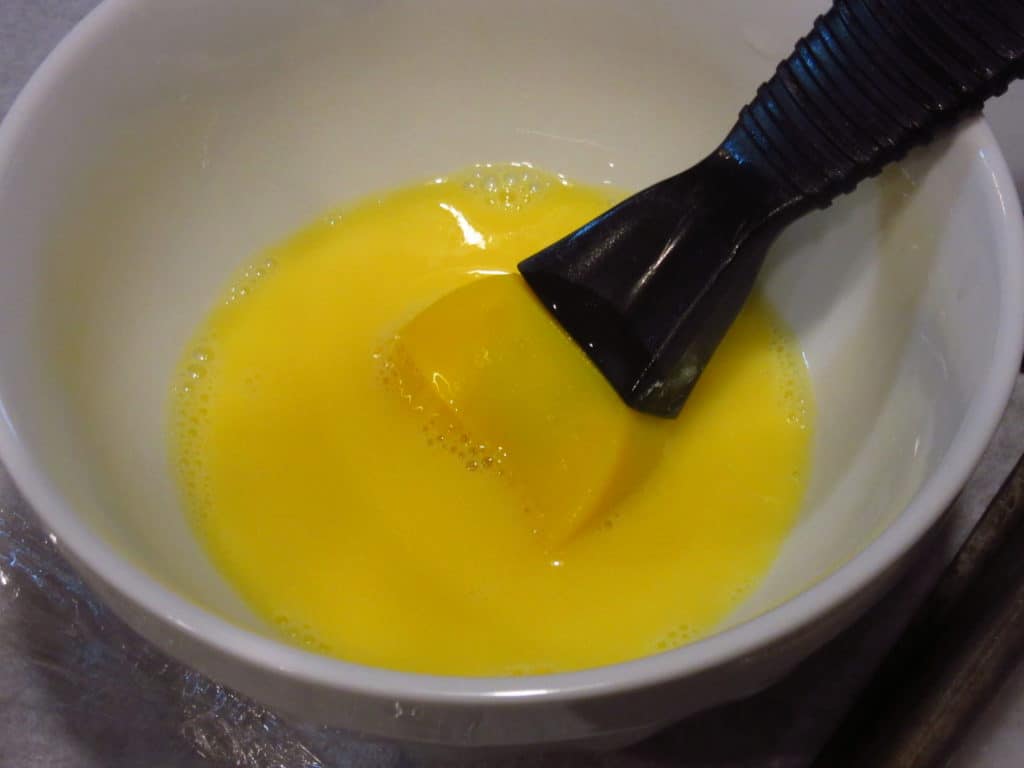
- In a medium bowl, whisk 1 egg with 1 tablespoon of water.
- Use a pastry brush to paint the egg wash gently but completely over the entire surface of the bunny.
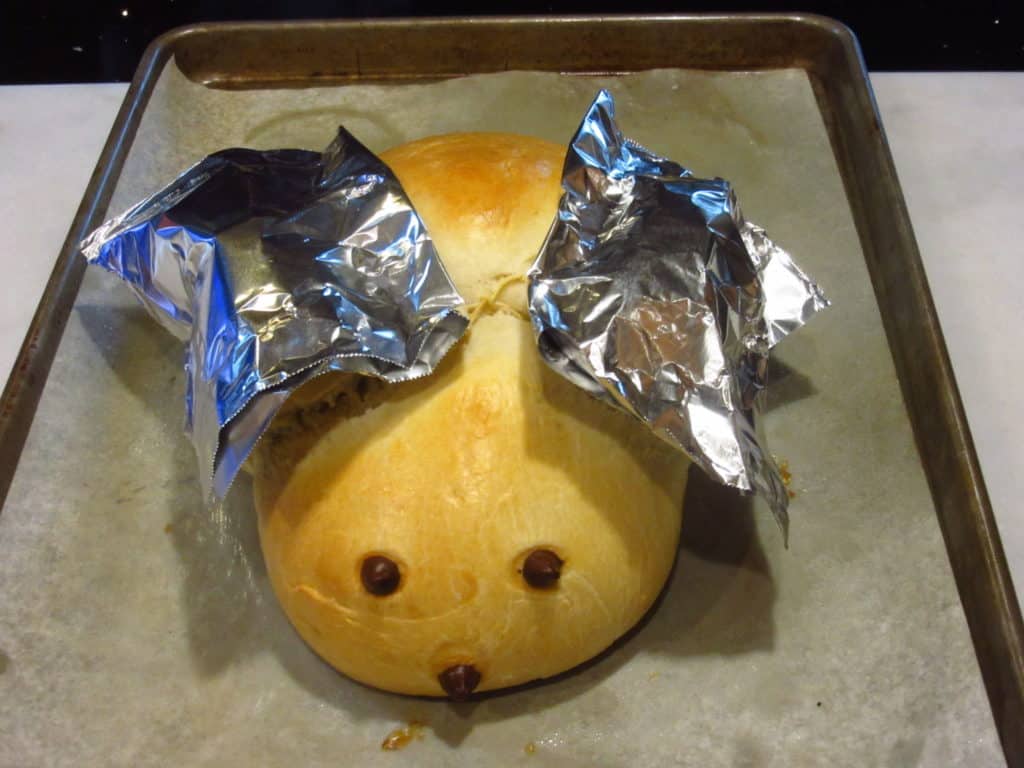
- Bake the bunny bread in the preheated oven for 30-40 minutes, making sure to cover his ears with foil (shown) if the ears are browning too quickly so they don't burn before the body is fully baked.
- The bread will be done when the bunny's body sounds hollow when tapped.
- Gently poke spaghetti holes next to the bunny nose while the bread is still warm, but then remove the spaghetti leaving just the holes.
- Cool the bunny bread completely on a wire rack.
- Once the bread is completely cool, add the spaghetti whiskers back into place.
- Remove the butcher's twine by snipping with scissors and gently pulling it from one end.
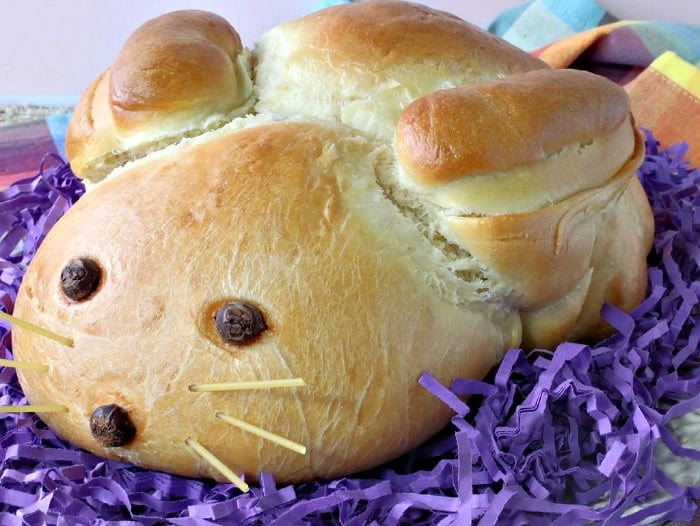
- Serve on a platter along with some colorful Easter grass, if desired.
Can German Easter bunny bread be frozen?
Yes!
After he's been completely cooled wrap him well in several layers of plastic wrap and freeze for up to 2 months.
Additional Easter recipes:
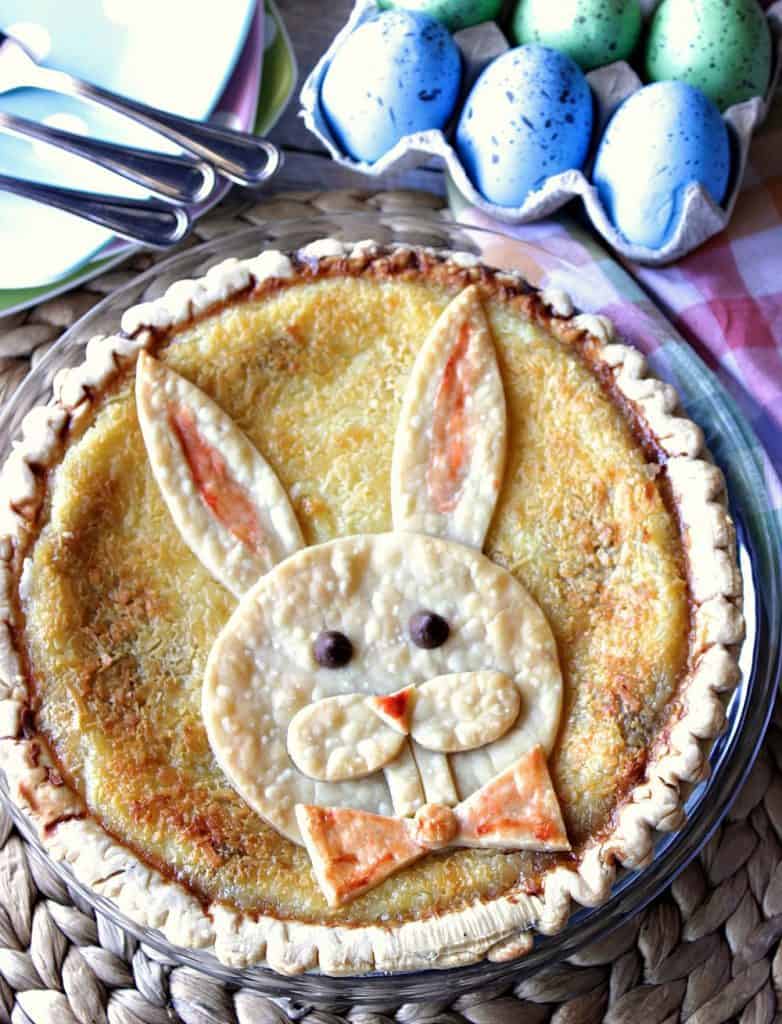
*Coconut Custard Easter Bunny Pie (pictured below) from (yours truly) Kudos Kitchen
"With the help of store-bought pie dough, you can easily recreate this whimsically delicious Easter Bunny Pie in the shake of a cottontail…so you’d better hop to it!"
*No-Bake Cadbury Egg Cheesecake from Cincy Shopper
*Bunny Tail Cake Balls from Mommy Enterprises
*Deviled Dijon Ham and Eggs (pictured below) from (yours truly) Kudos Kitchen
"Whether you choose to serve these easy-to-make deviled Dijon ham and eggs for breakfast, brunch, appetizers, or a hearty snack, you just can’t go wrong! They’re utterly scrumptious no matter how, or when, you eat them!"

*Candied Carrots from Dancing Through the Rain
*Candied Sweet Potatoes from Simply Stacie
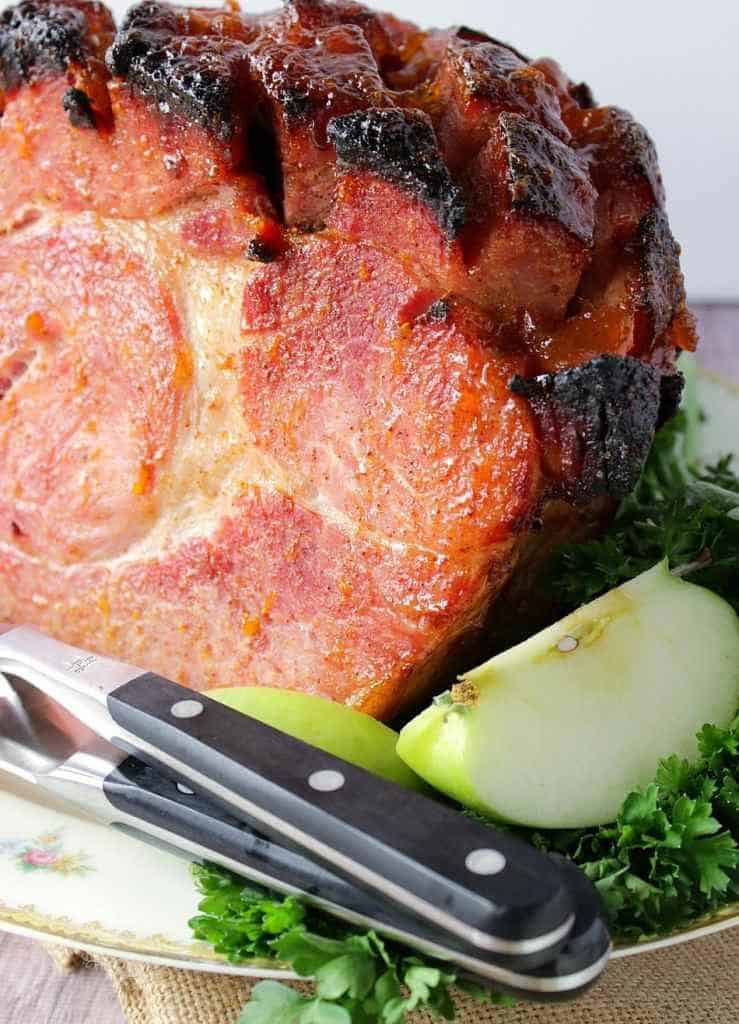
*Spiced Apricot Glazed Ham (pictured below) from (yours truly) Kudos Kitchen
"This irresistible Spiced Apricot Glazed Ham will take your holiday meal (or any meal for that matter) to epic proportions, and with hardly any effort."
*Smoked Gouda Scalloped Potatoes from Sidewalk Shoes
*No-Cook Creamy Pea Salad from Baking Beauty
*Bunny Bread (pictured below) THIS IS THE PLACE!
When you make today's recipe (and I hope that you will), I'd appreciate it if you'd take the time to come back and give it a star rating along with a comment on why you rated as you did.
Search engines such as Google appreciate comments and ratings and, in turn, will show my recipes to more people. Please look for the pink star rating box within the printable recipe card. Thank you!!
Printable Recipe Card

German Bunny Bread
Ingredients
- 4½ cups bread flour all-purpose may be substituted but the rise will be less
- 1½ teaspoons coarse salt
- 6 tablespoons softened butter
- 1¼ cups warm milk 105-110 degrees
- 1 tablespoon sugar
- 4½ teaspoons 2 packages active dry yeast
Instructions
- In a large bowl, whisk together the flour and salt. Set aside.
- In a small bowl, dissolve the yeast in the warm (to the touch 105-110-degrees) milk.
- Add the sugar to the yeast and milk mixture. Whisk to combine. Allow the yeast and milk mixture to sit and get foamy (approximately 5 minutes).
- Meanwhile, add the softened butter to the flour and salt mixture and blend until you can no longer see the butter.
- Add the yeast and milk mixture to the flour and use the dough hook to thoroughly knead until the mixture forms a dough.
- Continue to knead at least 10 minutes.
- Turn the dough out of the bowl and hand-knead for an additional 1-2 minutes.
- Add the dough ball back into the bowl of the mixer and cover it with plastic wrap.
- Allow the dough to rest in a warm place for approximately 60-90 minutes or until doubled in volume.
- Once doubled, turn the dough out onto a lightly floured surface and hand-knead for approximately 10 minutes.
- Form the dough into a smooth ball and allow the dough to rest for 20 minutes (covered with plastic wrap) before shaping.
- Break off a piece of dough (about the size of a golfball) for the tail. Roll, and set aside.
- Use a bench scraper or chef's knife to cut off a small' ish piece of the doughball for the bunny ears.
- Roll the bunny ear piece to pointy (if needed) and set aside.
- Reroll the main dough (as needed) to form a ball.
- Place the bunny dough on a parchment-lined baking sheet.
- Using a long piece of butcher's twine, gently tie off as much dough as you want to form the head of the bunny.
- Gently but firmly, press and shape the dough head (and body) with your hands until you're happy with the shape.
- Using water as "glue" affix the tail onto the back end of the bunny body, pressing it slightly into place.
- Cut the earpiece in half (lengthwise, to form two separate ears) and use water to gently press the ears (flat-side) into place onto the bunny's head. *Note - The placement is up to you, but remember that as the bunny rises (and bakes), the ears may tend to flop down to the sides a little, so plan accordingly.
- Use water to gently press the chocolate chips (raisins may also be used) in place for the eyes and nose.
- Cover the bunny bread with plastic wrap and allow to rest and rise for another 30-40 minutes.
- Preheat oven to 375-degrees.
- In a medium bowl, whisk 1 egg with 1 tablespoon water.
- Use a pastry brush to paint the egg wash gently but entirely over the entire surface of the bunny.
- Bake the bunny bread in the preheated oven for 30-40 minutes, making sure to cover his ears with foil (shown) if the ears are browning too quickly, so they don't burn before the body is fully baked.
- The bread will be done when the bunny body sounds hollow when tapped.
- Gently poke spaghetti holes next to the bunny nose while the bread is still warm, but then remove the spaghetti leaving just the holes.
- Cool the bunny bread completely on a wire rack.
- Once the bread is completely cool, add the spaghetti whiskers back into place.
- Remove the butcher's twine by snipping with scissors and gently pulling it from one end.
- Serve on a platter along with some colorful Easter grass, if desired.
Nutrition
I sincerely hope you've enjoyed today's fun yeast bread recipe as much as I've enjoyed bringing it to you.
Should you have any questions or comments regarding anything you've seen on my site, please don't hesitate to reach out to contact me. It is always my distinct pleasure to get back with you just as soon as I possibly can!
Thank you so much for visiting me today in my Kudos Kitchen. I hope you found something you'll love and that you will come back and visit me often. Please know that there is always room for you around my kitchen table!
Until we eat again, I hope you have a delicious day!


All of the recipes you'll find here on my website are in loving memory of my son, Greg, who left this earth far too soon and will be forever in our hearts.


Mark says
It tasted as good as it looks.
Sharon A. Wentzel says
I am definitely going to try this one for our church Easter breakfast!
Renée says
Have fun with it, Sharon!
I hope he's a hit!!
Fondly,
Renee
Noelle says
This is too cute to eat! hah but delicious too!! Thanks for the great idea 🙂