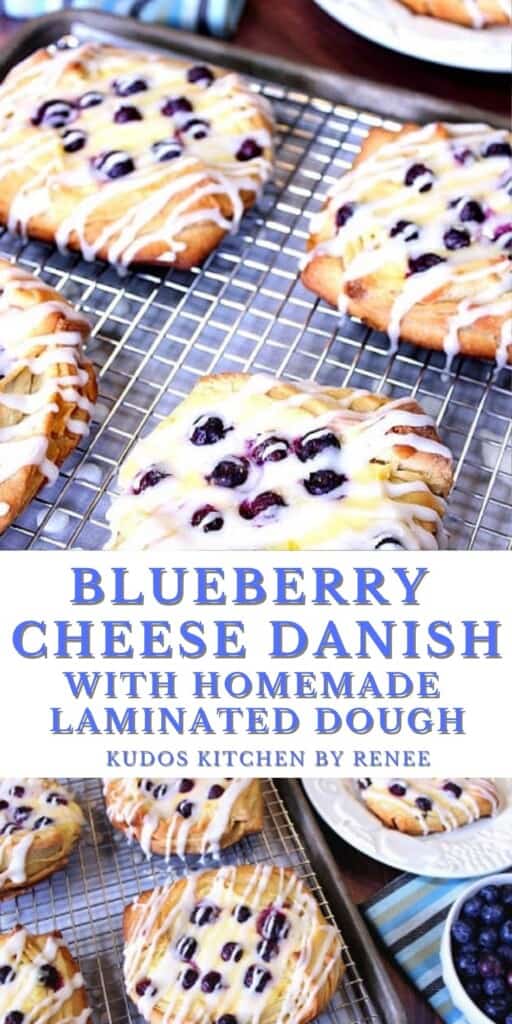
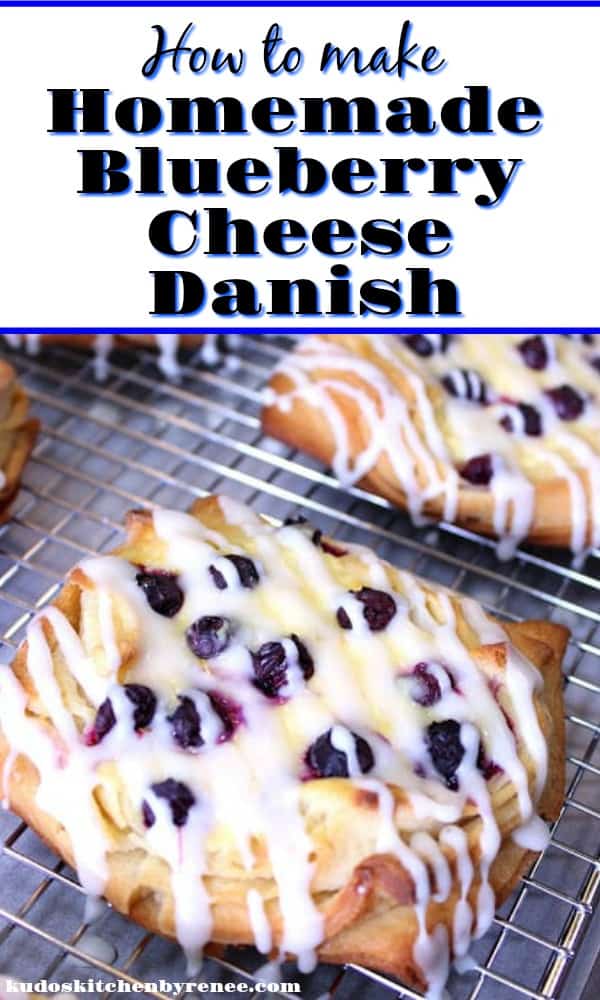
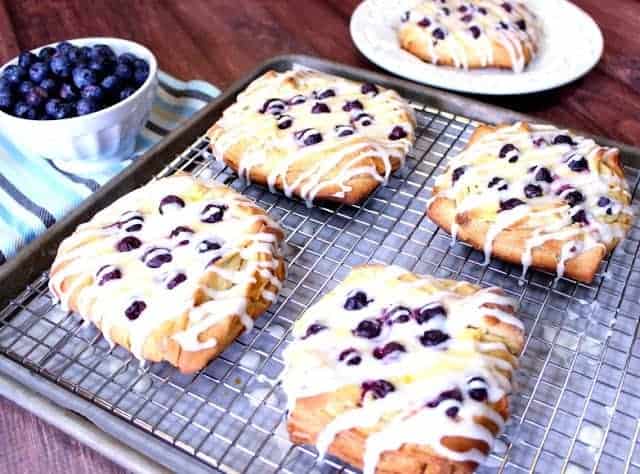
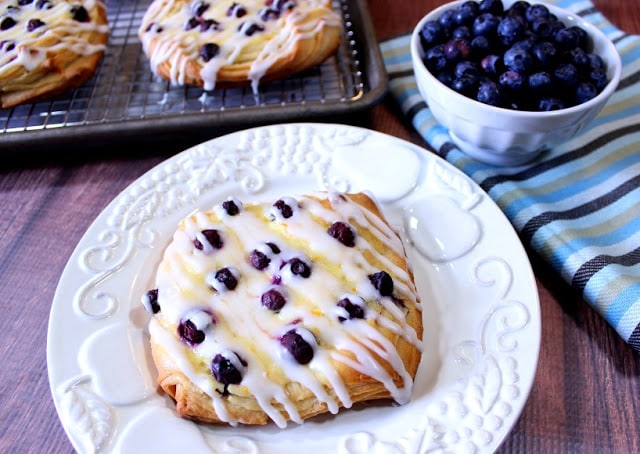
These homemade Blueberry Cheese Danish are super buttery, not overly sweet, and they're loaded with fresh seasonal blueberries. How's that for a great way to start your morning?

Table of Contents Found Here
- The ingredient list:
- Why this recipe works:
- My easy method of making laminated puff pastry dough:
- Can store-bought puff pastry be used for this recipe?
- What does laminated mean?
- Wondering about laminated puff pastry dough?
- How long does it take to make laminated pastry dough?
- FAQs
- My step-by-step instruction for making laminated pastry dough:
- Additional recipes using puff pastry:
- Printable Recipe Card
- Please comment if you've made this recipe.
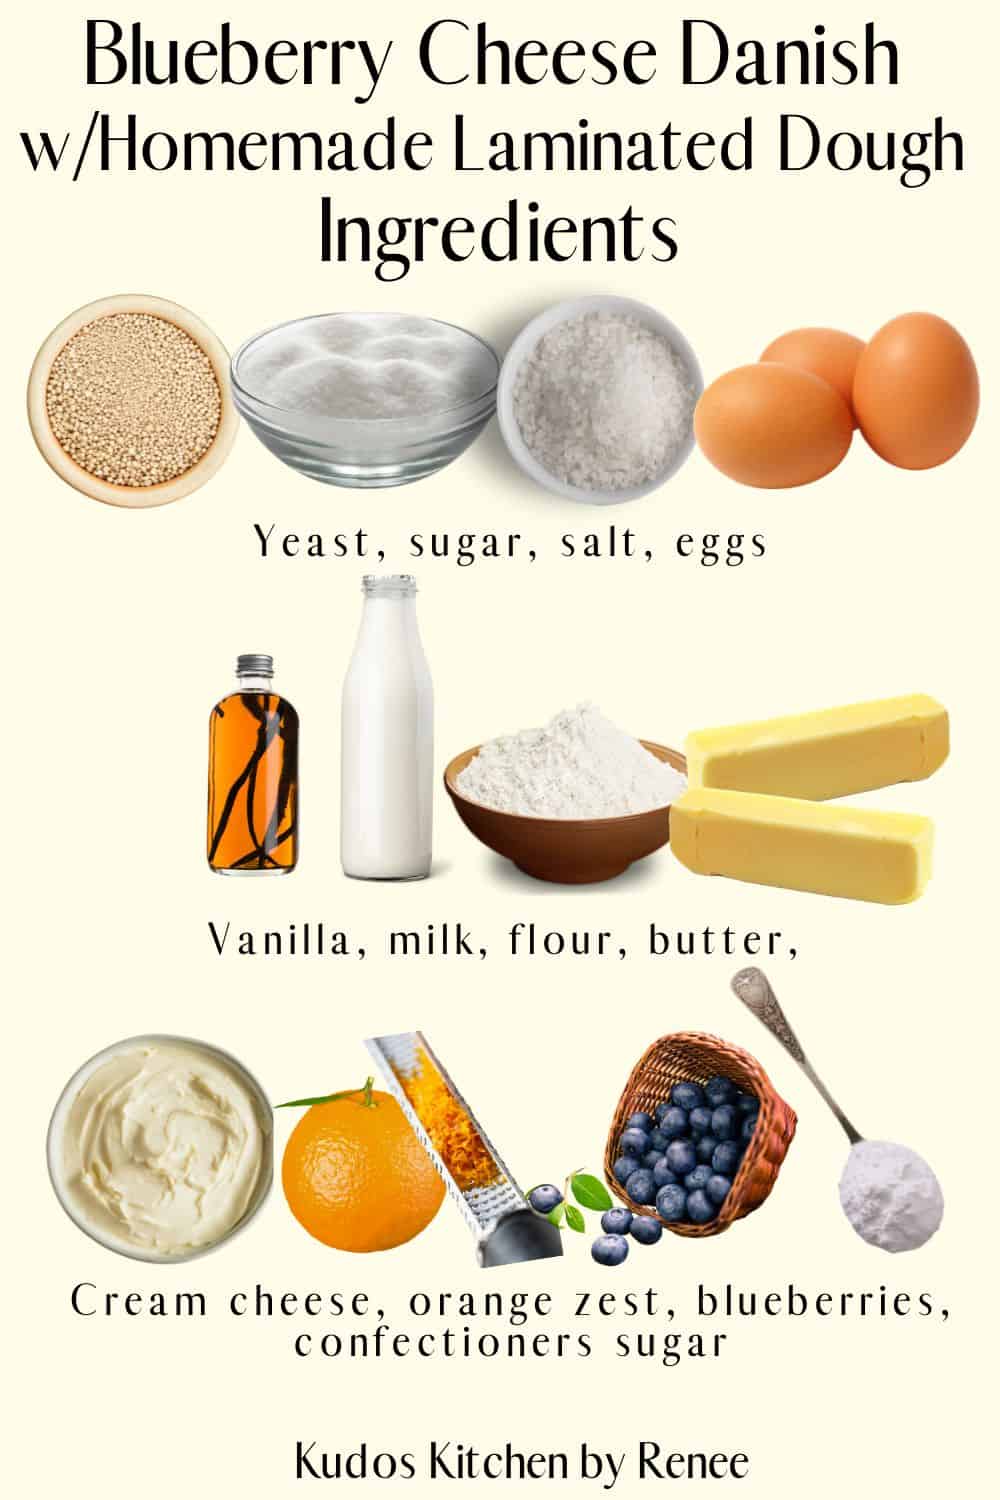
The ingredient list:
*Please note that the exact measurements along with a "shop the recipe" feature from Instacart and Walmart is available inside the printable recipe card.
Why this recipe works:
Making homemade blueberry cheese Danish is a labor of love.
I don't want to fool you into thinking homemade blueberry cream cheese Danish is super simple to make, but I also don't want to scare you away thinking that they're too advanced for you if you're not all that comfortable in the baking/yeast department.
Don't be frightened.
I'm here to walk you through the process so that you'll be successfully savoring your Blueberry Cheese Danish in no time at all.

My easy method of making laminated puff pastry dough:
What I urge you to do is read through the recipe at least once, maybe twice, before you start.
It's the old "do as I say, not as I do" method of teaching.
I've adapted this recipe (well, more the technique than the ingredients) from one I found online on Epicurious.com.
You see, I didn't follow the directions properly. I jumped the gun (as I tend to do) and wound up improvising the steps in assembling and rolling out my Danish dough.
The results are here in this post and written in my recipe, but if you check out the Epicurious recipe, you'll find a whole other way to create Blueberry Cheese Danish.
But this is my method and I'm sticking to it! 🙂
Can store-bought puff pastry be used for this recipe?
Yes!
In the instructions, just pick up from where you cut the dough into squares, and take it from there.
Don't worry. I promise I won't tell a soul. *wink*

What does laminated mean?
Thin layers.
In this case, thin layers of dough and butter.
Wondering about laminated puff pastry dough?
Here's a quick lesson as to what it is, and why it's so delicious!
How long does it take to make laminated pastry dough?
For my version, this recipe will take approximately 90 minutes of dough preparation time. This does not include baking time.
Save this for later.
Email forwarding service for saving information.
Much of these 90 minutes will include the hands-off chilling time which is imperative for making successfully laminated dough.
For wonderful information regarding laminated pastry dough, you'll love this article from Baker Bettie. She's a whiz in the kitchen when it comes to making puff pastry dough.
FAQs
Store these wrapped well, or in an airtight container in the refrigerator for up to 5 days.
Preheat the oven to 350-degrees Fahrenheit and reheat on a baking sheet for 5-7 minutes.
Yes. Cool them completely before wrapping them well or storing them in a airtight freezer container. These may be frozen for up to one month.
Yes. After the dough is made, wrap it well in several layers of plastic wrap and freeze for up to 2 months.
They sure can. They can also be swapped with another type of berry or fruit if that's your choice.
As written it makes 9 substantial homemade fruit pastries.

My step-by-step instruction for making laminated pastry dough:
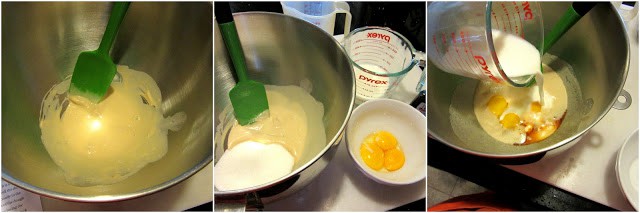
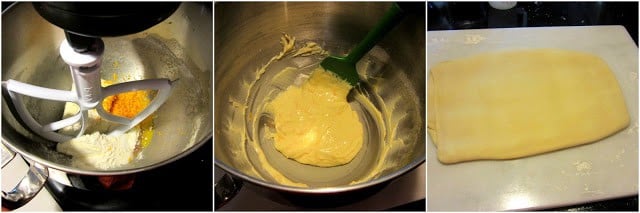
- In a large bowl, dissolve the yeast in the warm water.
- Let sit for 2-3 minutes.
- Stir in the ⅔ cups sugar, salt, 3 egg yolks, 2 teaspoons vanilla extract, and ⅔ cups milk.
- Stir well to combine.
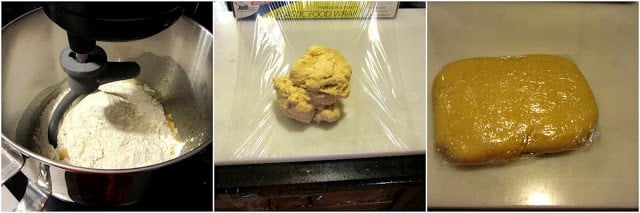
- Using a dough hook for the stand mixer (or a wooden spoon if mixing by hand), stir in the 3 and ¾ cups of all-purpose flour until the mixture forms a smooth, semi-stiff ball.
- Turn the dough out onto a sheet of plastic wrap and form the dough into a flattened rectangle shape.
- Refrigerate at least 30 minutes.
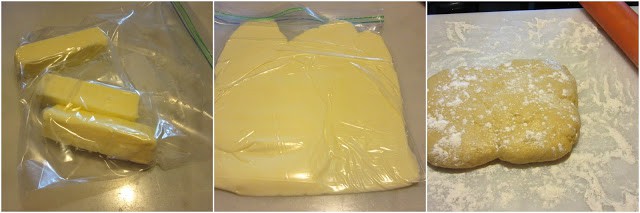
- Place the 3 sticks of butter into the zip-top bag and use a rolling pin to gently pound and roll the butter into a flat sheet inside the plastic bag.
- Freeze the flattened butter until the dough had been chilled for 30 minutes.
- When the dough is ready to roll, use scissors to cut the butter bag open, remove the butter sheet from the plastic, and cut the butter sheet into two even, flat pieces.
- While the dough and butter are chilling, prepare the filling by blending all the ingredients (except the blueberries) in a large bowl until smooth and creamy.
- Set aside until ready to construct the Danish.
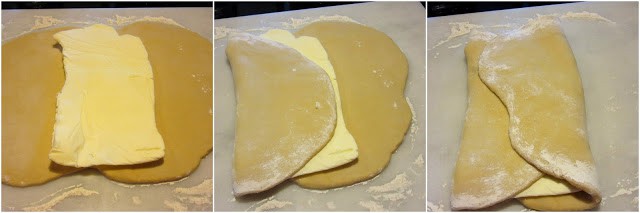
- Working quickly roll the chilled dough out onto a lightly floured surface to form an approximate 14" x 9" rectangle.
- Place one of the butter sheets in the center of the dough and fold each side of the dough in towards the center, overlapping the butter sheet.
- Use the rolling pin to firmly roll the dough out into another approximate 14" x 9" rectangle.
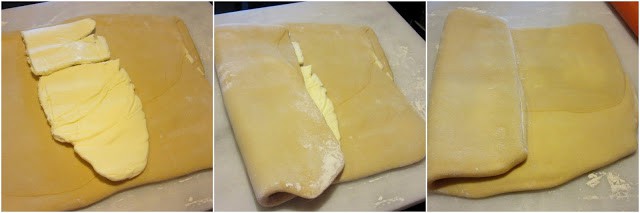
- Complete the same steps with the second butter sheet as done with the first, placing the butter sheet in the middle of the dough, and overlapping the sides of the butter sheet.
- Roll again, using pressure to flatten the dough as much as possible.
- Turn the dough occasionally and roll firmly to form into another approximate 14" x 9" rectangle.
- Trim the edges with a pizza cutter to form straight, neat edges.
- Discard the scraps.
- *Note - The process of rolling the butter sheets into the dough is important to form a light and flaky pastry. It's also helpful to brush any additional flour from the dough during the rolling process or problems with adhering the dough to itself may occur and rolling may be difficult.
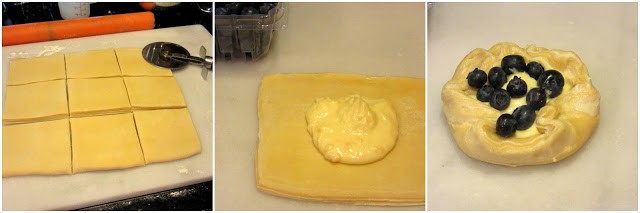
- Using the pizza cutter (or sharp knife), cut the dough into 9 equal pieces.
- Use your fingers to lightly press each dough square to increase its size slightly.
- Place about 1-2 tablespoons of the cream cheese filling in the center of each square.
- Gently press the edges of the dough to form a neat square.
- Gently spoon the cream cheese filling over the top of the pastry square, and top with a handful of fresh blueberries, pressing them lightly into the filling.
- Continue the same process with the remaining dough squares and the cream cheese filling.
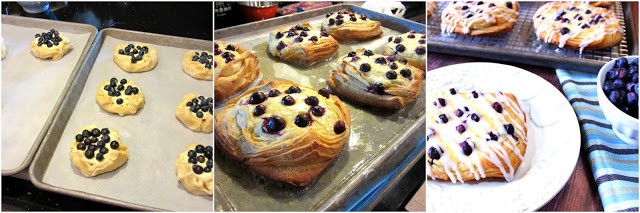
- Place the formed Danish onto parchment-lined baking sheets leaving 3" of space in between each Danish.
- Allow the Danish to rest at room temperature for 1 hour before baking.
- Preheat the oven to 350-degrees.
- Bake for 35-40 minutes in a preheated oven, or until they're crisp and golden.
- Remove from the oven and cool completely before icing.
- In a small bowl, whisk together all the icing ingredients.
- *Note - If the icing is too thin, add a little more confectioners sugar. If it is too thick, add a drop of more milk.
- Drizzle the icing over each Danish and serve at room temperature.
- Refrigerate any uneaten Danish.
Additional recipes using puff pastry:
They'll think you bought these delicious Puff Pastry Apple Turnovers at the bakery, but you made them at home, and it was quick and easy! TA-DA!!
What would you call layers upon layers of puff pastry which encase layers and layers of chocolate, cream cheese, and cherries? Well, why not ... Chocolate Cherry Pastry Tower? Works for me! LOL
When it's time for dessert, and you want to impress but not spend hours in the kitchen preparing, then these rustic Apple Puff Pastry Squares are just what the dessert doctor ordered.
Ever wonder how to make your own fillable Puff Pastry Appetizer Cups? Wonder no more! Once made, you can fill them however you like! They're so versatile!
When you make today's recipe (and I hope that you will), I'd appreciate it if you'd take the time to come back and give it a star rating along with a comment on why you rated as you did.
Search engines such as Google appreciate comments and ratings and, in turn, will show my recipes to more people. Please look for the pink star rating box within the printable recipe card. Thank you!!
Printable Recipe Card

Blueberry Cheese Danish with Homemade Laminated Dough
Equipment
- stand mixer optional
- wooden spoon optional
- gallon-size zip lock bags
Ingredients
For the dough:
- ¼ cup warm water, 110 -115 degrees
- 2 packages (4½ teaspoons) active dry yeast,
- ⅔ cup granulated sugar
- 1 teaspoon salt
- 3 large egg yolks, at room temperature
- 2 teaspoons pure vanilla extract
- ⅔ cup milk
- 3½ cups all-purpose flour
- 3 sticks cold butter
- 1 large gallon-size zip top bag
For the filling:
- 8 ounces cream cheese, softened
- ¼ cup granulated sugar
- 1 large egg yolk, at room temperature
- 2 tablespoons fresh orange zest
- 1 teaspoon pure vanilla extract
- 2 tablespoons all-purpose flour
- 1 cup fresh blueberries
For the icing:
- 1 cup confectioners sugar
- 1 tablespoon fresh orange juice
- 1 teaspoon pure vanilla extract
Instructions
- In a large bowl, dissolve the yeast in the warm water. Let sit 2-3 minutes. Stir in the ⅔ cups sugar, salt, 3 egg yolks, 2 teaspoons vanilla extract and ⅔ cups milk. Stir well to combine.
- Using a dough hook for the stand mixer (or a wooden spoon if mixing by hand), stir in the 3 and ¾ cups all-purpose flour until the mixture forms a smooth, semi-stiff ball. Turn the dough out onto a sheet of plastic wrap and form the dough into a flattened rectangle shape. Refrigerate at least 30 minutes.
- Place the 3 sticks of butter into the zip top bag and use a rolling pin to gently pound and roll the butter into a flat sheet inside the plastic bag. Freeze until the dough had been chilled for 30 minutes.
- While the dough and butter are chilling, prepare the filling by blending all the ingredients (except the blueberries) in a large bowl until smooth and creamy. Set aside until ready to construct the Danish.
- When the dough is ready to roll, use scissors to cut the butter bag open, remove the butter sheet and cut the butter sheet into two even, flat pieces.
- Working quickly roll the chilled dough out onto a lightly floured surface to form an approximate 14" x 9" rectangle. Place one of the butter sheets in the center of the dough and fold each side of the dough in towards the center, overlapping the butter sheet. Use the rolling pin to firmly roll the dough out into another approximate 14" x 9" rectangle. Complete the same steps with the second butter sheet as done with the first, placing the butter sheet in the middle of the dough, and overlap the sides of the butter sheet. Roll again, using pressure to flatten the dough as much as possible. Turn the dough occasionally and roll firmly to form into another approximate 14" x 9" rectangle. Trim the edges with a pizza cutter to form straight, neat edges. Discard scraps.
- *Note - The process of rolling the butter sheets into the dough is important to form a light and flaky pastry. It's also helpful to brush any additional flour from the dough during the rolling process or problems with adhering the dough to itself may occur and rolling may be difficult.
- Using the pizza cutter (or sharp knife), cut the dough into 9 equal pieces. Use your fingers to lightly press each dough square to increase its size slightly. Place about 1-2 tablespoons of the cream cheese filling in the center of each square. Gently fold the edges of the dough square up and slightly over the cream cheese filling and top with a handful of fresh blueberries, pressing them lightly into the filling.
- Continue the same process with the remaining dough squares and the cream cheese filling. Place the formed Danish onto parchment lined baking sheets leaving 3" of space in between each Danish. Allow the Danish to rest at room temperature for 1 hour before baking.
- Preheat oven to 350 degrees Fahrenheit. Bake for 35-40 minutes in a preheated oven, or until they're crispy and golden. Remove from the oven and cool completely before icing.
- In a small bowl, whisk together all the icing ingredients. *Note - If the icing is too thin, add a little more confectioners’ sugar. If it is too thick, add a drop more milk. Drizzle the icing over each Danish and serve at room temperature.
Notes
Nutrition
Should you have any questions or comments regarding anything you've seen on my site, please don't hesitate to reach out to contact me. It is always my distinct pleasure to get back with you just as soon as I possibly can!
Thank you so much for visiting me today in my Kudos Kitchen. I hope you found something you'll love and that you will come back and visit me often. Please know that there is always room for you around my kitchen table!
Until we eat again, I hope you have a delicious day!


All of the recipes you'll find here on my website are in loving memory of my son, Greg, who left this earth far too soon and will be forever in our hearts.

Should you have any questions or comments regarding anything you've seen on my site, please don't hesitate to reach out to contact me. It is always my distinct pleasure to get back with you just as soon as I possibly can!
Thank you so much for visiting me today in my Kudos Kitchen. I hope you found something you'll love and that you will come back and visit me often. Please know that there is always room for you around my kitchen table!
Until we eat again, I hope you have a delicious day!
All of the recipes you'll find here on my website are in loving memory of my son, Greg, who left this earth far too soon and will be forever in our hearts.

Chey says
Just made these today! The flavor is great, unfortunately I baked them at 350 for 35 minutes and had to take them out 10 minutes early because they started to burn! Next time I’ll bake them at 325 and hopefully they come out better.
Renée says
Hi, Chey!
Thank you for writing to let me know. I'm glad you were keeping an eye on your oven.
As you know every oven is different. I'm happy you enjoyed the flavor, though.
I'm glad you're going to try them again at a lower temp.
Please let me know how that works for you.
Take good care,
Renee
Austyn says
I’m confused on the yeast part. Do you want each packet to have 2 1/4 teaspoons, or is that what they should equal combined?
Renée says
Hi, Austyn!
I'm sorry for the confusion. I've since fixed the recipe and made it more clear.
It's two packages of dry yeast at 2¼ teaspoon (per package), so 4½ teaspoons total.
Thank you for writing and alerting me to this. It's an important fix.
I hope you'll enjoy the recipe.
Take good care,
Renee
Taryn says
I love danish! These are just as good, if not better than the ones from the bakery.
Renée says
Thank you, Taryn!
Beth says
These are exactly what I need to start my day! Your directions are easy to follow so I'm confident I can make something that resembles your recipe - but it is good to know I can buy pastry and get a similar look and taste!
Renée says
Yes. I'm glad that you saw that you can purchase puff pastry too. There are no steadfast rules for this recipe. Either one will for fine. Thanks for the comment, Beth!
Helene D'Souza says
I am so addicted to these Danish pastries with blueberry. So good!!
Renée says
You really can't go wrong with them. Thanks 🙂
Jacqueline DiNuoscio says
Who wouldn't love to wake up to a batch of these! So perfect for summer!
Renée says
I agree. Perfect for summer, but then swap out cinnamon apples for the fall and winter. Right?
Souffle Bombay says
First recipe I came across to day to make me literally salivate...and in a big way! Good Heavens I want to eat these right this second! Beautiful!
Nutmeg Nanny says
Oh my goodness you are a sweetbread making machine! While this recipe looks to have a lot of steps it also looks to be TOTALLY worth it!
Nancy Piran says
These danishes look absolutely amazing!
Angie Barrett says
When I use to work at starbucks I use to eat their cream cheese danishes almost every day that I worked! I miss them so much and the ones they make now are nowhere near as good as the old ones! I may just have to use this recipe to make my very own!
Lora CakeDuchess says
One of my all-time favorite breads is a Danish! I have so many memories going to a favorite bakery when I was little (with a Danish baker)and the pastries he made were amazing. Your step-by-step photos could get any one scared of baking a bread to give a recipe a try! Loving the aprons, Renee!
The Food Hunter says
I've been wanting to try danish for a long time. thanks for sharing
Marjory says
These are totally my weakness. Anything cream cheese is immediately a must. But, the blueberries take them over the top for me. Love!!!
Ginny McMeans says
Great step by step photos and they look fantastic!
Karen Kerr says
Wow, I am very guilty of starting a recipe without reading it through!! These look totally delicious!!
Catherine says
Dear Renee, what a beautiful treat! Worth every bit of work...these are just heavenly! I wish I had one right now. xo, Catherine
Heather Schmitt-Gonzalez says
I can just imagine how flaky and irresistible this danish base is...and don't even get me started on the filling. I want one of these, they sound beyond amazing!
Judy says
is this enough water to dissolve 4.5 tsp of yeast?
Renée says
Yes it is.
-Renee
Judy says
Thanks for responding. I got only a paste with the 1/4c water and 4.5 tsp yeast. is that normal?
Renée says
Hi again, Judy!
Please refer to the process photos I've included in the body of the post.
As you can see, the yeast mixture is quite thick and "paste-like."
I'm guessing you're in the process of making this dough right now?
Please continue and let me know how it works out for you. I hope
you will find the process shots helpful if you need to refer to them.
I add them for that reason.
I'll be anxious to hear back from you.
Take care, Judy.
Renee
Robin @ A Shaggy Dough Story says
What the heck, I'm up for a challenge! These look GORGEOUS and your process shots definitely help demystify the…process. I think I know what I'll be making this weekend. Or trying to make. If they come out looking half as good as yours I'll consider it a success. Thanks for sharing these!
Kimberly says
Oh my goodness ... you are a baking angel! I do love baking so much, but I just don't think I'm patient enough to make these. I will however be using the term "butter sheets" -- and dreaming about your GORGEOUS danishes -- as much as I possibly can! KUDOS!
Camilla Mann says
Oh, my goodness, Renee! These look astounding. I will give it a try soon. With the boys out of school next week, I have more kitchen time for the next eight weeks. Woohoo.