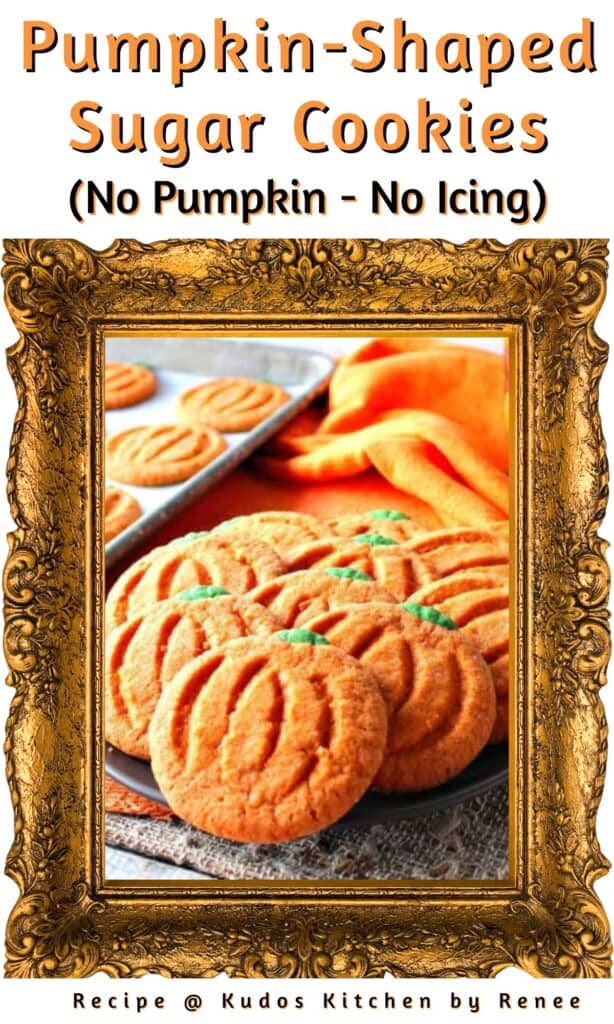
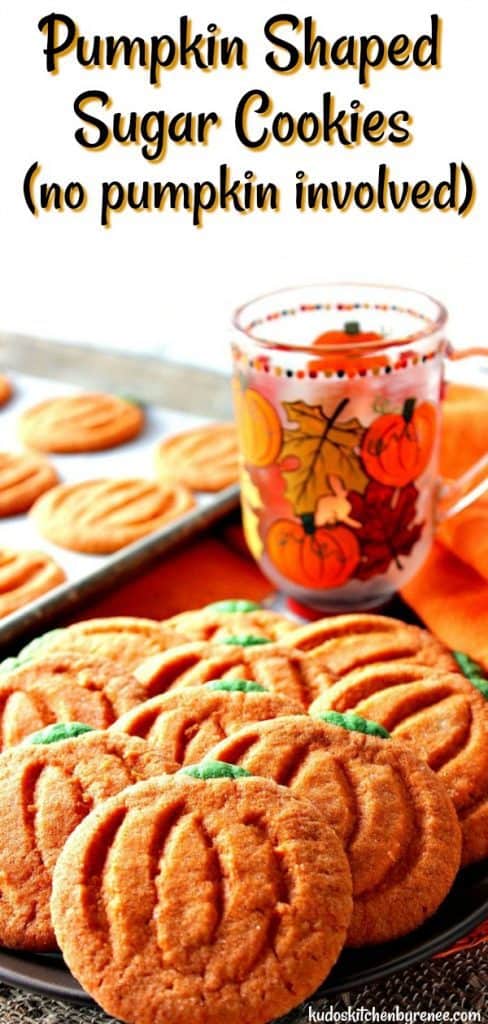
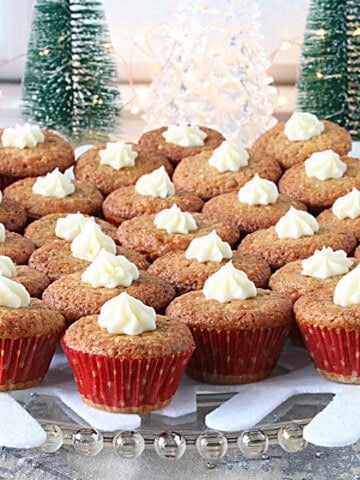
Easy to make Pumpkin-Shaped Sugar Cookies are as charming as they are delicious. But surprise, don't let them fool you! There is no pumpkin in the ingredient list.
This simple cookie recipe celebrates the pumpkin, but not the ingredient itself. It's all about the look and shape, and not about a pumpkin spice flavor.
This recipe post and its contents may include affiliate links for your consideration. I may earn a commission from qualifying purchases, but your prices are never increased as a result. Thank you.
Table of Contents Found Here
Save this for later.
Email forwarding service for saving information.
How this recipe came to be:
Every year for Christmas it's a tradition for me to make my family's favorite sugar cookie.
I've shared the recipe back in 2010 and dubbed it "Santa's Favorite Cookie."
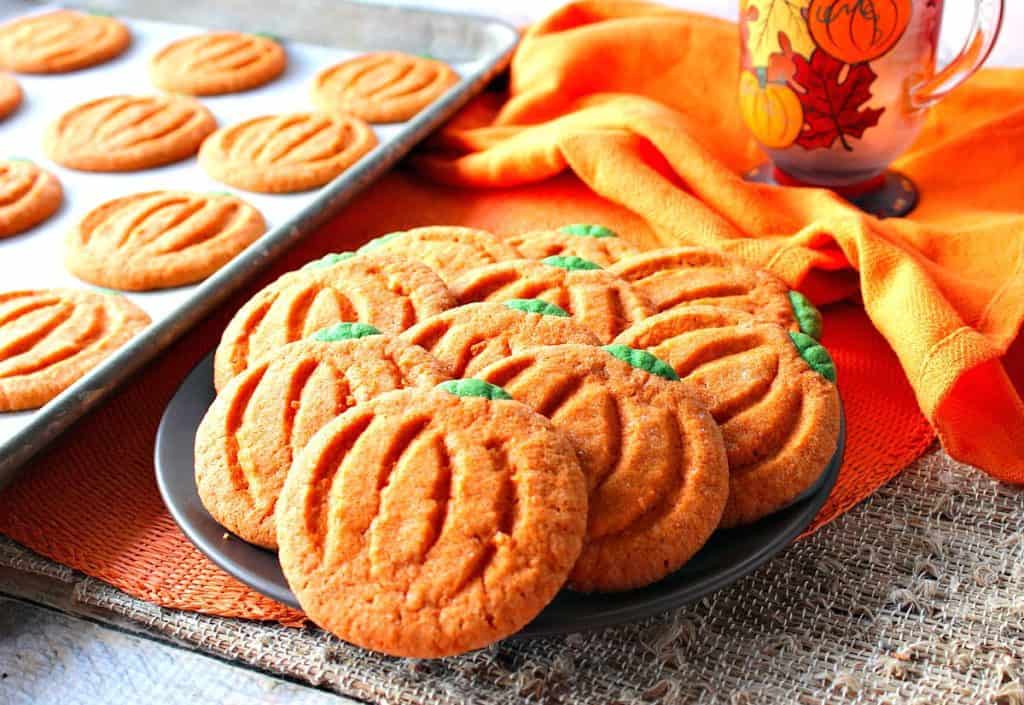
This year, I decided to mix things up a little, so I used the same recipe (basically), and made pumpkin-shaped sugar cookies as a special surprise they didn't see coming!
Needless to say, the cookies were gobbled up quickly. 🙂
When is the proper time to color the dough?
After the cookie dough is thoroughly mixed, divided the dough into two pieces. One large, and one small.
The larger section of dough should be colored orange for all the pumpkin bodies, and the smaller piece of dough I colored green for all the pumpkin stems.
What is cream of tartar?
Cream of tartar is a leavening agent similar to baking powder.
The cream of tartar combined with the baking soda will give the pumpkin cookies a nice little lift and will balance the flavor of the cookies.
Can the colored cookie dough be frozen before shaping and baking the cookies?
Yes!
Wrap the colored dough well in cling wrap and freeze, unbaked, for up to 2 months.
When ready to make the pumpkin cookies, thaw the dough completely, shape the cookies as instructed, and bake.

When you make today's recipe (and I hope that you will), I'd appreciate it if you'd take the time to come back and give it a star rating along with a comment on why you rated as you did.
Search engines such as Google appreciate comments and ratings and, in turn, will show my recipes to more people. Please look for the pink star rating box within the printable recipe card. Thank you!!
Printable Recipe Card


Pumpkin-Shaped Sugar Cookies
Equipment
- stand mixer optional
- hand mixer optional
- cookie scoop optional
Ingredients
- 2 sticks (16 tablespoons) butter softened (I use salted butter)
- ½ cup brown sugar
- ¾ cup granulated sugar divided
- 1 large egg beaten
- 1 teaspoon pure vanilla extract
- 1 teaspoon baking soda
- 1 teaspoon cream of tartar
- 1 teaspoon kosher salt
- 2 cups all-purpose flour
- orange gel food color
- green gel food color
Instructions
- Preheat oven to 350 degrees Fahrenheit (175 degrees Celsius)
- Use a hand mixer or stand mixer to cream the butter, brown sugar, and ½ cup granulated sugar together until light and fluffy.
- Blend in the beaten egg and vanilla until thoroughly combined.
- In a separate bowl, whisk together the baking soda, cream of tartar, salt and all-purpose flour.
- Slowly add the flour mixture to the creamed mixture and blend until a soft dough forms and the ingredients are completely blended.
- Remove ¼ cup of the dough to a small bowl and add a few drops of green gel color. Mix well.
- Add a few drops of orange gel color to the large bowl and mix until well combined and no streaks remain.
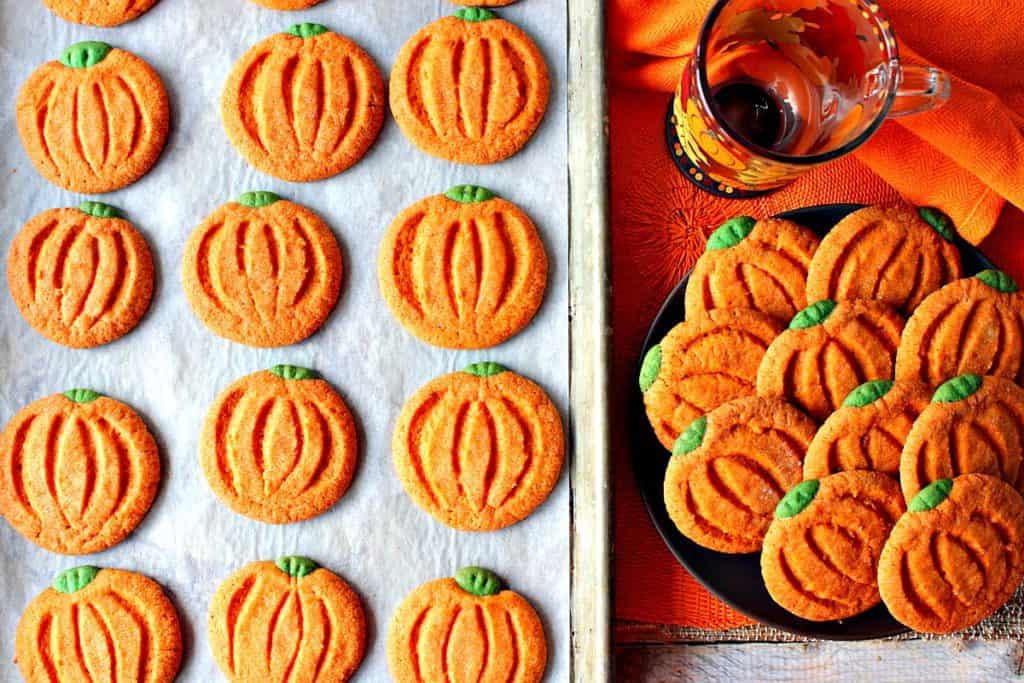
- Scoop the orange dough out by the tablespoonful (or use a small scoop) and roll into balls approximately the size of a golf ball. Roll each ball into the remaining granulated sugar to coat.
- Place the orange sugared balls onto baking sheets lined with parchment paper (optional), and use a glass with a flat bottom (or a measuring cup) to flatten each ball into a disc.
- Press a small dimple into the top of each pumpkin (where the stem will go), and use a paring knife to carefully cut four rounded slits onto each pumpkin.
- Use the green dough to form a small cone shape for each pumpkin and press the narrow end into the area at the top of each pumpkin for the stem.
- Use the paring knife to carefully cut two small slits on each pumpkin stem (optional).
- Bake in a preheated oven for 18 minutes (or until the bottoms of the cookies are lightly browned, but not dark).
- Cool the cookies on a wire rack and repeat the same process with the remaining dough.
Video
Notes
Nutrition
I sincerely hope you've enjoyed this recipe for pumpkin free pumpkin cookies as much as I've enjoyed bringing it to you.
Should you have any questions or comments regarding anything you've seen on my site, please don't hesitate to reach out to contact me. It is always my distinct pleasure to get back with you just as soon as I possibly can!
Thank you so much for visiting me today in my Kudos Kitchen. I hope you found something you'll love and that you will come back and visit me often. Please know that there is always room for you around my kitchen table!
Until we eat again, I hope you have a delicious day!


All of the recipes you'll find here on my website are in loving memory of my son, Greg, who left this earth far too soon and will be forever in our hearts.

Mary Susan says
I look forward to trying this recipe, but first, I thought I should let you know that your metric butter measurement should read 228g not 28g.
Renée says
Well, now. That certainly does make a big difference, doesn't it? Yikes.
Thanks for catching that error, Mary Susan. I do appreciate you bringing it
to my attention. I've gone in and fixed it.
Thank you so much!!
Warm regards,
Renee
Jeanette Flores says
I’m making these cookies to give my thanksgiving treat boxes a bit of color. I followed the recipe and am a seasoned baker but with those measurements my dough came out too wet so I added a bit more flour to stiffen a bit but that didn’t seam to help so I then packed it up in ziplock bags to refrigerate/freeze a little so I’ll be able to work with them. The dough was too wet and sticky for me following these measurements but if it’s an error I made perhaps it was that my butter was pretty soft to start off so I’ll try again if these don’t bake well (presentation is key) & next time I’ll use butter that hasn’t quite gotten as soft in hopes that it will fix my issue with sticky dough. Wish me luck
Renée says
Hi, Jeanette!
I'm so sorry you're dealing with a too soft dough issue. Refrigerating it should help, but I wonder why that happened in the first place?
Like you, I'm wondering if the butter was too soft or perhaps the egg you used was too large? Still though, that small difference shouldn't make such a wet dough.
Also, did you add gel food color or liquid? Using a liquid would make a difference in the dough consistency.
Other than adding more flour, I'm not quite sure what else you can do to salvage the dough to make it workable.
In the future, you can also use Crisco in place of butter, but not everyone is a fan of using shortening. I've used both, and they both work well.
Please keep me informed with how your cookies turn out.
Renee
Kerri Hess says
Hello, Renee!
If you were to use a cookie scoop for the cookies, do you know what number of scoop you would use? Do you think a #50 scoop would be the right size? I'm also curious about the length of bake time. Does it require 18 minutes?
Thanks!
Renée says
Hi, Kerri.
Thanks for your question. I do believe a #50 cookie scoop will work well.
After doing a little research I believe it's very similar in size to what I used (per cookie), perhaps a tiny bit more.
It's hard to say because I don't know how many tablespoons are in a golf ball. 😉
That said, keep an eye on them around the 18 minute mark. They'll most likely be done. You're looking for a very light brown on the bottom.
You don't want to take them too far as you don't want them to lose their vibrant orange color. Note - they will firm up a bit as they cool.
I hope this information is helpful and that you enjoy these cookies.
They're fun to see, and even better to eat.
Have a great day,
Renee
Sangeeta Nelson says
Cute cookies! I was just curious, if you were going to put in cream of tartar and baking soda, why not just use baking powder which is essential both together.
Renée says
Hello, Sangeeta!
Thanks for the sweet words about the cookies.
Regarding the cream of tartar and baking soda combo.
It's just the way I've always made them.
Feel free to use baking powder if you prefer.
Have a great day!
Renee
El says
How do you keep the cookies from losing their cute pumpkin shape??
Amanda says
These are so cute I know my nieces will love this
Taylor says
These are SO cute and perfect for Halloween parties! Love them!
Renée says
Glad you like them, Taylor. Thank you!
Justine Howell says
So good and cute for a Fall themed party, love these!
Renée says
Yes, they would be perfect for a fall themed party, Justine. Glad you think so.
Britni says
I love recipes that you can do with your little ones. Thank you for your creativity!!
Renée says
These cookies would delight the little ones! I'll bet they'd have a blast making these in the kitchen!
Renée says
I'm all about the inspiration. You're welcome. Now, have fun baking, and make them your own!
Cathy @ Lemon Tree Dwelling says
Such perfect little works of art!
Renée says
Thank you. They're easy too!!
Abeer says
I feel like I can eat these cookies every day!
Renée says
Well, I wouldn't stop you. LOL
Catalina @ Peas & Peonies says
What a great idea! Looks so good!
Renée says
Glad you like them, Catalina. Thank you.
Joanie @ One Dish Kitchen says
These are such pretty cookies and I really love your step by step instructions!
Renée says
Thank you so much. I love adding all the photos. I'm glad you find them helpful.
Anna @ Crunchy Creamy Sweet says
Your treats are always so pretty and colorful! These cookies are adorable!
Renée says
The end of the year always begs for colorful treats 🙂 Thank you, Anna.
kouten07 says
Love your idea!
Renée says
Thank you so much. That makes me happy!!
delaneyyutzy says
These are so festive and I love them!
Renée says
I'm glad you do. Thank you!
Dorothy Reinhold says
There is something so simple and tasty about sugar cookies!
Renée says
They're the best! I agree!