The recipe for this Brown Bear Pumpernickel Bread is relatively easy to make and the assembly of the bear takes hardly any time at all.

*Disclaimer - This recipe was originally published in 2014. I'm working hard to update all my older recipes with recipe cards, new photos, and additional recipe information. But, getting to all of them will take time. Please bear with me. In the meantime let me assure you that this recipe is still a winner and one I'm sure you'll be well pleased with when you make it at home.
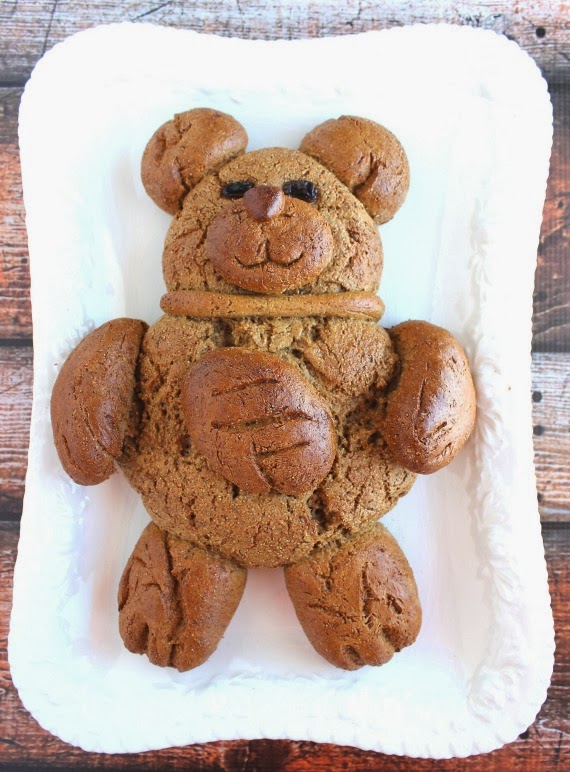
What do you get when you mix a little bit of yeast, some dark molasses, caraway seeds, some hearty rye flour, and lots and lots of love? You get an adorable teddy bear bread that is sure to make your heart smile with a whole lot of lovin' when you pull this Brown Bear Pumpernickel Bread out of your oven. 🙂
When I'd heard of the worldwide teddy bear parade that was being formed on the Bread Baking Babes and Friends group on Facebook, I thought it would be a fun way to expand a little of my creativity and bake a wonderful pumpernickel bread at the same time.
Save this for later.
Email forwarding service for saving information.
BROWN BEAR PUMPERNICKEL BREAD {PRINT THIS RECIPE}
Yield: 1 large bear Prep Time: 2 ½ hours (including rising time) Bake Time: 35-40 minutes
1 ½ cups warm water, divided (110-115 degrees)
3 packages of active dry yeast
2 teaspoons sugar
½ cup molasses
1 ½ tablespoons salt
2 tablespoons butter, softened
2 tablespoons caraway seeds
2 ¾ cup rye flour
2 ½ cups unbleached all-purpose flour
egg wash (1 egg mixed with 1 tablespoon water)
2 raisins for the eyes
-In a small bowl, combine ½ cup of warm water and the yeast. Stir to dissolve the yeast. Add in the sugar, stir and allow the mixture to sit and get foamy (about 5 minutes).
-Meanwhile, in the bowl of a stand mixer with the dough hook attachment, combine the remaining 1 cup of warm water, molasses, salt, butter, caraway seeds, and the yeast mixture.
-Slowly add the rye flour into the yeast/molasses mixture and mix until almost incorporated.
-Add in the all-purpose flour and continue kneading with the dough hook until the mixture comes together into a soft, smooth dough ball. *Note-If your dough seems a little too stiff, add a tablespoon of water at a time until your dough turns soft and smooth. If your dough seems a little too sticky, add in a few tablespoons of flour at a time until your dough is soft and smooth.
-Turn the dough out onto a lightly floured surface and knead by hand for an additional 5 minutes.
-Lightly grease a large bowl. Add the dough ball into the bowl and turn it once to coat the entire surface with oil.
-Cover the bowl with plastic wrap and allow the dough to rise to double in a warm, draft-free place. (approximately 1 hour).
-Punch the dough down and divide it into pieces to make your bear: 1 large one for the body, 1 smaller one for the head, 3 tiny ones for the snout and ears, 4 medium-size ones for the arms and legs.
-Go ahead and have fun constructing your bear. Remember, there are no rules here. Just fun. *Note-I used a little bit of water on my fingertips (as glue) when attaching pieces of dough together.
-Once your bear is looking just the way you like, place him again in a warm, draft-free place to rise in size (approximately 45 minutes).
-Brush the bear all over with the egg wash and push 2 raisins in place for his eyes.
-Preheat the oven to 375 degrees.
-Bake the bear in the preheated oven for about 35-40 minutes or until he's a deep, dark brown and sounds hollow when tapped.
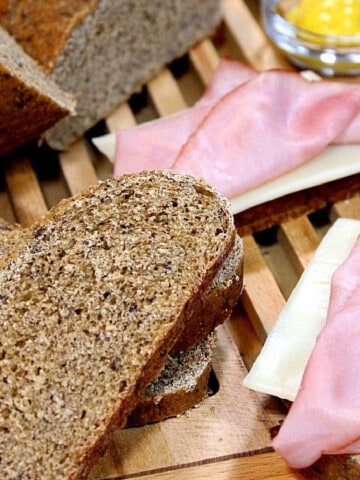
-Remove him from the oven and allow to cool completely before....well, you know...before you slice him up. There. I said it 🙂
If you're a caraway see lover like I am, I urge you to check out some of the other recipes I've made using them over the years. Like my German Caraway Meatballs in Cream Sauce, St. Patrick's Day Sourdough Rye Bread, Giant Everything Bagels and Pork and Cabbage Stew for the Slow Cooker. I just know you're going to love them.
Should you have any questions or comments regarding anything you've seen on my site, please don't hesitate to reach out to contact me. It is always my distinct pleasure to get back with you just as soon as I possibly can!
Thank you so much for visiting me today in my Kudos Kitchen. I hope you found something you'll love and that you will come back and visit me often. Please know that there is always room for you around my kitchen table!
Until we eat again, I hope you have a delicious day!


All of the recipes you'll find here on my website are in loving memory of my son, Greg, who left this earth far too soon and will be forever in our hearts.


Tara Noland says
How cute is that, OMG!! Love it!!