This No-Knead Yeasted Beer Bread is easy to make and delicious to eat! If you love working with yeast, add this beer bread to your must-make list ASAP!
*Disclaimer - This recipe was originally published in 2012. I'm working hard to update all my older recipes with recipe cards, new photos, and additional recipe information. But, getting to all of them will take time. Please bear with me. In the meantime let me assure you that this recipe is still a winner and one I'm sure you'll be well pleased with when you make it at home.
If you know me, then you know that one of the favorite things I make in my Kudos Kitchen is yeast bread.
There is something about the smell of the yeast, the feel of the dough, and the temperamental nature of the mix of such simple ingredients.
To me, it's one of the most exciting baking experiences when you get to witness a well-made yeast dough rise and plump if all the elements and ingredients are in perfect proportion.
It's also one of the most deflating experiences to see a dough that, for whatever reason, sits lifeless in a bowl and doesn't have the energy to lift itself up and puff itself out.
Strange that somedays I know that feeling! 🙂
This isn't meant to scare you off from making yeast bread.
Not hardly.
meant to draw you into the wonders of working with yeast.
It's a mystery that I never tire of, and an ingredient that has a secret life that keeps you on the edge of your seat in anticipation of that perfect loaf that melts your heart, as well as your butter!
I found this particular recipe by Chef John on allrecipes.com.
The only thing I did differently from Chef John was that I made my dough in my stand mixer because I was a little strapped for time.
Chef John used a bowl and a spoon. You can't get much easier than that!
NO-KNEAD YEASTED BEER BREAD {PRINT THIS RECIPE}
Save this for later.
Email forwarding service for saving information.
1 ½ teaspoons active dry yeast
4 ½ cups all-purpose flour - divided
½ cup warm water (100 degrees)
1 (12 fluid ounce) can of beer
1 ½ teaspoon fine salt
additional flour for dusting
1 tablespoon cornmeal
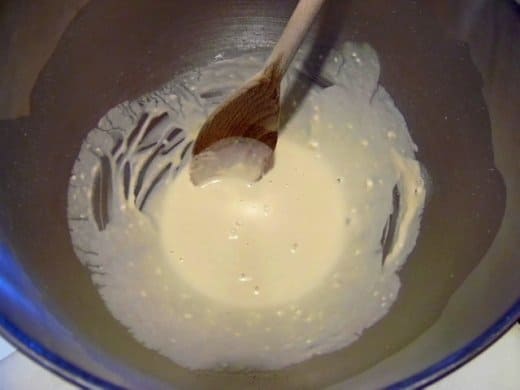
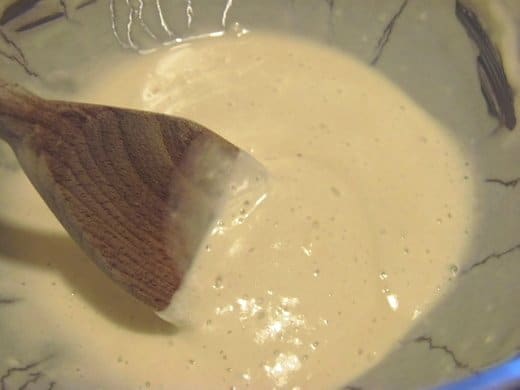
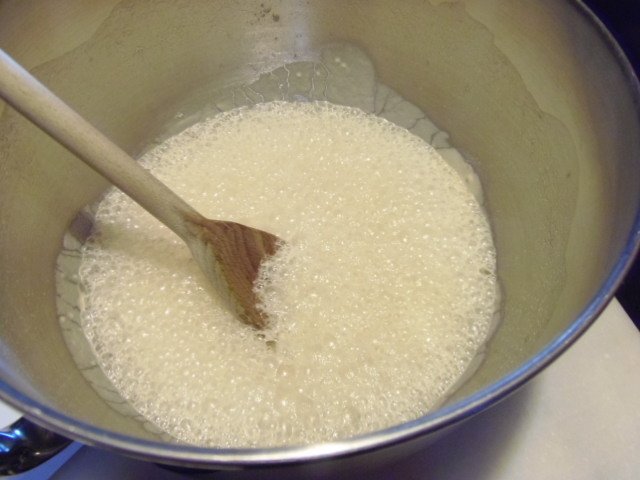
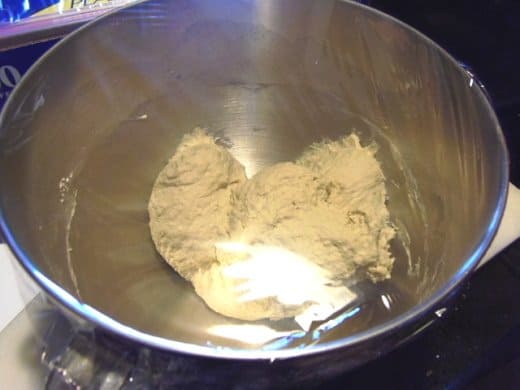
-Stir together the yeast, ½ cup of the flour, and the warm water in a large bowl.
-Let rest in a warm spot for approximately 30 minutes, until the mixture becomes foamy.
-Add the beer and the remaining flour and salt into the bowl.
-Mix until all the flour is incorporated (I used a dough hook) and forms a sticky dough that pulls away from the sides of the bowl.
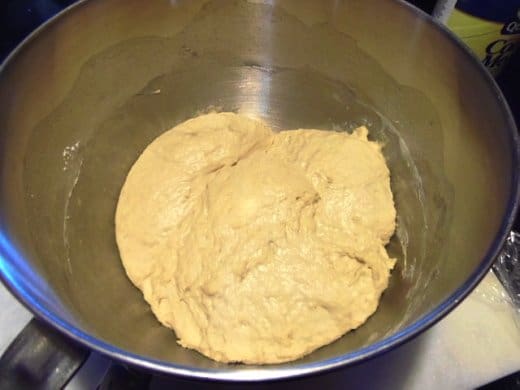
-Cover and let rise in a warm place for 2 hours, or until the dough has doubled in size.
-Scrape the dough from the bowl and place it on a well-floured surface.
-Generously flour the top of the dough and form it into a long, rustic loaf shape.
-Sprinkle a baking sheet with cornmeal and transfer the loaf to the baking sheet.
-Allow the loaf to rise in a warm place until doubled (approximately 1 hour).
-Preheat the oven to 425 degrees.
-Place a small oven-proof pan, filled with water, on the bottom rack of the oven. This will form steam inside the oven as the bread bakes and give your loaf a beautiful crust.
-Using a sharp knife, slash the top of your loaf a few times before baking. This helps with the rise during baking and also gives your bread an artsy artisanal bakery look.
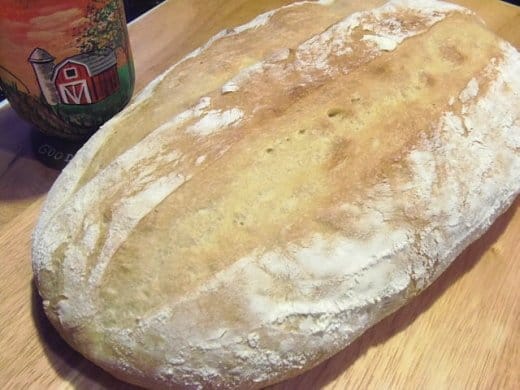
-Bake for 35 minutes until the loaf is a beautiful golden brown.
-Allow to cool and then wrap with plastic wrap and bring to your sister's house for dinner. LOL, Well, at least that's what I did (which is sadly why I have no "sliced" pictures of this wonderful bread)!


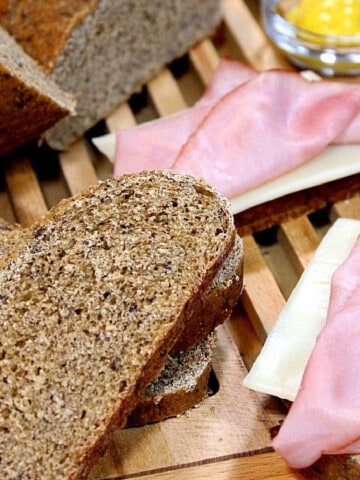
The tender crumb on this bread is just what you'd expect from a wonderful corner bakery loaf.
Panera has nothing on me!!!
Should you have any questions or comments regarding anything you've seen on my site, please don't hesitate to reach out to contact me. It is always my distinct pleasure to get back with you just as soon as I possibly can!
Thank you so much for visiting me today in my Kudos Kitchen. I hope you found something you'll love and that you will come back and visit me often. Please know that there is always room for you around my kitchen table!
Until we eat again, I hope you have a delicious day!


All of the recipes you'll find here on my website are in loving memory of my son, Greg, who left this earth far too soon and will be forever in our hearts.


Tracey Giesen says
This is fabulous bread. Thank you for sharing. I have shared it several times with family and friends. I have not made bread in a very long time and this recipe was delicious.
Renée says
That's wonderful. Thanks so much for letting me know, Tracey!! 🙂
Renee
Paula says
This is one beautiful rustic loaf of bread! Made me laugh when you said *...not a a cheap can that's been stuck in the back of the fridge*
Cher Rockwell says
Ok, I need to remember this one for when I finally decide to put my oven back into commission. This looks right up my alley!
Angie Barrett says
I love beer bread! Looks great!