I took the easy way out with my method for Grilled Beer Chicken, and the results were just as delicious, but a little less personal than the original of sticking a can in his posterior end. LOL
*Disclaimer - This recipe was originally published in 2010. I'm working hard to update all my older recipes with recipe cards, new photos, and additional recipe information. But, getting to all of them will take time. Please bear with me. In the meantime let me assure you that this recipe is still a winner and one I'm sure you'll be well pleased with when you make it at home.
The reason I've always liked the concept of beer can chicken but have never tried the method is that I'm afraid the poor chicken will get so tipsy, with all that beer shoved in his can, that he'll fall over and make a huge mess.
Well, I've adapted this method with some very delicious results. This particular time, I made him on the grill. I'll even show my trick for turning my backyard grill into my outdoor oven. You'll love this idea! Grilled Beer Chicken with Herbs.
- First I cover a roasting pan with several layers of heavy-duty aluminum foil. This keeps the pan clean from any soot build-up that roasting on the grill will cause to the pan.
- In the bottom of my pan, I add an assortment of fresh herbs from my garden. This time I chose rosemary, sage, and thyme. At this point, you can place the chicken on top of the herbs in the pan and pour an entire can of beer (your choice of brand) over the chicken and in the cavity.
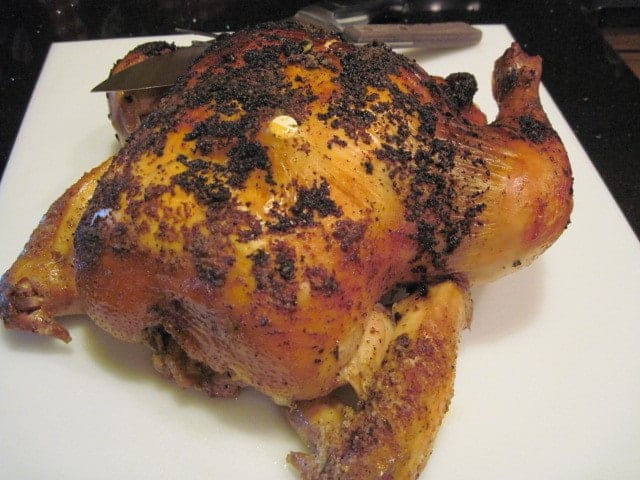
- Then drizzle a liberal amount of olive oil on the outside of the chicken and season with salt, pepper, and garlic powder.
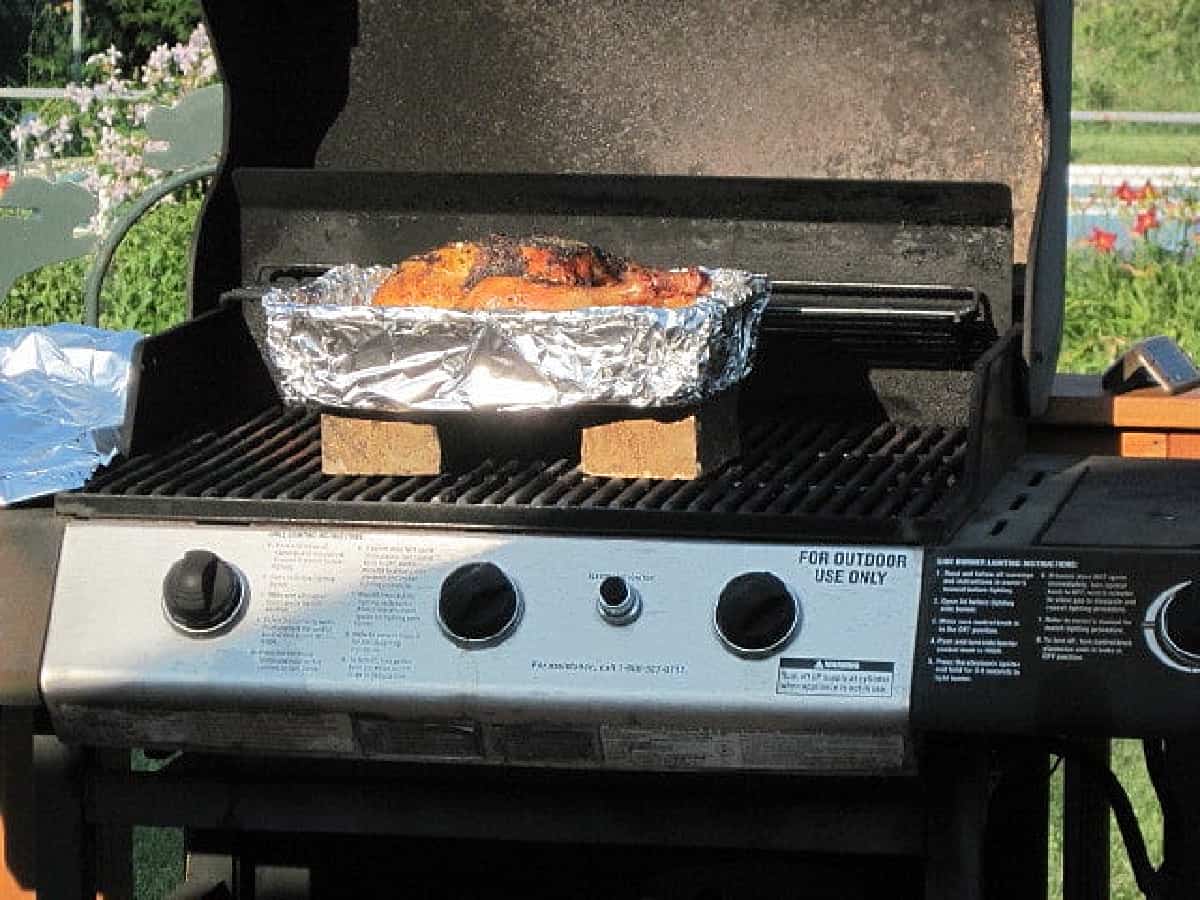
- Head outside to preheat your grill. While your grill is coming to temperature, place two bricks, side by side, on the grill grate.
- When your grill is properly preheated (350-degrees if it has a thermometer), place your pan of chicken on top of the two bricks and close the grill cover.
- The addition of the bricks will keep your grill temperature even and also elevate your food from the direct heat, making a more "oven-like" cooking method with even heat distribution around the pan, and no 'hot spots'.
- See? I told you you'd like this idea! It works wonders!
- After your chicken is nice and browned, but not fully cooked through, cover the entire pan with aluminum foil and continue cooking the chicken until the internal temperature at the thickest part of the thigh meat reaches 170-degrees.
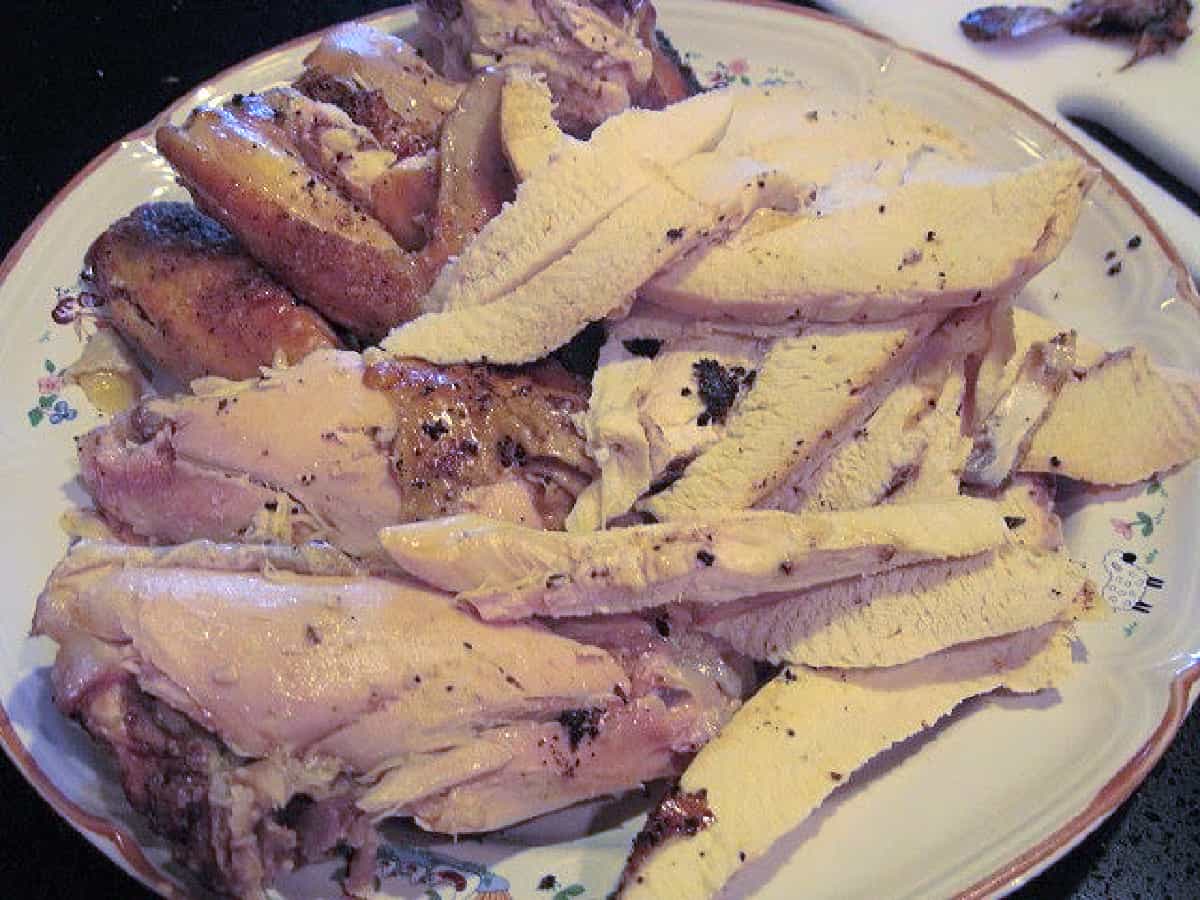
- Remove from the grill and leave covered to rest for 10-15 minutes before carving.
Thank you so much for visiting me today in my Kudos Kitchen. I hope you found something you'll love and that you will come back and visit me often. Please know that there is always room for you around my kitchen table!
Should you have any questions or comments regarding anything you've seen on my site, please don't hesitate to reach out to contact me. It is always my distinct pleasure to get back with you just as soon as I possibly can!
Follow me across my social media platforms and join in on the conversation: FACEBOOK, INSTAGRAM, PINTEREST, TIKTOK, YOUTUBE, and AMAZON
Until we eat again, I hope you have a delicious day!


Teresa says
FYI, there is a cheap little stand out there (I think we found ours at one of those kitchen stores at an outlet mall) that helps keep the chicken upright on the Beer Can. We use the recipe in the Weber Grilling cookbook. It is one of our favorite meals to make!
Maranda says
Yum!!! I've never had beer chicken but I've heard it's good! Thanks for sharing this!!
Paula says
My husband always does our chickens on the rotisserie but I've always wanted to try the beer can chicken. I think this post has inspired me to surprise him with this one evening. Just waiting for you to ship me some of your gorgeous fresh herbs O.K. LOL.